I’ll be compiling all of my photos into a monster project
page once I’ve completed the whole shebang, but I’m very
pleased to be just about finished.
Technical Talks
I’ve added a new section to the site to house transcripts of my tech talks at
various meetups and conferences. My hope is that they provide some expanded
context for those that were there as well as be accessible to those that may
not have been able to make it when I was speaking.
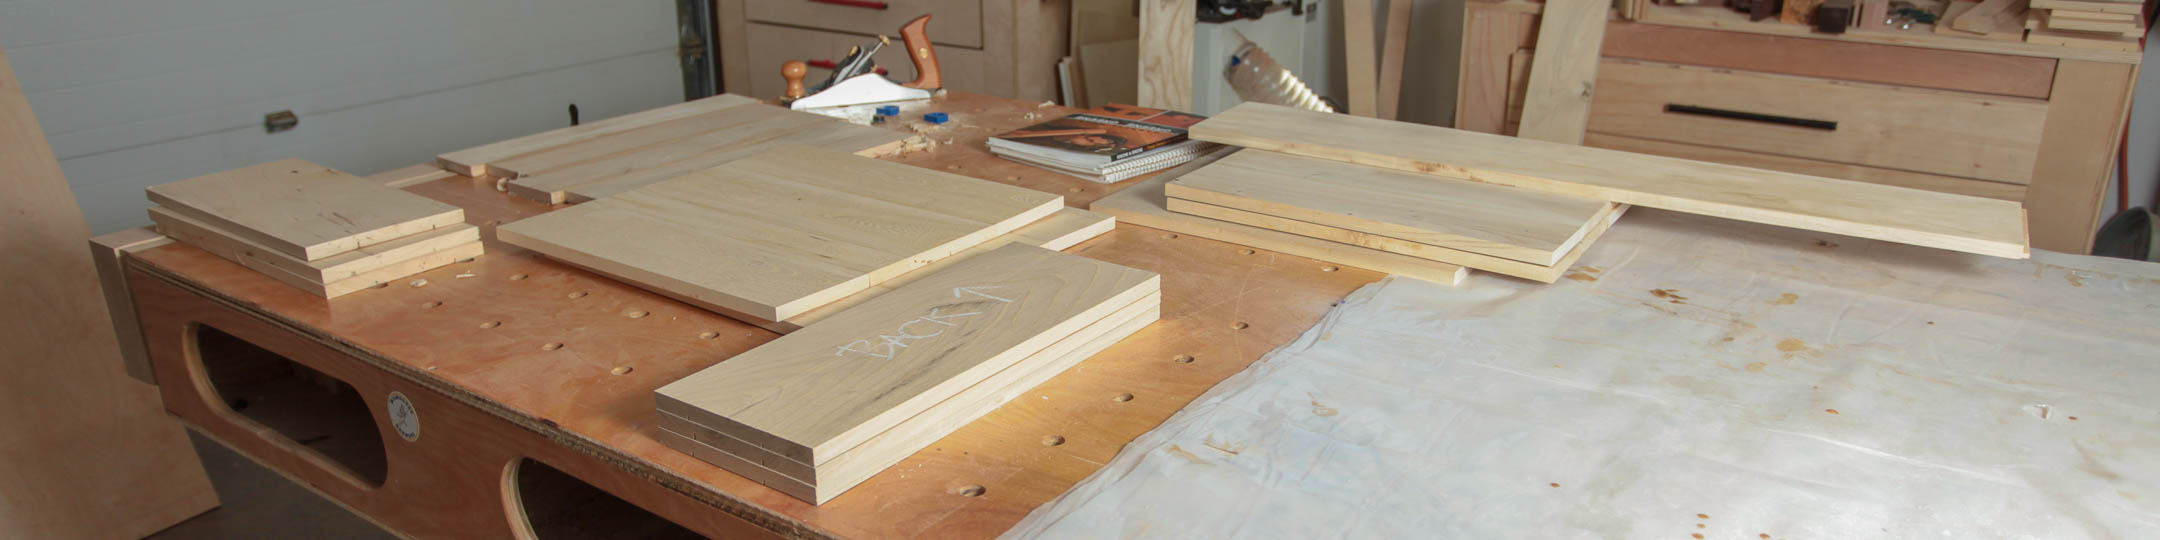
Checking in after a few busy weeks: nightstands, jigs, shelving and more!
It’s been awhile since the last post but I’ve been quite busy in the shop.
The problem is that it’s mostly on (for now) Supre Seekrit Projects! I have
project descriptions in-progress but until I can reveal them I’ll have
to content myself with some small updates.
I’ve so far really enjoyed the book, which is not only a history of the
Greene brothers and their now-iconic furniture designs but also includes
details on how to incorporate some of their design aesthetics into your own
furniture.
Moreover, after completing the rather simplistic changing
table this spring I’m eager to start working in
stylistic elements into my pieces. In fact, I’m planning on using a G&G
element in the nightstands build.
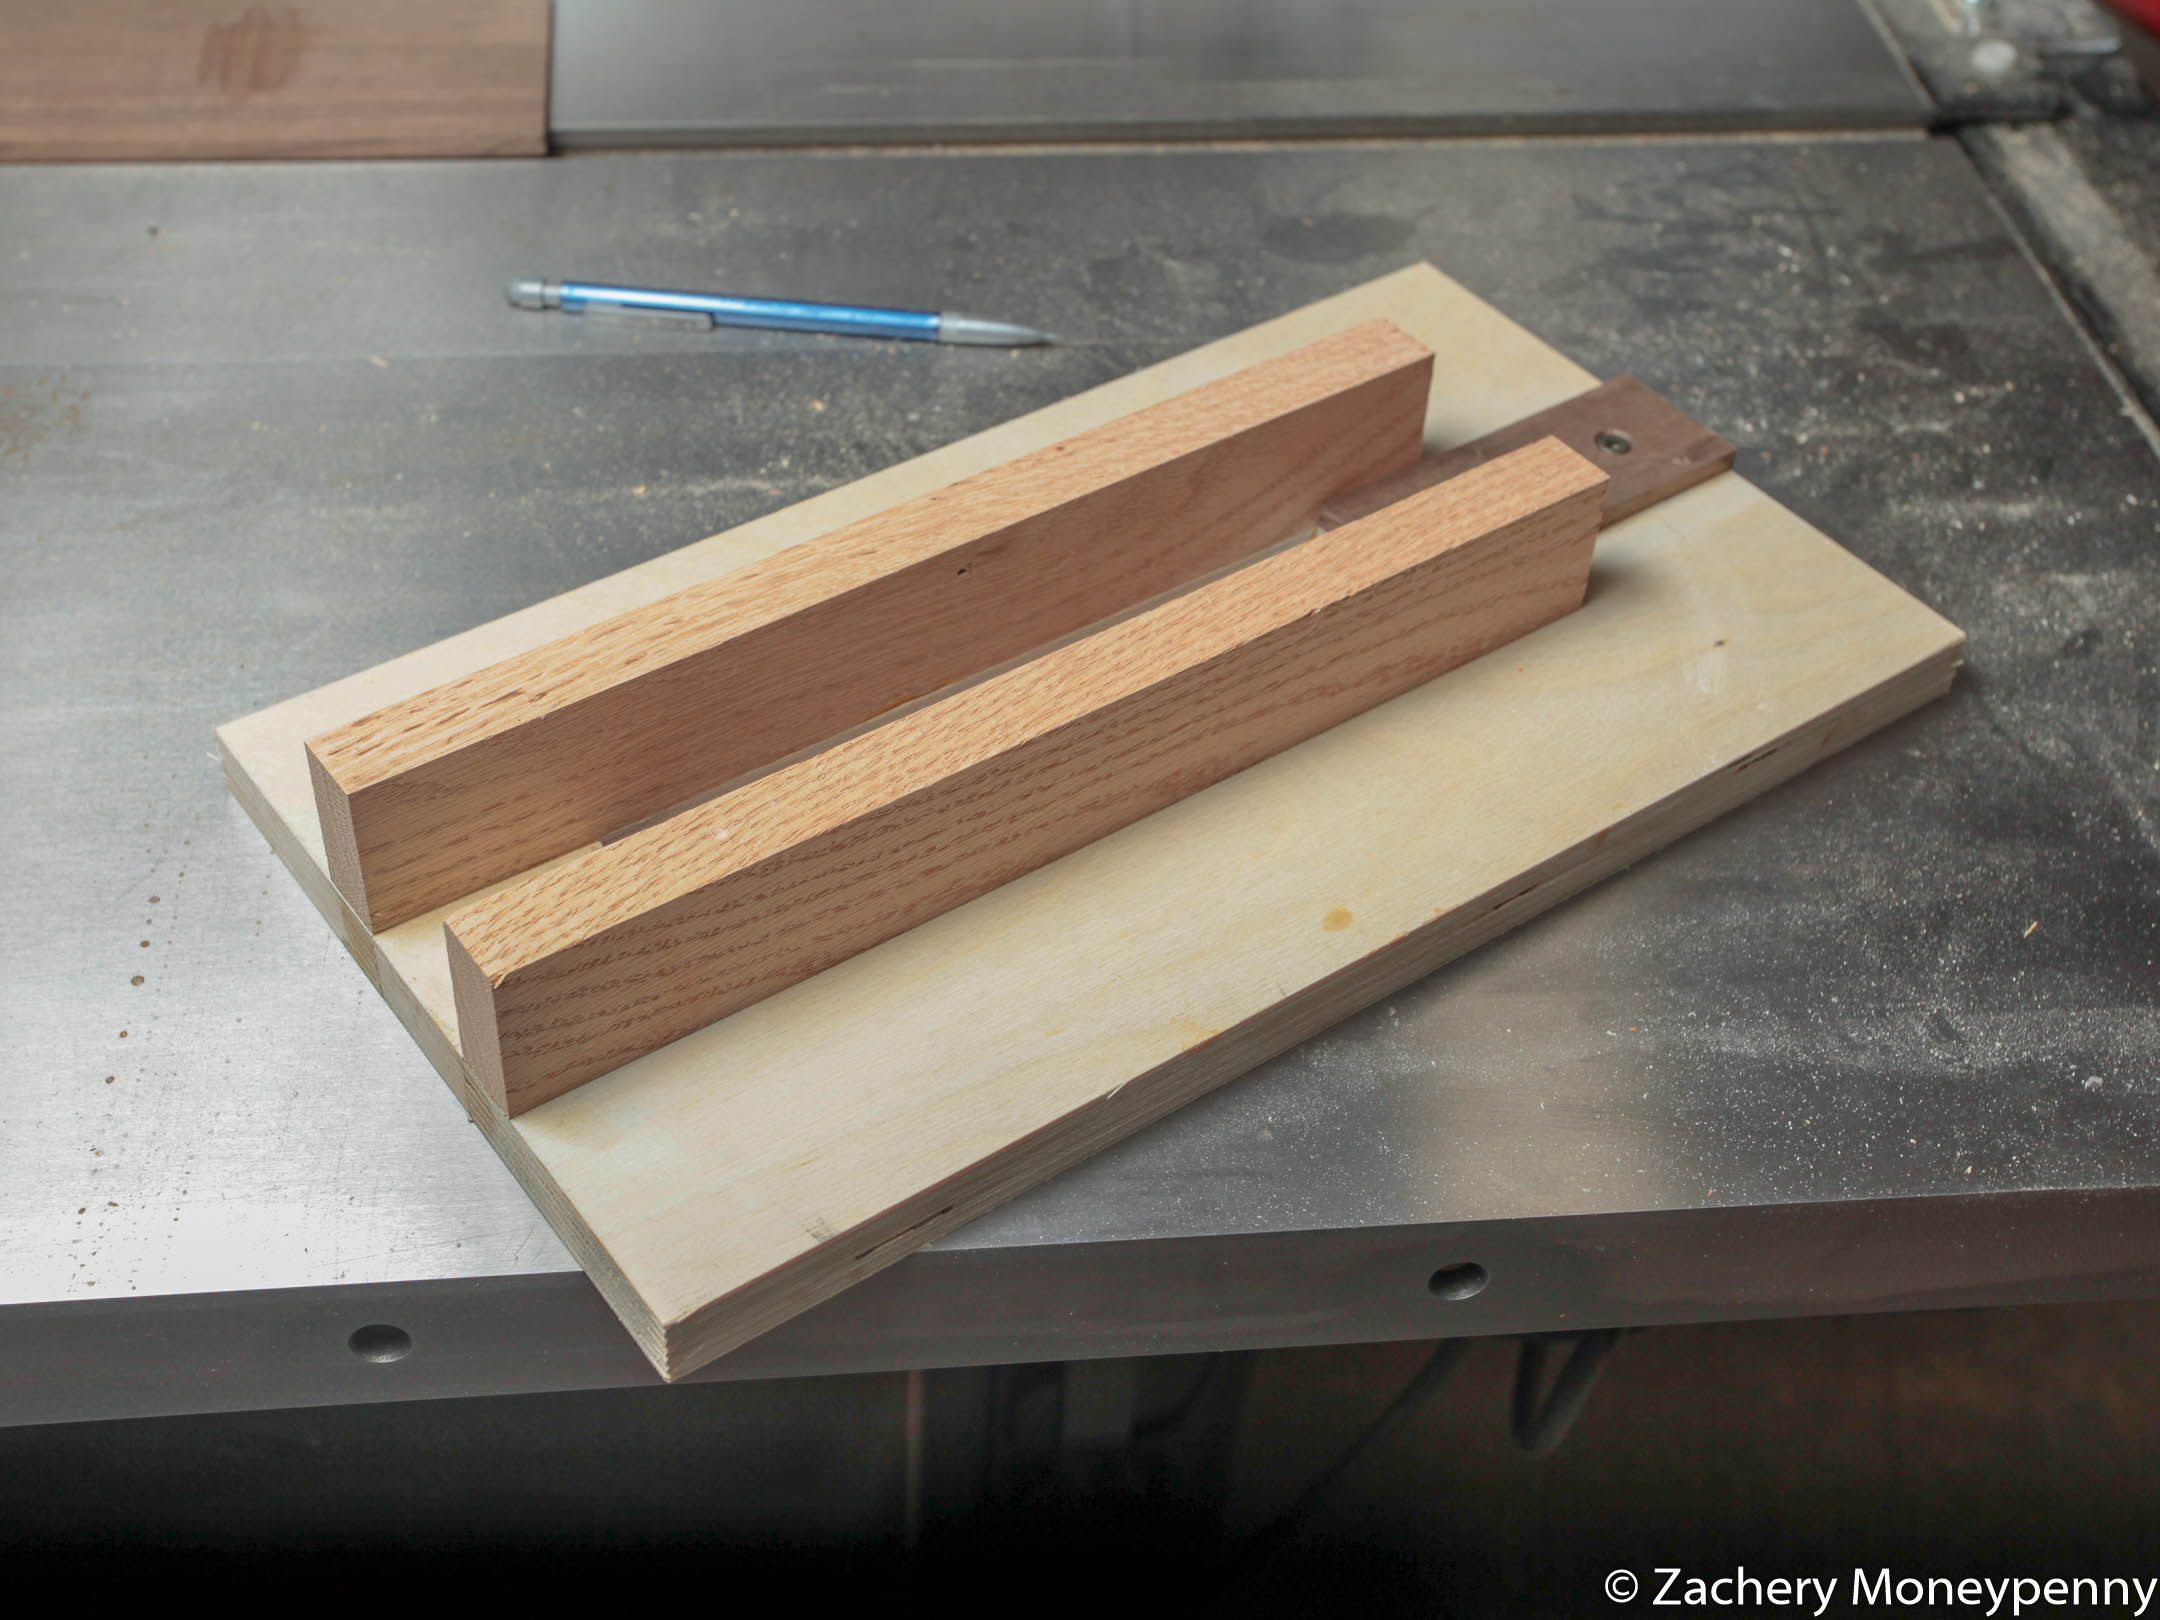
Jigs for Upcoming Projects
That design element requires a jig so I started working on that while waiting
for the glue to dry on some panels last week. It took about an hour to put
together, and I should be able to use it on the nightstands as well as the
adirondack chairs.
Greene & Greene design element jig
Also, our house needs picture frames!
This looks really cool and I plan on making one real soon, as well as the
spline jig.
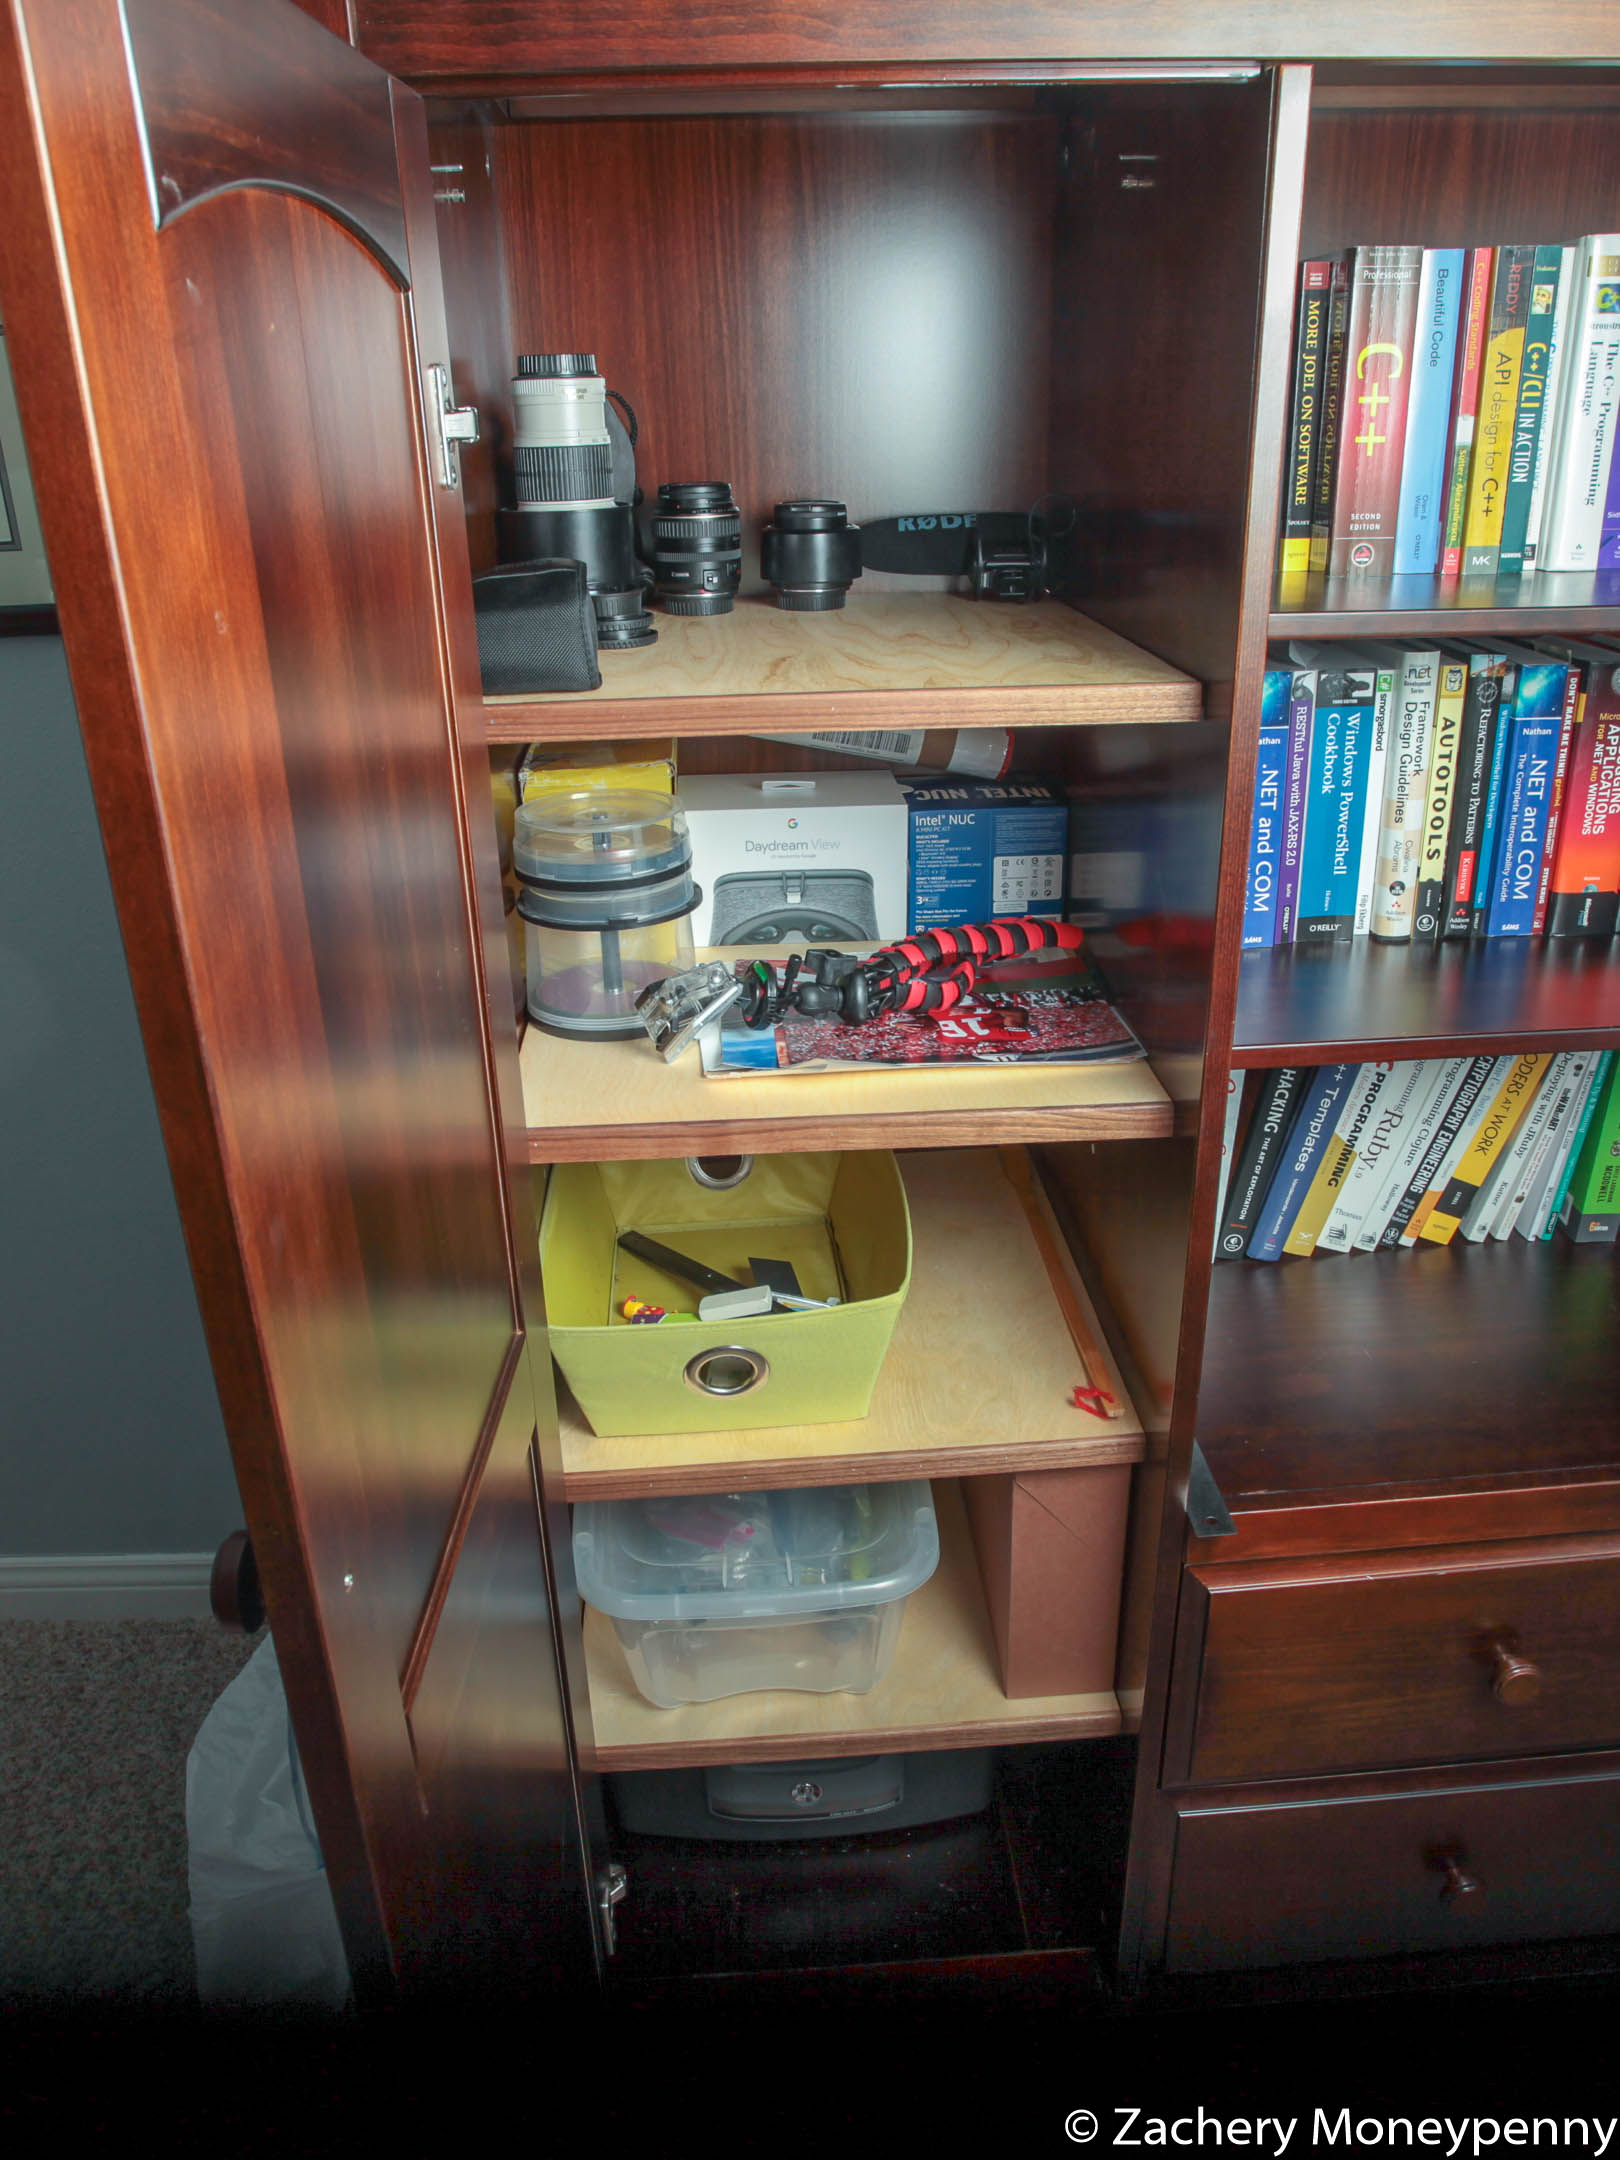
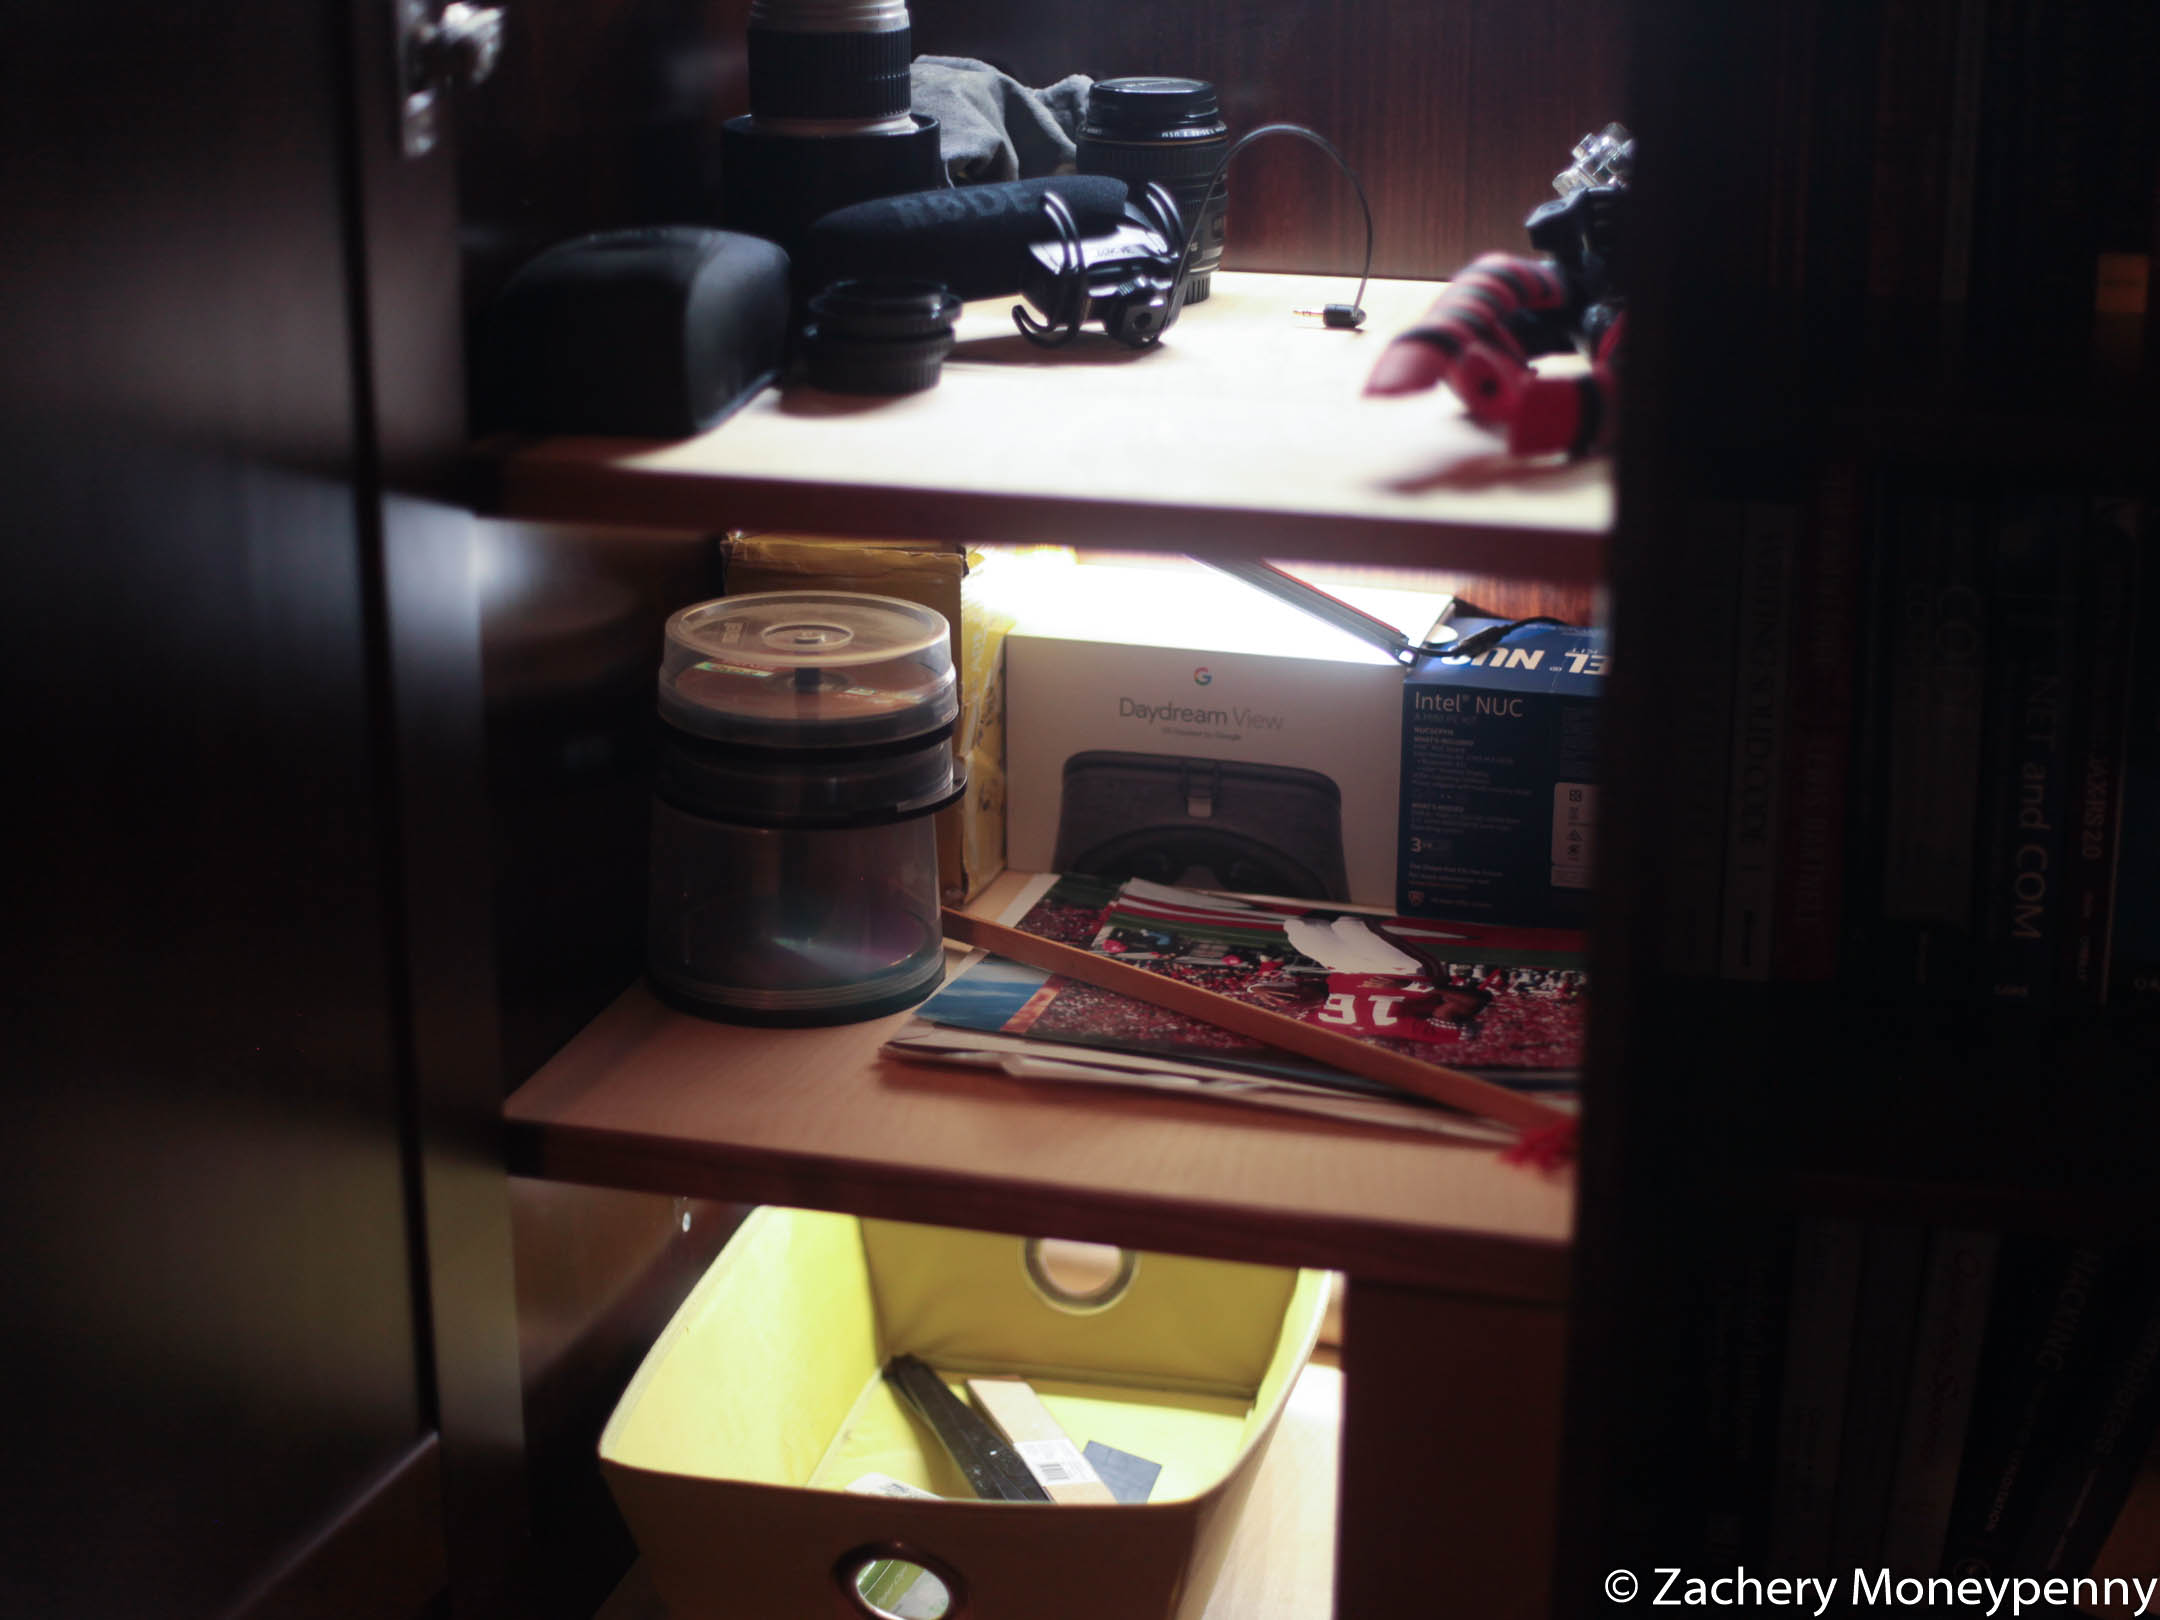
Armoire Shelving
The armoire that used to be in my son’s bedroom is now in my home office, but
I’ve been frustrated with the large closet in it because I don’t really have
anything to hang on the rods.
I had a bunch of extra baltic birch plywood out in the shop so I cut it
into shelving and then used some walnut offcuts to make front edge banding
for them.
Installed shelves before lighting added
Now instead of a five foot tall closet with a bunch of junk piled in the
bottom I have five 17” x 19” shelves: perfect for my photography gear as well
as some extra storage for office supplies. As an extra bonus I installed some
LED lights with a motion sensor. The shelves are
so deep it was a little difficult to see the lower shelves. Now it’s
terrific, with even lighting on every shelf that comes on every time you open
the door.
LED lighting installed under each shelf
Office Shelving
When we moved into our new house last year I kinda just threw everything into
piles in the office. Books, extra furniture, whatever it just all went into
there in no particular order. Now, getting things into order with the
armoire shelving gave me a kick in the pants to actually decorate the office
and get things in order, so the next thing I’m doing is to make some
shelves for the wall to put all my trade paperbacks.
I originally wanted to use hardwood for the shelves, but now I realized that
I can use this as another opportunity to reduce all th extra plywood out in
the shop. I have some nice 1/2” maple plywood that I’m going to laminate
together into a roughly 1” thick board and then band that with some more
walnut offcuts, similar to the armoire shelves.
Images to come once I finish!
Nightstand Work
Finally, work continues on the nightstands project. I’ve definitely had
the most issues of any project on this one, but I feel like I’m unblocked
now and so I’ll be moving forward this weekend.
Work continues apace on nightstands
Happy Friday everyone! I’m looking forward to posting about my projects soon!
My Synology 410j NAS is getting on in years and
I’m starting to get annoyed at the performance. I’ve always liked the
Synology DSM software and the packages
on offer, but it’s not fun waiting for a couple of minutes for a preferences
panel just to load in a web UI.
At work lately I’ve been getting trained up on some sysadmin stuff for the
servers we maintain in our lab, and my recent experience with those along
with my annoyance at my existing backup solution for my photos sent me onto
Amazon looking at what bare-bones rackmount servers cost.
And holy shit did I learn some shit.
It turns out there are a variety of resellers on Amazon that deal in
decommisioned servers of all varieties, and at pretty surprising prices.
As an experiement I ended up buying a 2U server to see whether it would suit
my home networking/server/backup needs, so let’s talk about it!
I also bought a 12U four-post rack to mount it on
plus a variety of additional tools and supplies to be able to hook everything
up. Finally, I bought a rack mountable shelf to set my existing NUC
system and Synology NAS on top of, so that I could
run power and a switch to the back of the rack and enclose all my systems in
one place.
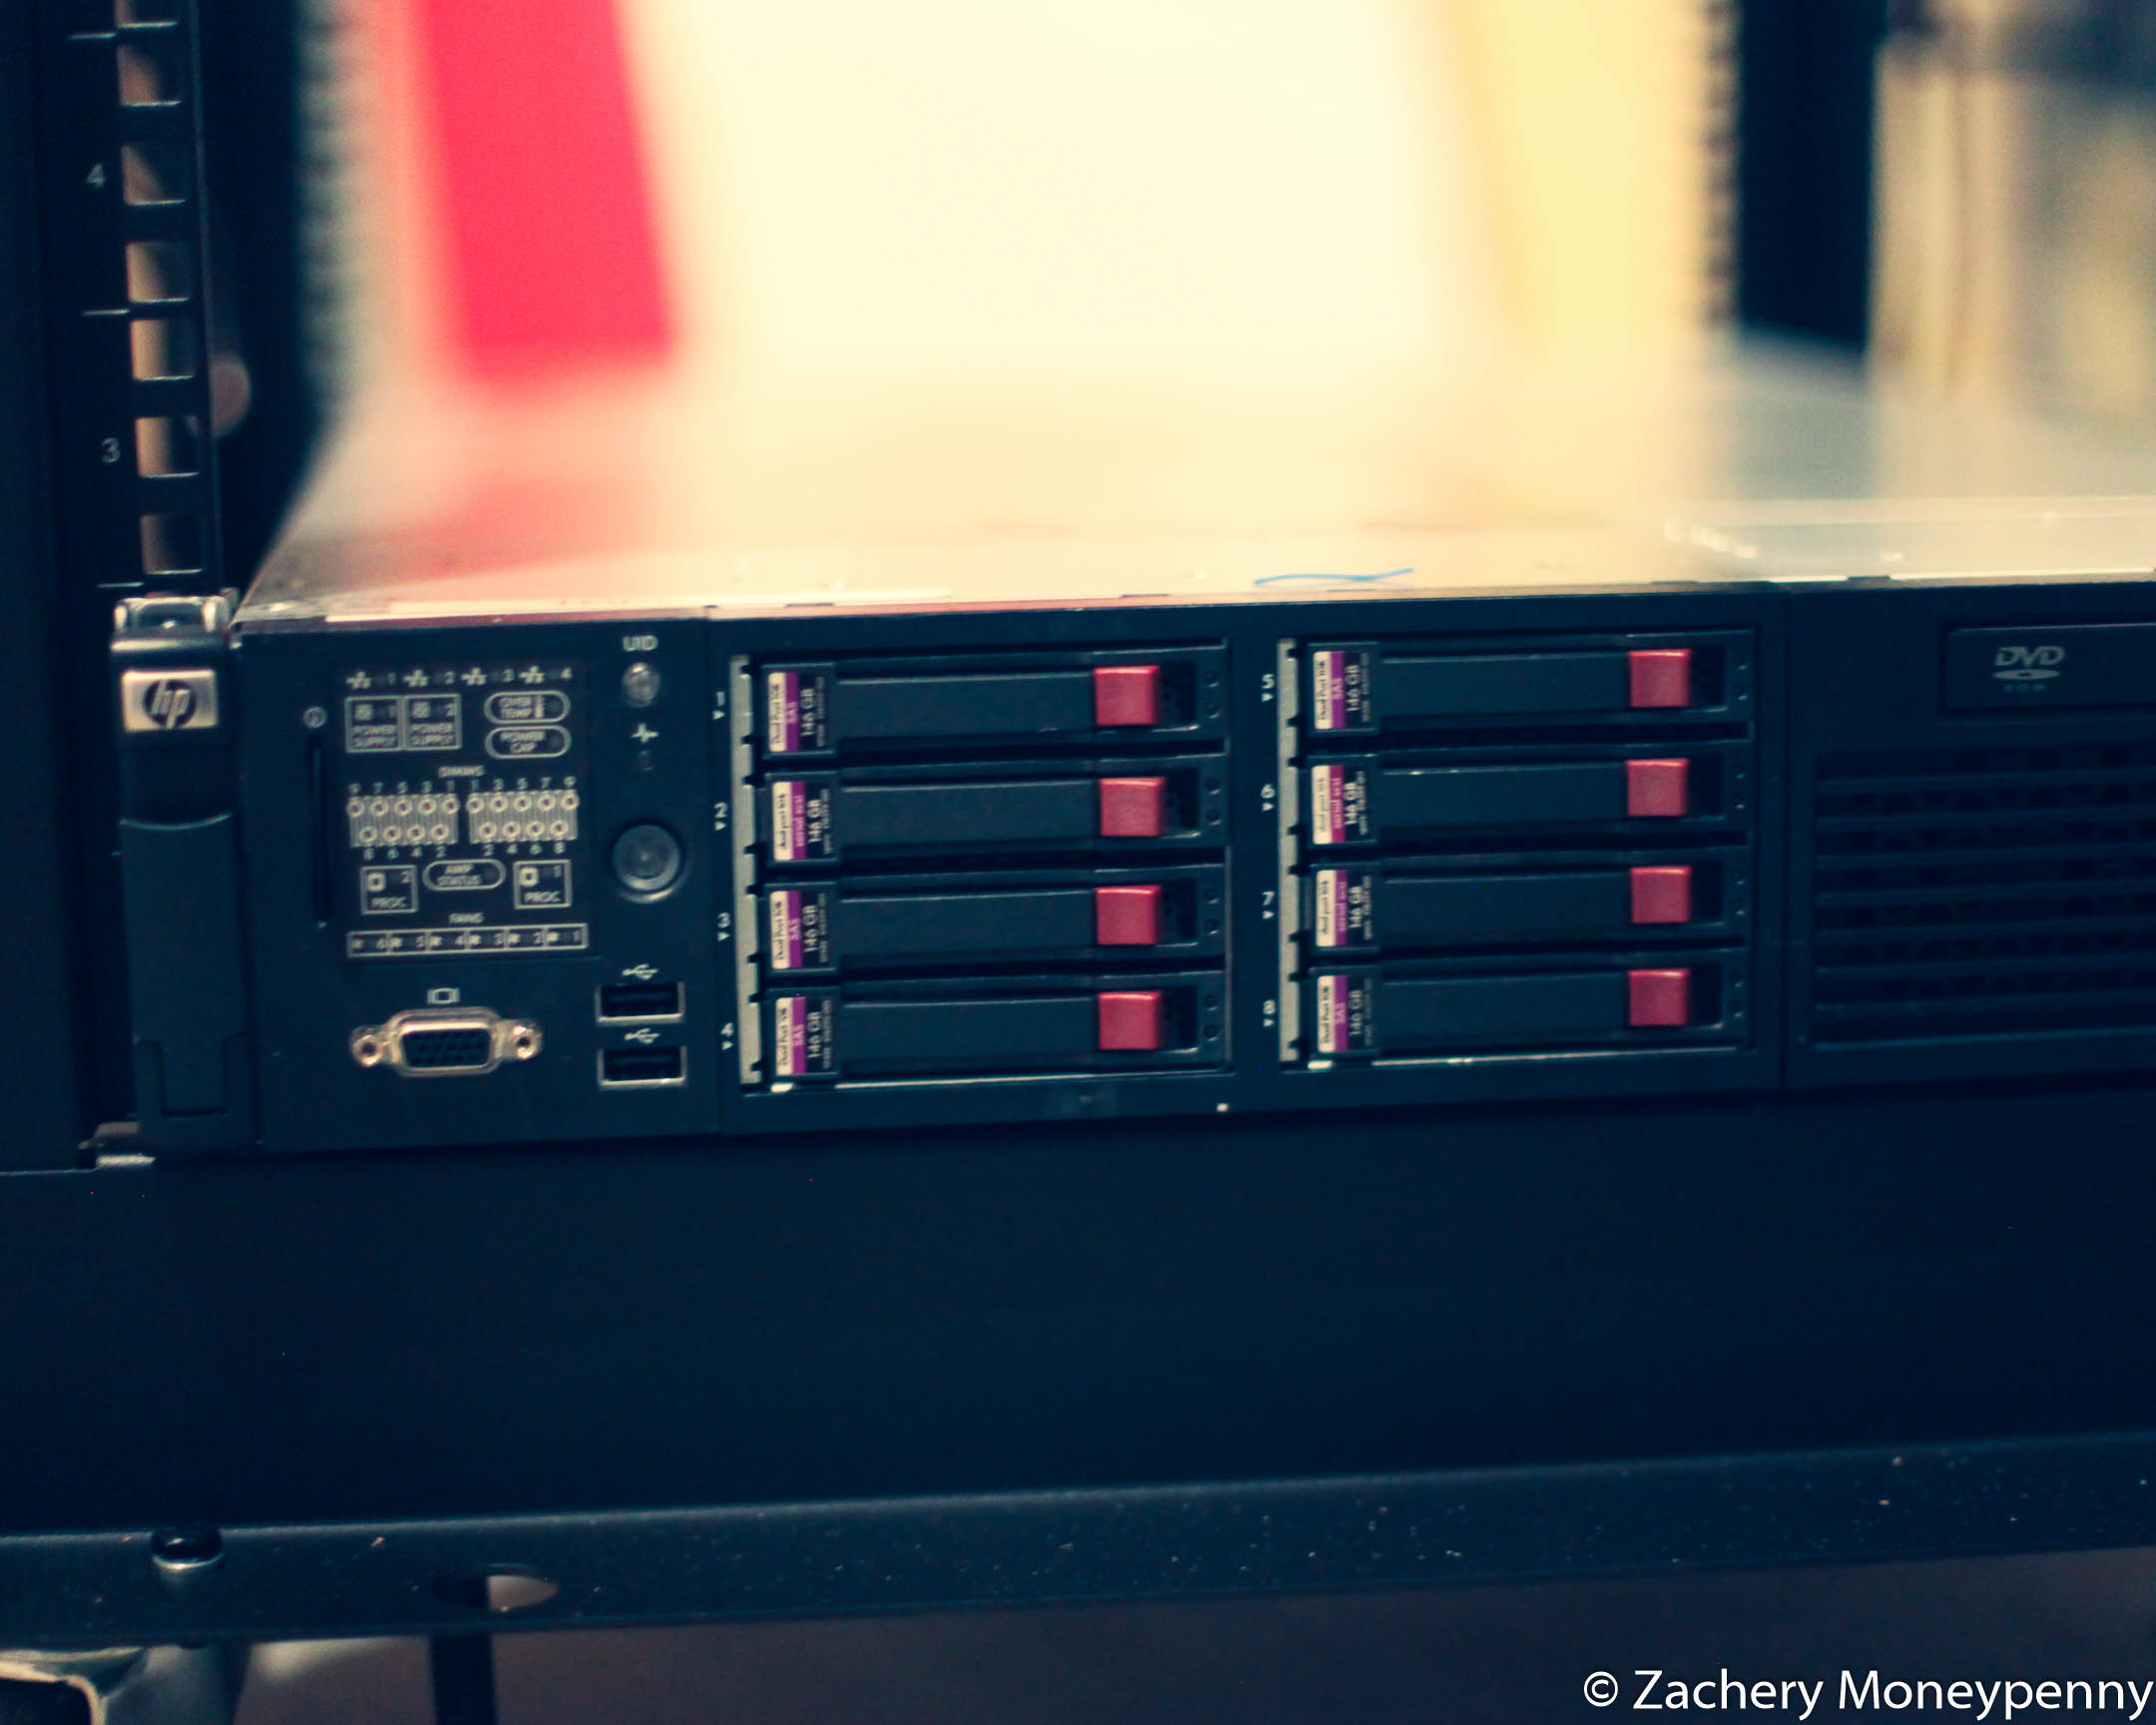
Racked but not wired yet
The first thing I did was to switch the RAID array over from 0 to 1+0. It cut
my logical disk space in half, but the whole point of the system to is to
allow for disk failure without losing my data. The system came with eight
146GB disks, and at some point I’d like to bump those up to eight 1TB disks,
but for now the roughly 540GB of redundant storage I’m getting is enough (my
photo collection, after extensive cleanup and pruning, sits at 100GB right
now.) I will likely buy a few spare 146GB disks just in case of failure, then
in the longer term I’ll start acquiring 1TB ones for down the road.
I installed Ubuntu Server 17.10 on it, and the installation was rough only
because (a) due to a storm the power in our house went out one time as I was
laying down the file system and (b) I could not get LVM partitions working
with the P410i RAID controller. In the end I was able to get things working
by partitioning without LVM, then installing the system as normal.
I have OpenSSH and Samba running on it right now, and I’m considering whether
I want to run the Proliant as a DNS server with my NUC as a backup. That
would allow me to set up a real home lab
environment
while falling back to something like 1.1.1.1 or
8.8.8.8. This is still in
the planning stages, but I’d rather take the plunge than continue to manage
/etc/hosts files across all of my home machines.
My backups from my main photo editing machine to my backup server are now
operational, but I haven’t yet setup off-site backups yet. The Synology had
an installable package to automate Amazon
Glacier backups, but I’m not sure if I want
to go that route from the new server or explore something like
Backblaze. If you have an opinion on this hit
me up on Twitter!
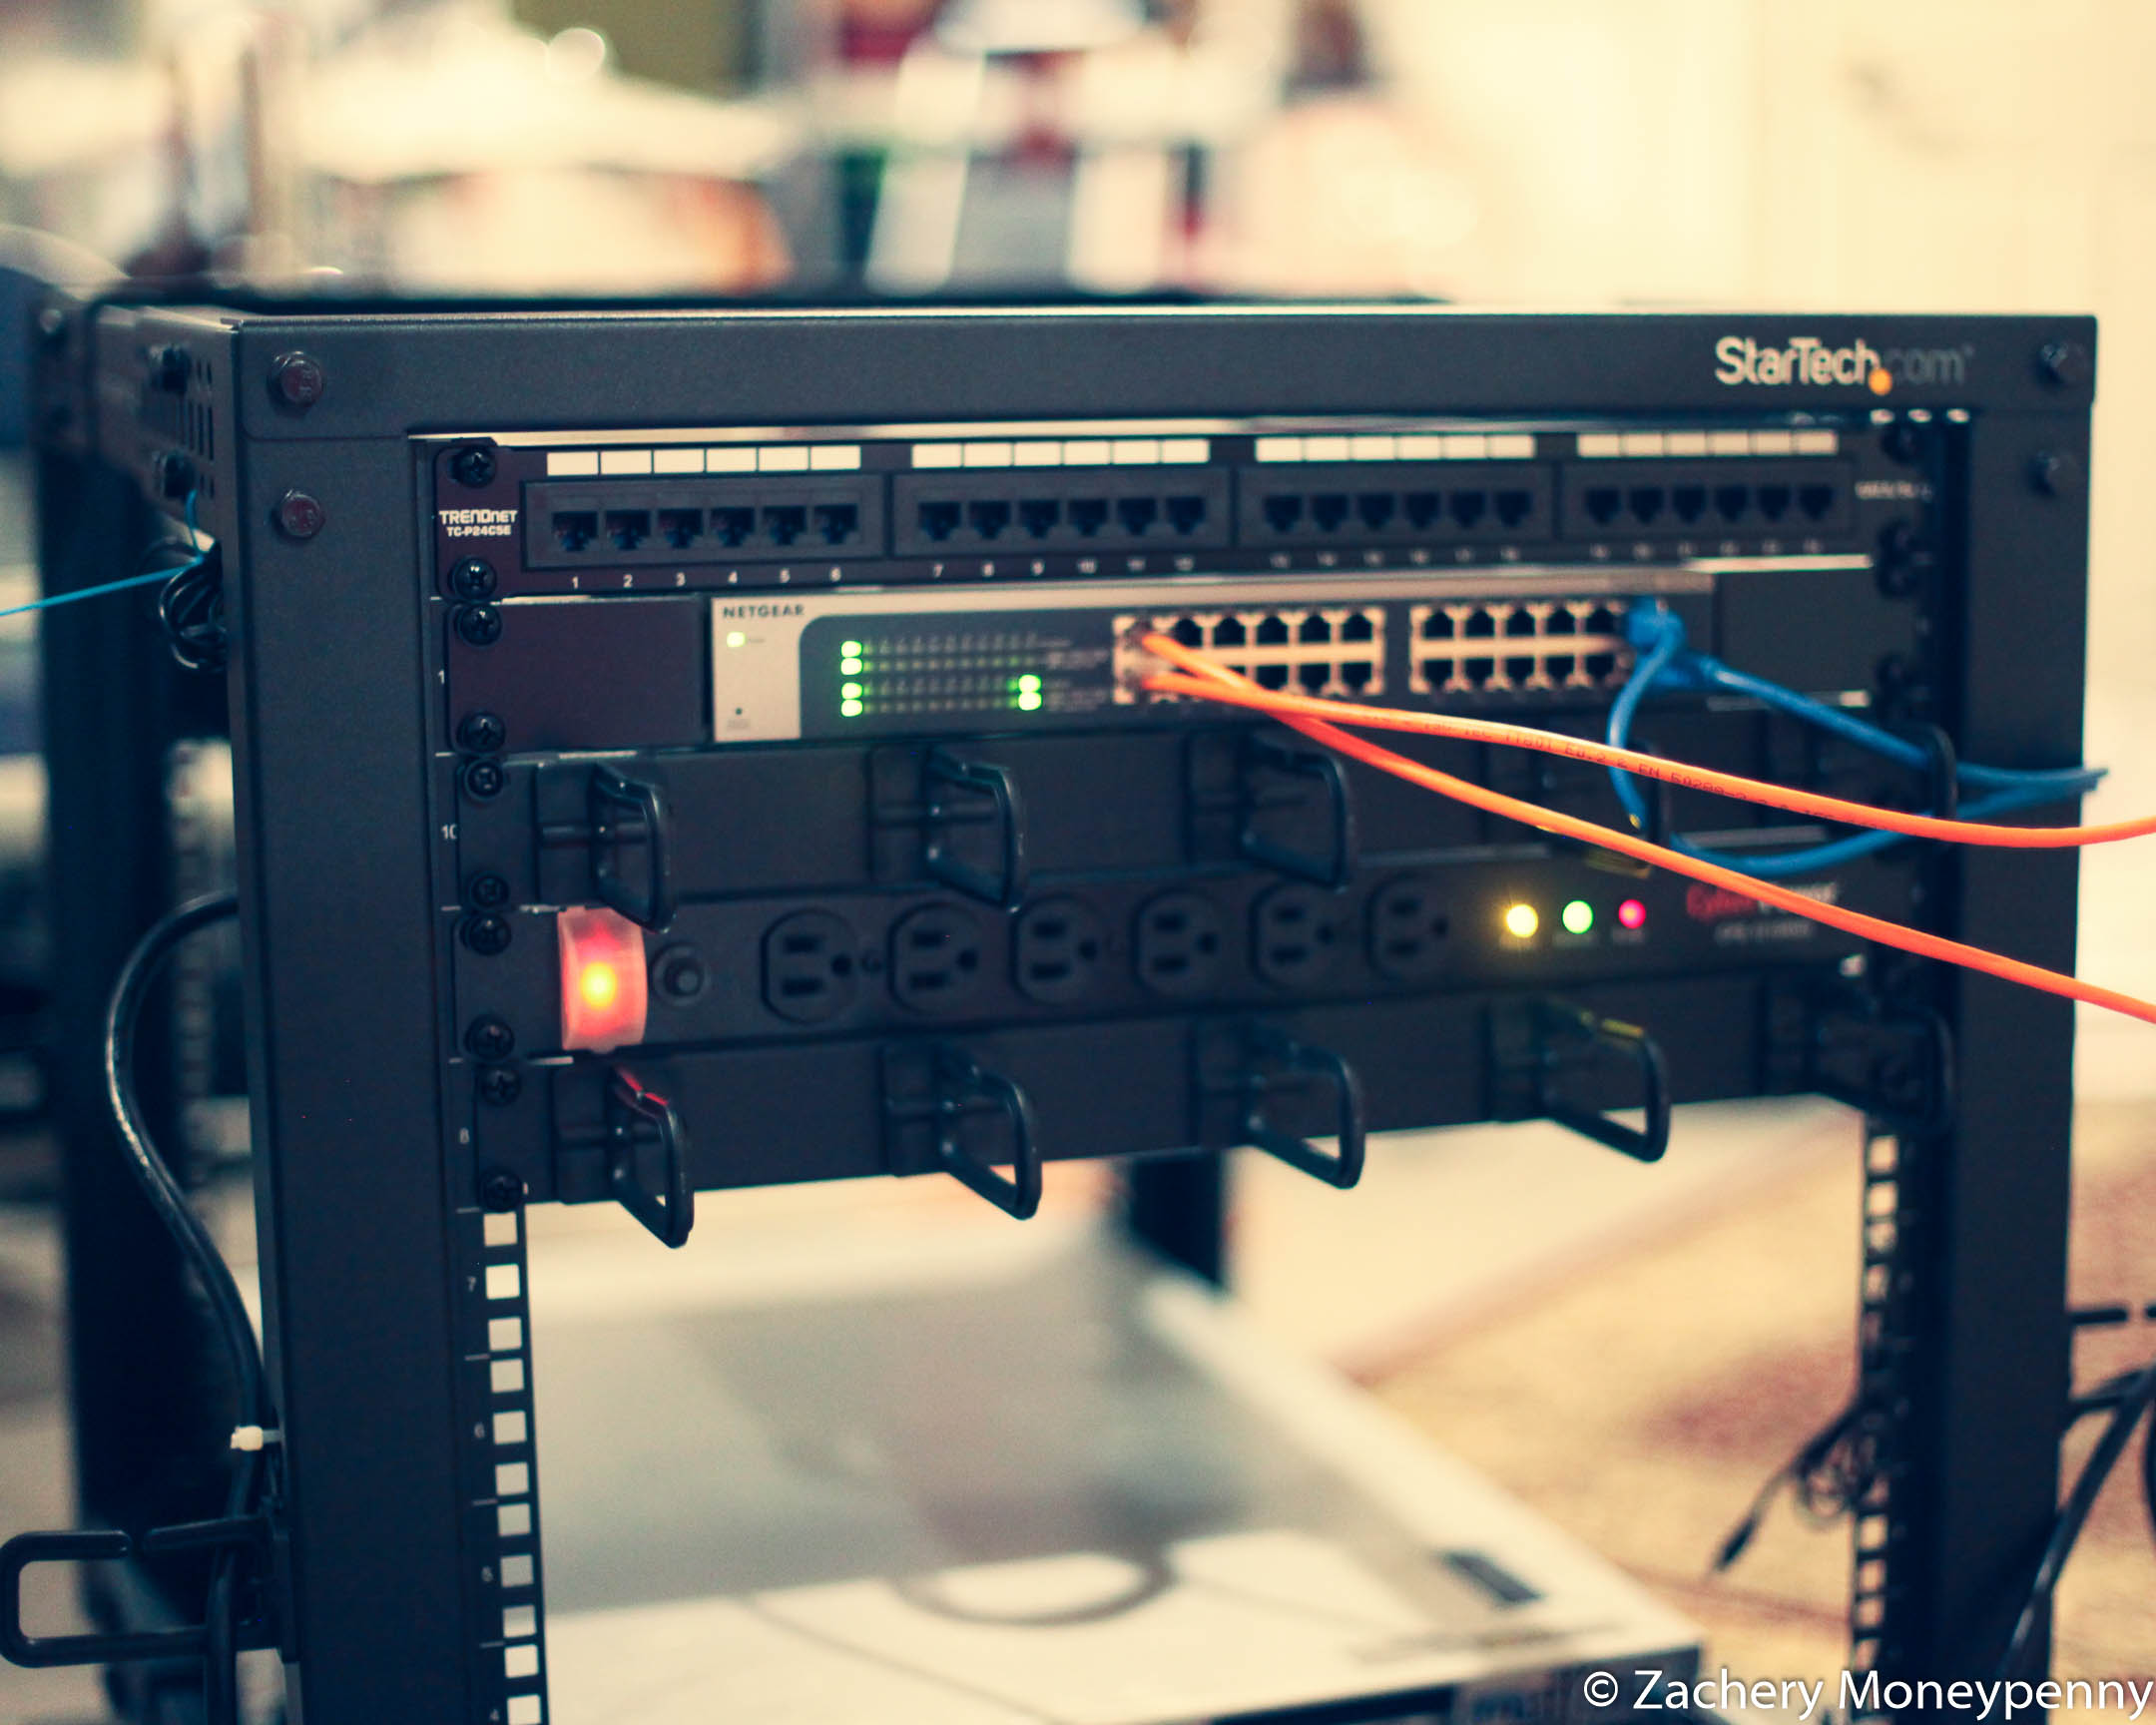
View from the back of the rack
Once the system was up and running, I looked to consolidate my network
footprint inside the rack as well. I took my switch down off the wall, and
added it to the back of the rack alongside the power unit (not UPS, basically
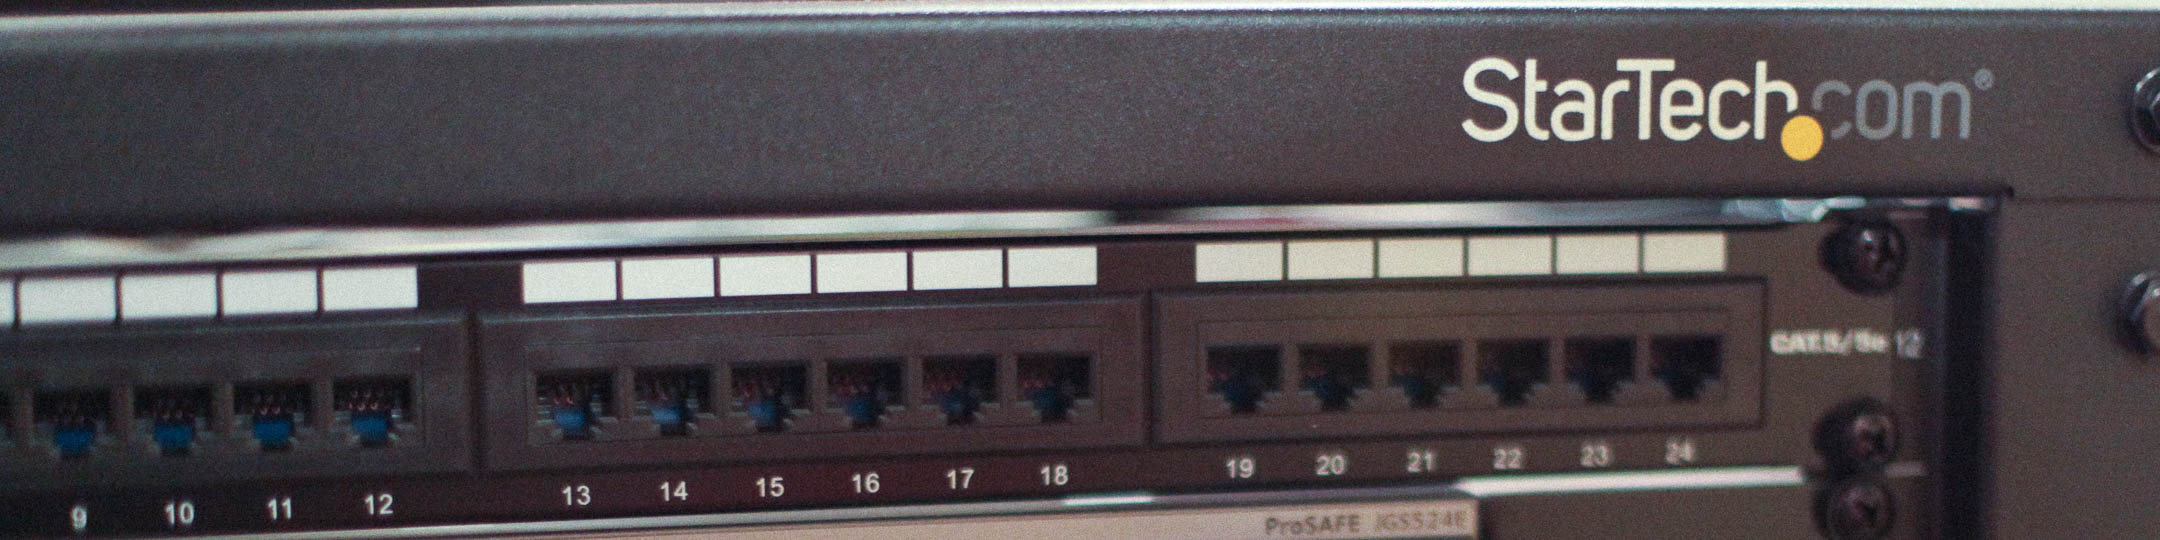
a big rackable power strip.) I also bought a patch panel, which as you can
see from the above picture is not hooked up yet.
The ultimate plan is to wire everything inside the rack into the patch panel,
and from there to the switch. Meanwhile, all connections coming in from
outside the rack (home theater, office, fiber modem) will connect directly
into the switch.
rubs hands with glee …and I still have 6 more U’s.
Modestly configured HP 1U servers are ~$200-$300,
and using them as Docker hosts for app development is sparking some ideas in
me. It’s also a low-cost way to continue to learn about administering
bare-metal stuff, which I’ve never done before.
So, uh, yeah. Maybe we’ll see my tiny data empire grow.
The flourescent lights in my shop burned out. What’re we gonna do?!
In the summer of 2017 I had my shop rewired by an electrician to add many
more 120V outlets along with a few 240V ones for the presumed upgrades I
was going to make.
At the same time, they swapped out the existing simple overhead light sockets
with new flourescent light fixtures, but only in
the third bay of the garage. The main bay of the garage where we park our
cars still used old light sockets.
The new lights were a huge improvement in the shop, though! Now, however,
we’re six months on and almost all of them have burned out. And one thing you
should know about me is that if I can upgrade something to save money in the
long term then I’ll always take that road.
So let’s talk about flourescent versus LED shop lights. I considered going
LED last summer when I bought the lights but was talked off that ledge by the
electrician. He counseled that LED was still too expensive and that a T8
flourescent fixture would be better. When I made that decision, however, I
didn’t think I’d only get 6 months out of a set of eight bulbs. A set of
compatible LED replacment tubes has an “expected
life” of 36,000 hours, which means less climbing up on a ladder to replace
them (and what you need to know about me is that I’m a lazy man.)
So easy! Let’s simply rewire our light fixtures and then pop in the new LED
tubes! The main car bay will still be lighted like a back-alley but the shop
will be bright and happy and I didn’t need to be able to see where I parked
the lawnmower anyways!
I have a better idea for the long term.
I’ve been following April Wilkerson’s wood and
metal shop build with interest via YouTube and Instagram and she recently had
a video about installing the walls and
ceiling, with a small aspect about the overhead lighting. The main thing that
interested me was the light fixtures she was using: Big Ass Lights Garage
Light.
I really like the look and profile of that light, but it’s too expensive for
me to swap out everything in my garage right now. My goal in the medium term
is to swap in one Big Ass Light above my most often-used work area and move
the LED tube fixture over to the car bay, then eventually buy a second Big
Ass Light for the shop side and move the other LED tube fixture over to the
car bay as well. At that point everything in the garage would be 5000K LEDs
and I think I’d be in pretty good shape!
…a few days pass, during which I actually follow-through with the above
plan…
Oh god ohnononono. This was much harder than it needed to be. I have lots
that I learned doing this. PLEASE SIR OR MADAM HEED MY WARNINGS.
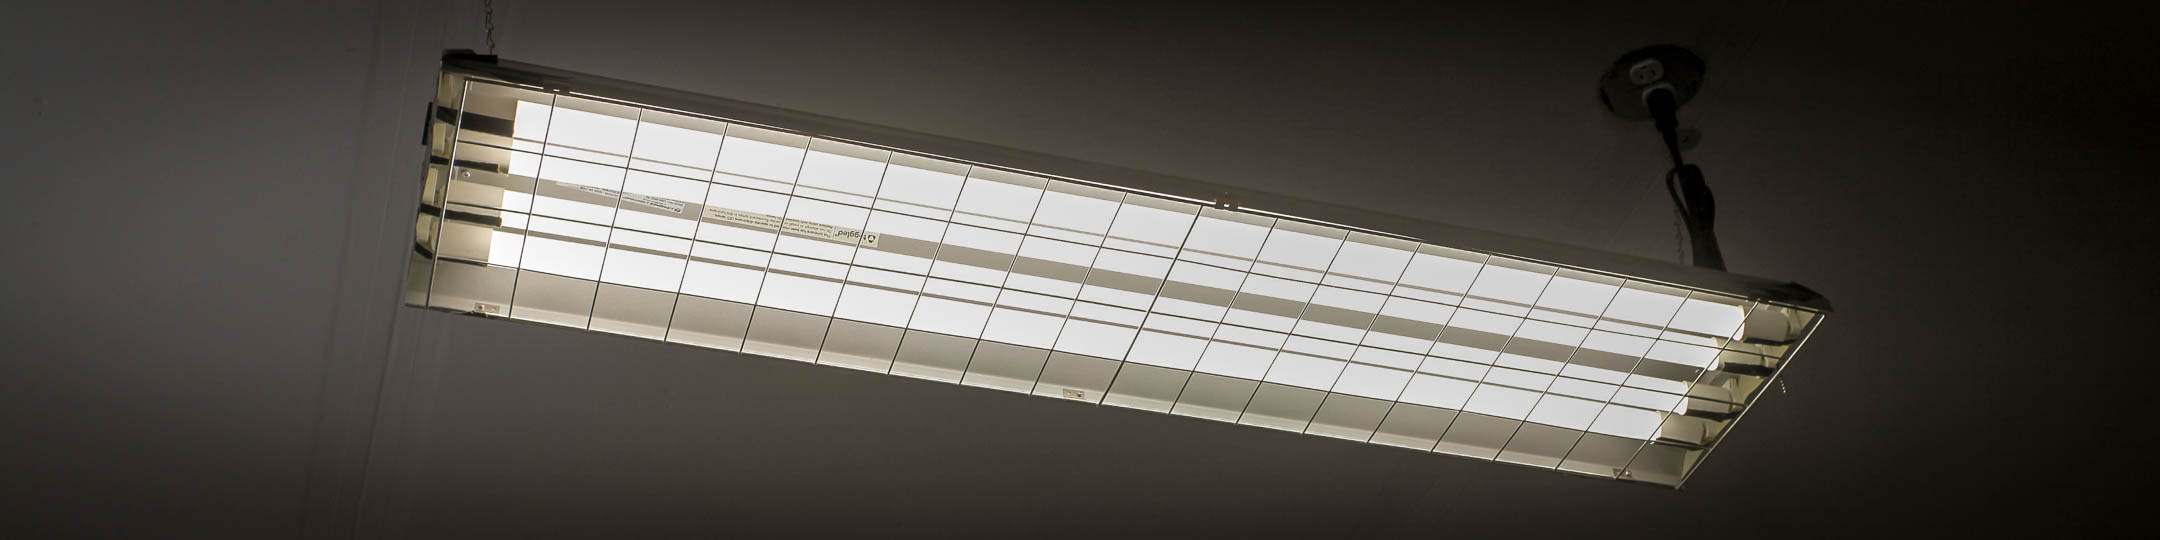
Ok, good news first: I now have only LED tube lights in the shop bay of
my garage. If that statement sounds carefully parsed, then you’re really good
at reading into statements! Congratulations!
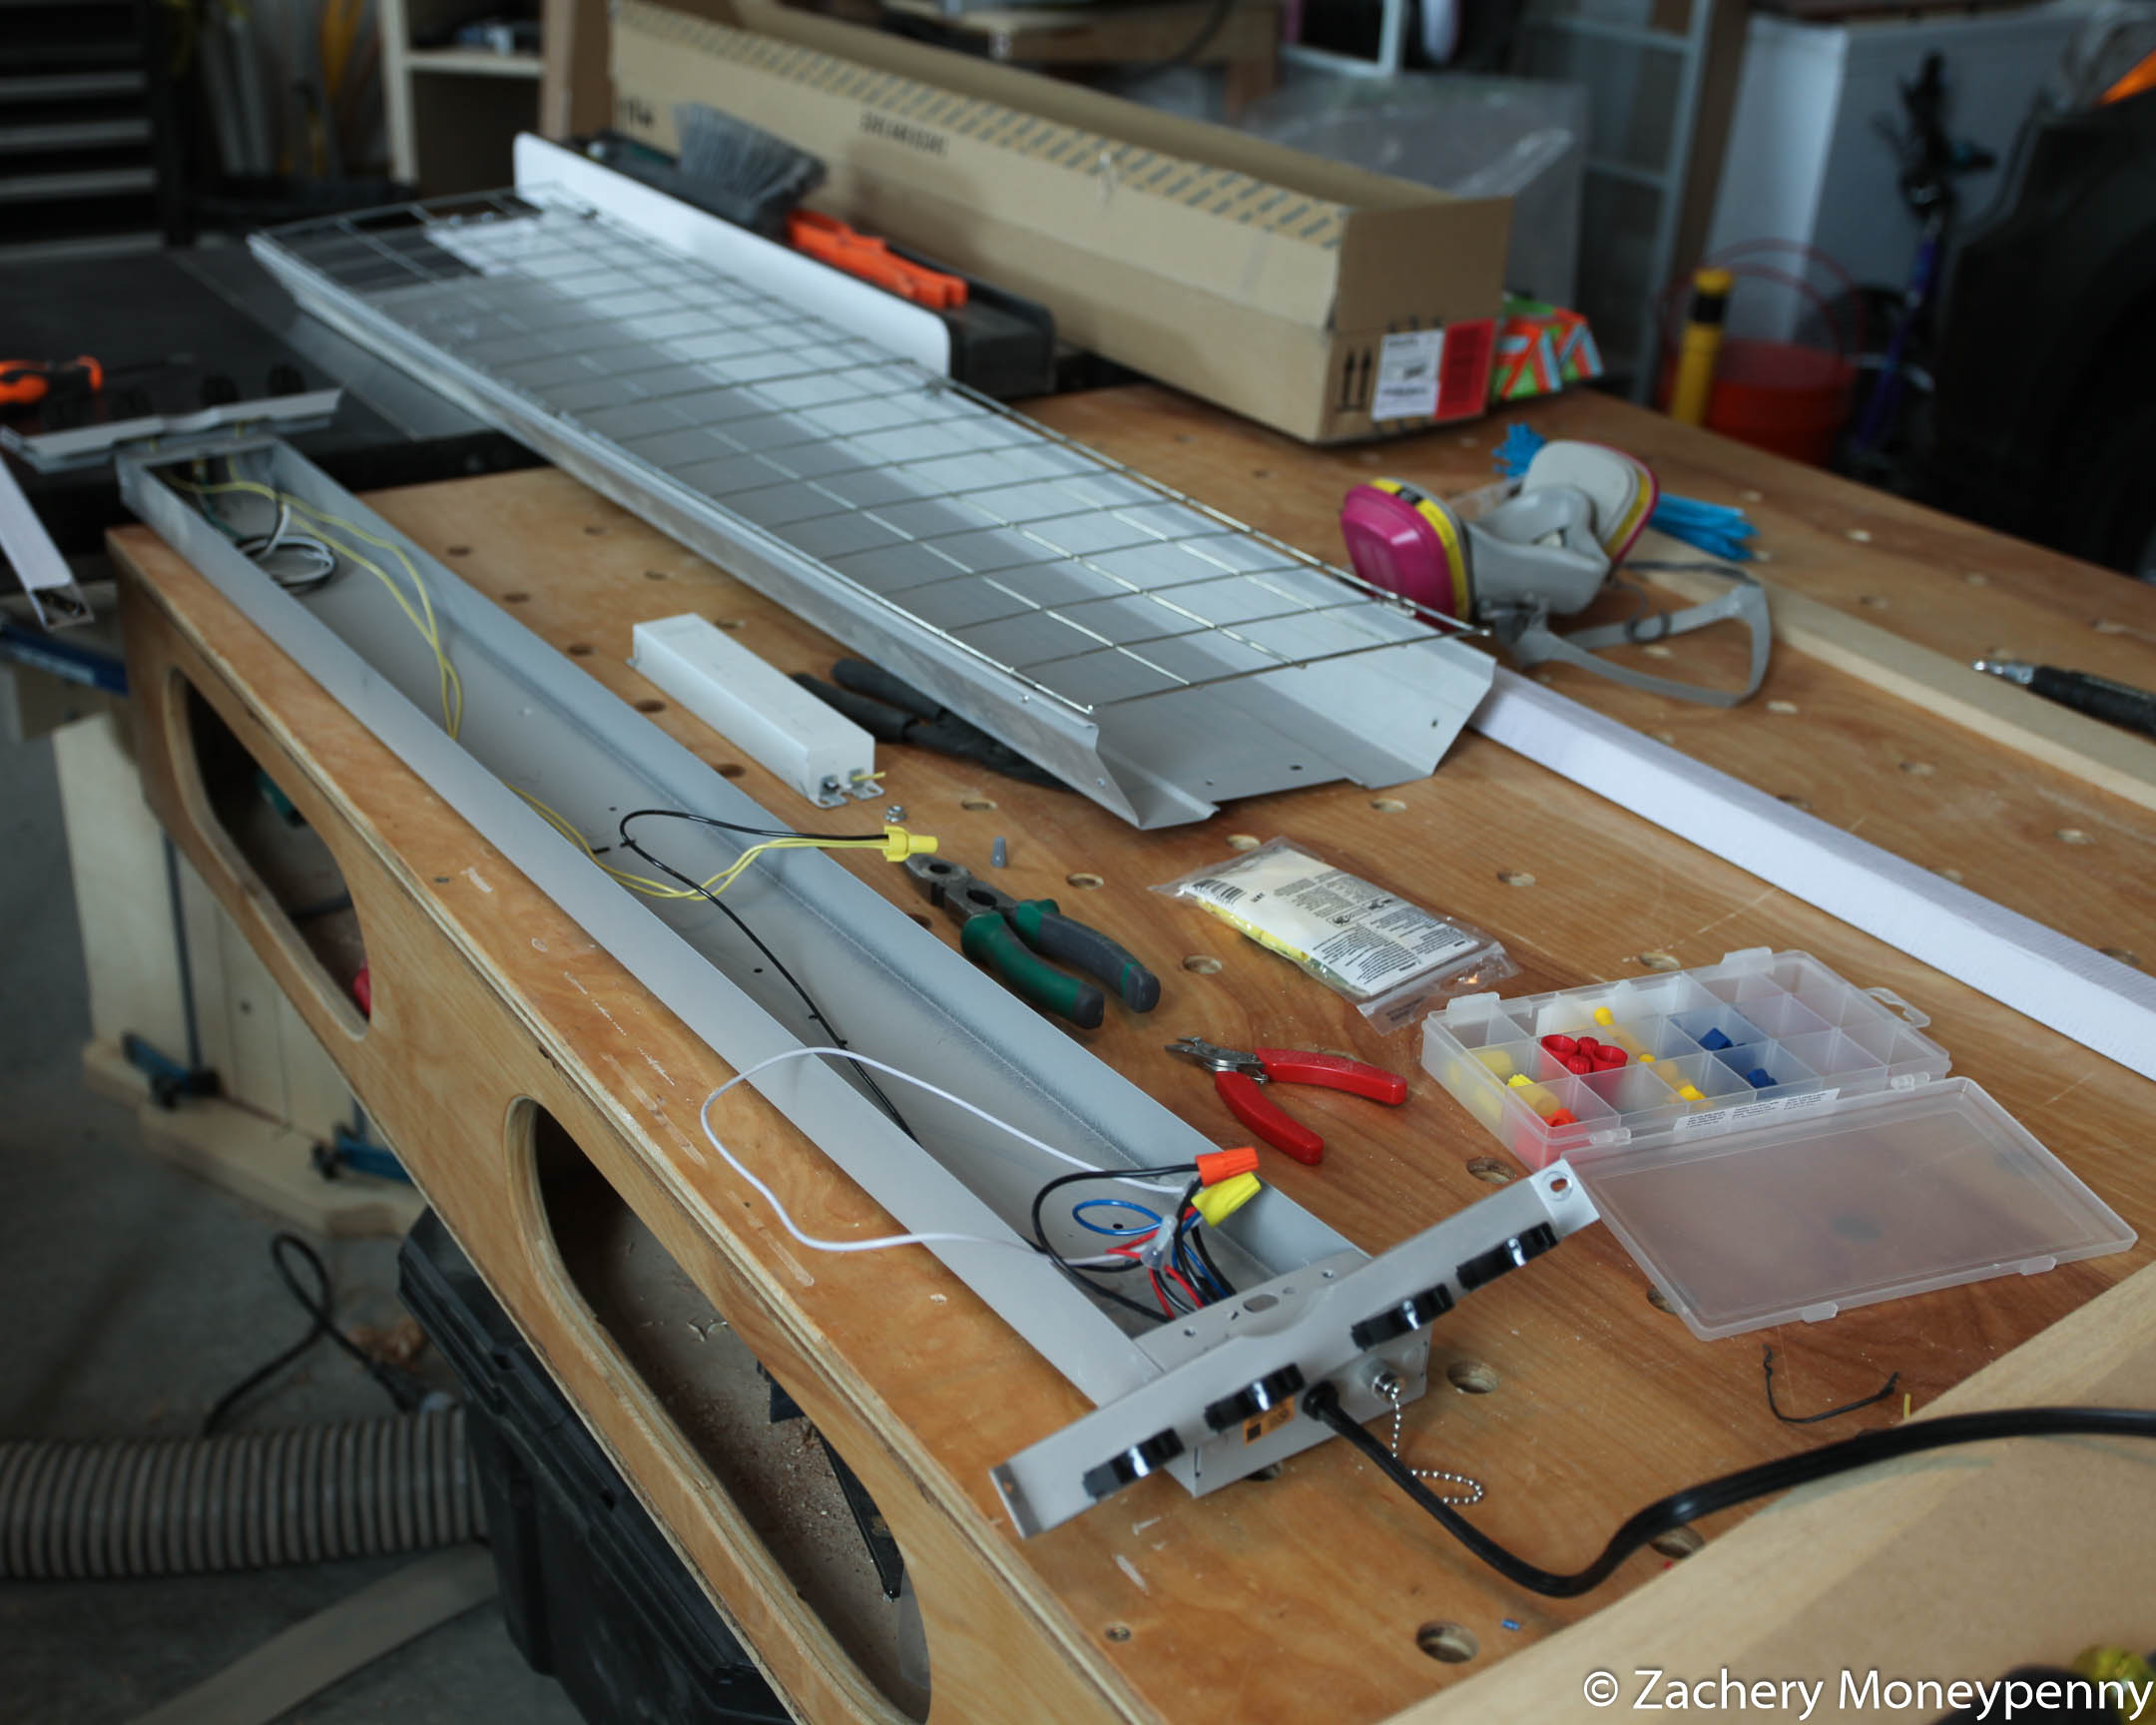
I pulled down one of the fixtures, and after watching the above YouTube video
again I disassembled it and cut the wires apart, re-hooking them back up
while bypassing the ballast. I then inserted the Phillips Instantfit LED
tubes and cautiously plugged everything back in.
Flourescent fixture: disassembled and rewired
Nothing.
I’ll skip the hours of swearing and rewiring and get right to my first lesson
of the day: Phillips Instantfit LED tubes will not work when you bypass the
ballast; they are meant to be used in UNCHANGED flourescent fixtures.
Unfortunately, by the time I figured this out, I’d already torn apart the
inside of one of my fixtures and the way I cut the wires… uh, I wouldn’t be
re-hooking up the ballast.
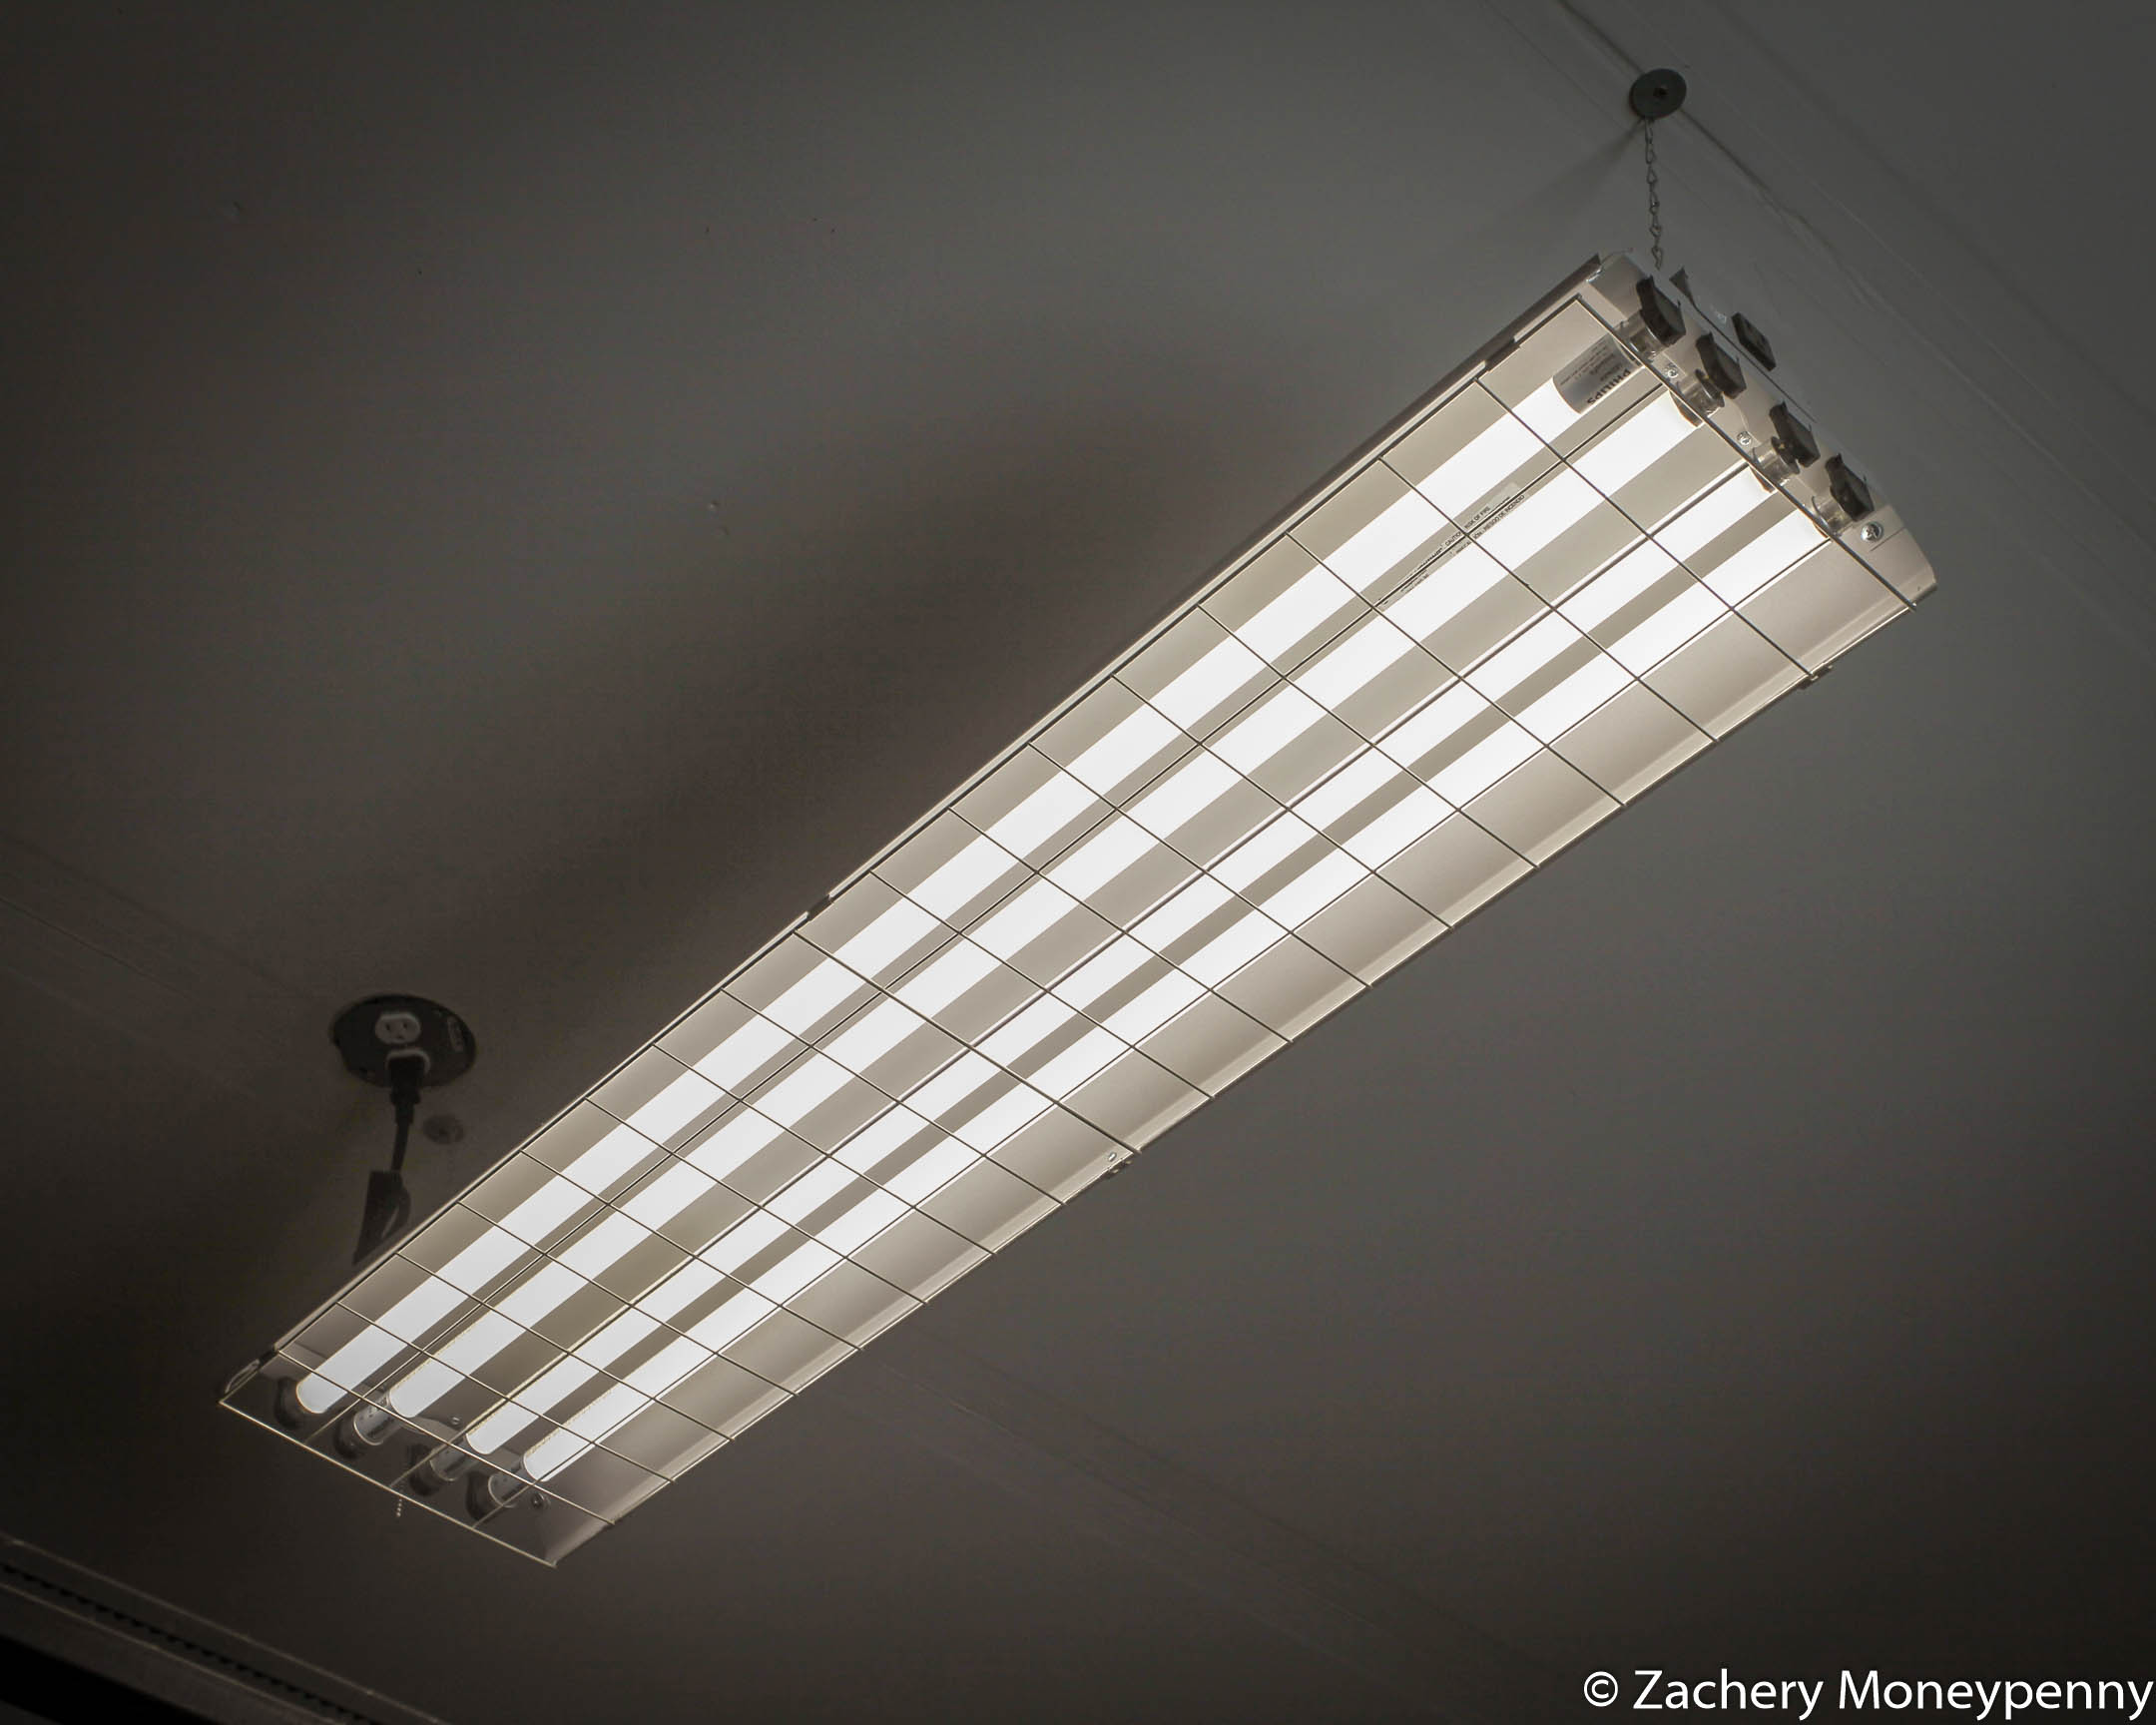
Good News: I was able to easily use the Phillips Instantfit tubes I had purchased through Amazon in the other fixture that I had not yet torn apart.
Bad News: The Phillips Instantfit tubes would not work in the fixture I had already torn apart.
Phillips Instantfit tubes working in an unmodified flourescent fixture
So, as is often the case when I’m working on something I’ve never worked on
before: to Home Depot we go!
There, I found toggled LED tubes specifically made
for bypassing a ballast in an existing fixture. They were a bit more
expensive, but I was reasonably sure they’d work in the fixture I’d already
rewired.
Once home, however, I realized that these tubes required even a different
wiring than I’d already done, so time to break out the wirecutters again and
rewire again. Luckily, the instructions that came with each tube were helpful
and instructive, and I was able to get things wired up pretty quickly. They
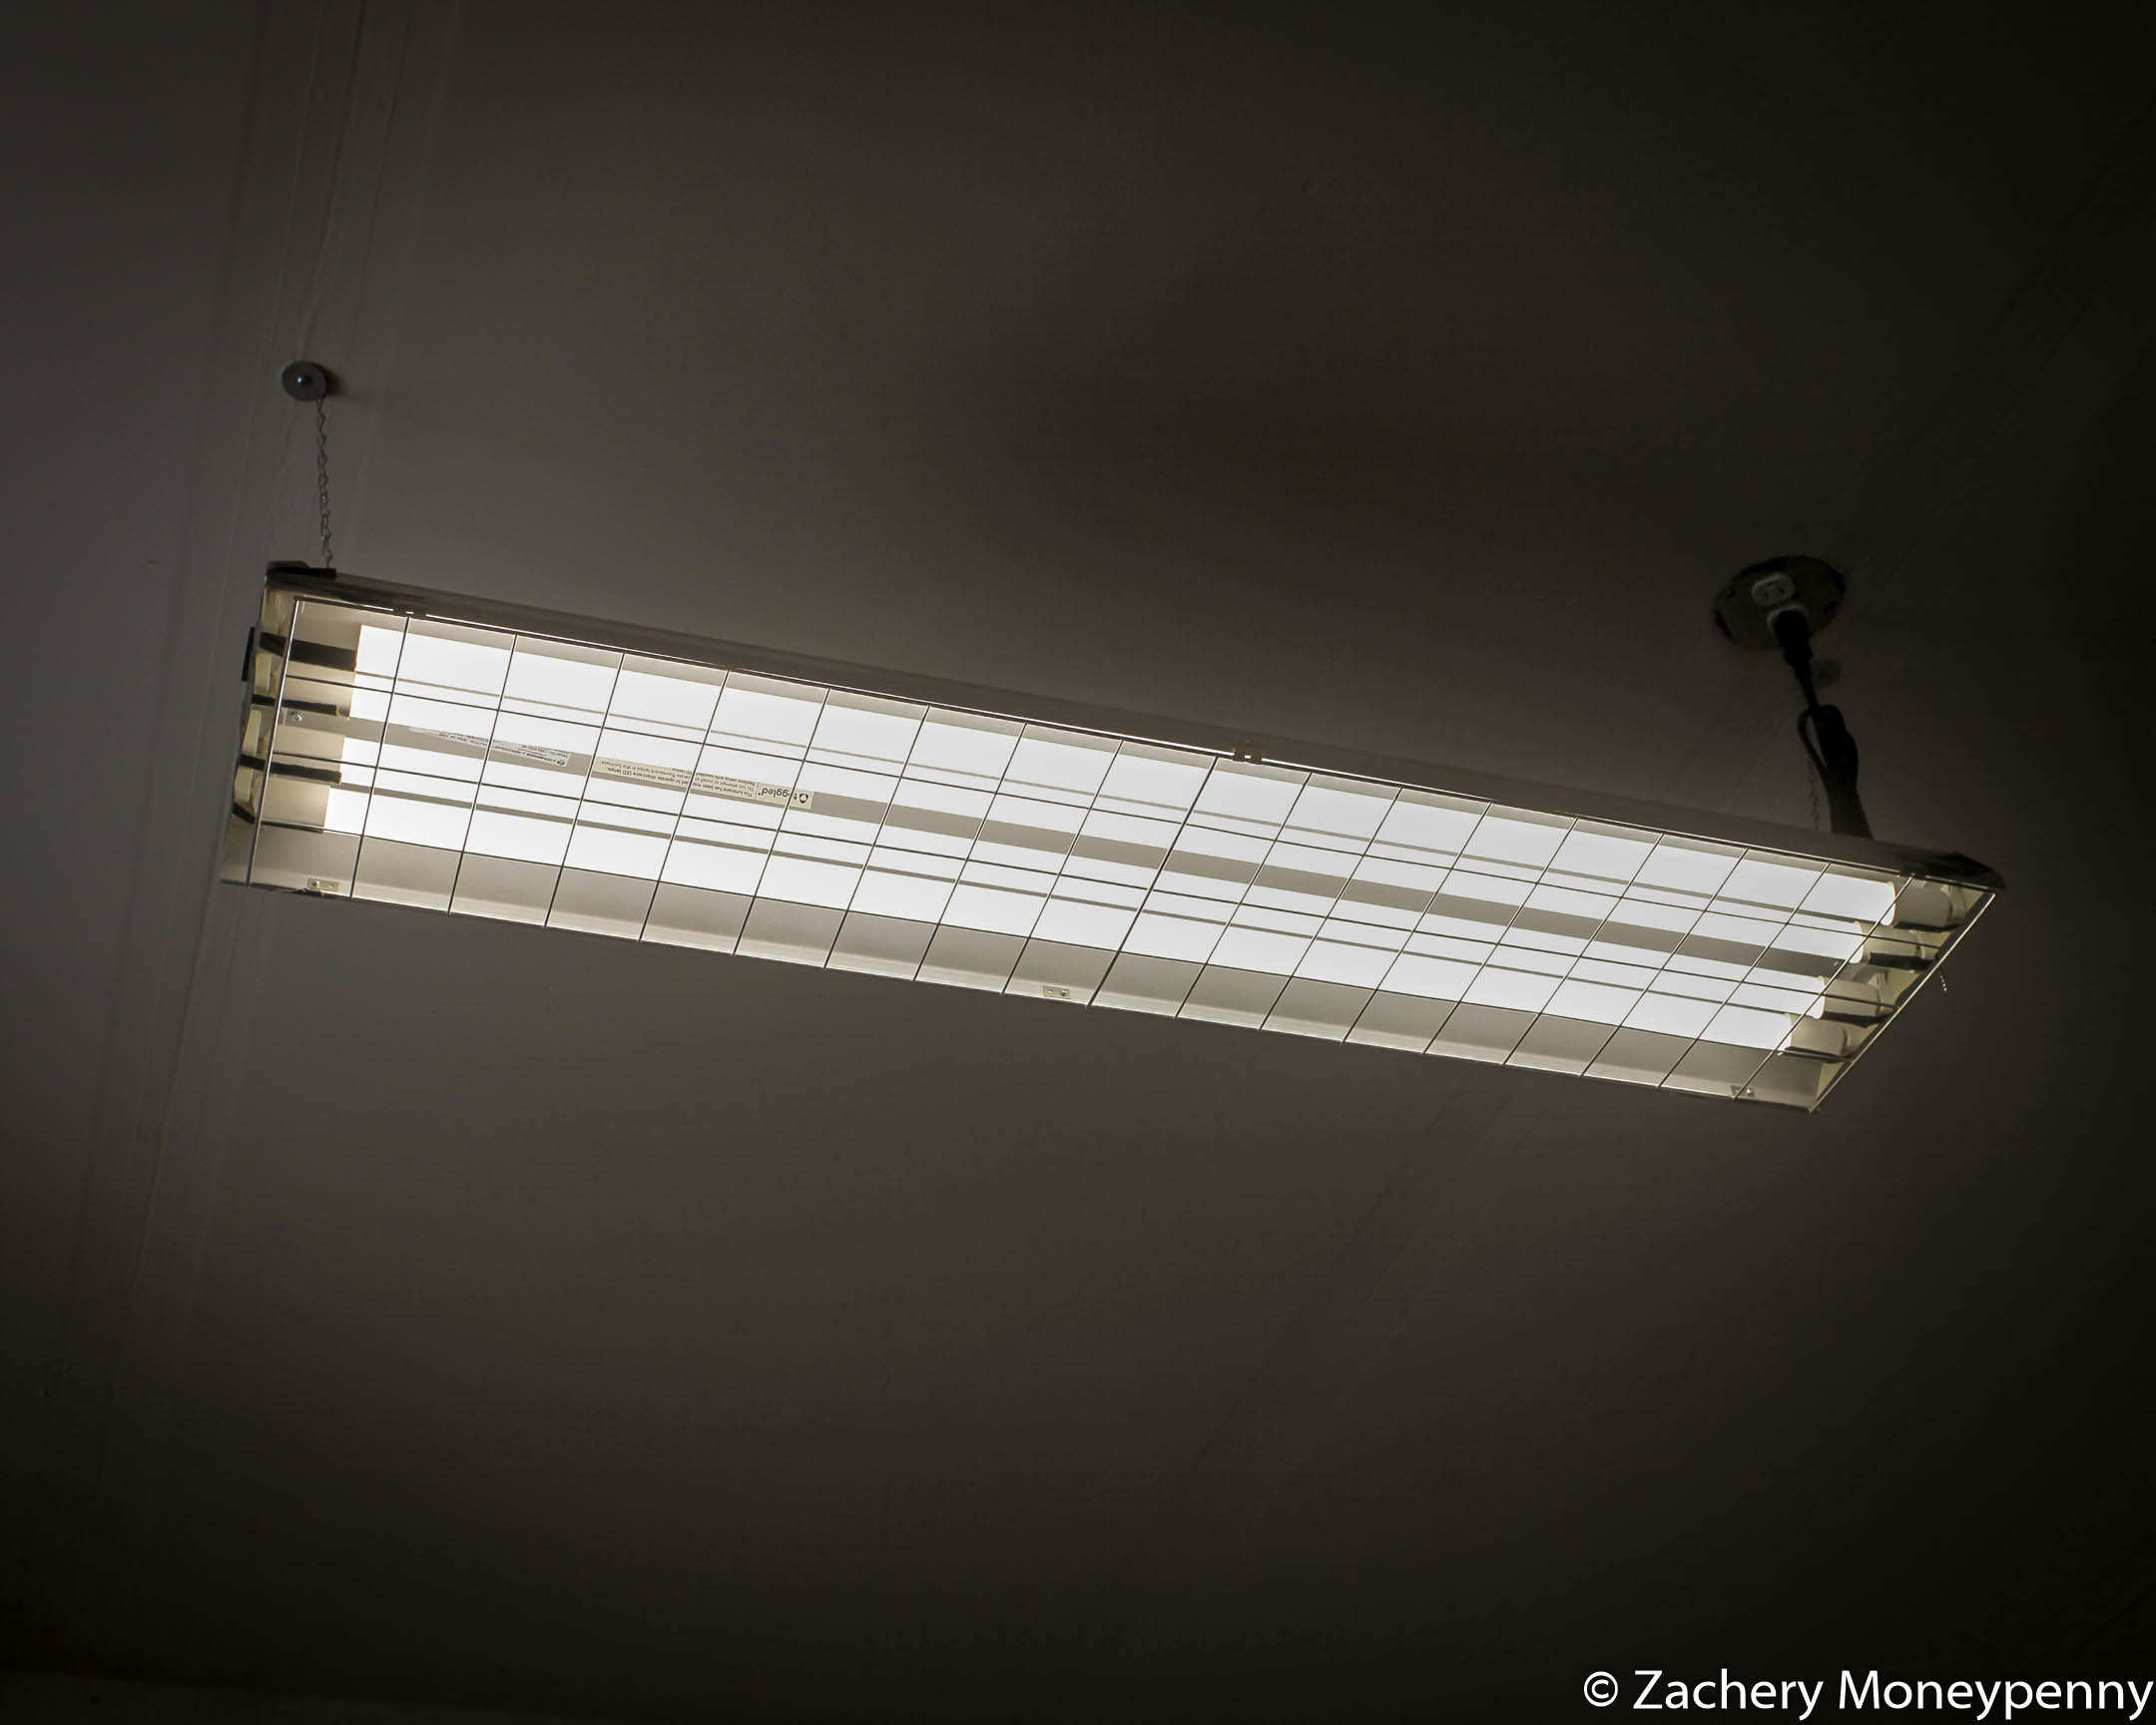
still weren’t working, however, until I realized that these tubes must be
installed in a certain direction or they won’t work. Once I turned them
around: voila!
toggled LED lights working in a ballast bypass-modified fixture
Good News: All my fixtures now have working lights in them
Bad News: Different lights in different fixtures… man.
Reflections & Learning
I’m gonna throw this section in even though this isn’t technically a
“project” post. As frustrated as I got with this, I really learned a lot
about the different options in converting from flourescent to LED.
The main thing you need to consider is why you’re converting:
If you’re converting primarily to save money on energy costs, you should
rewire your fixtures and purchase ballast-bypass LEDs. Note that this means
you should NOT buy Phillips Instantfit tubes. This is because the ballast
is still using the same amount of energy whether you’re using it to drive
flourescent or LED fixtures, so you won’t see the cost reduction from using
the LEDs in this case. You should still see a greater lifespan, however.
If you’re converting primarily for heat generation or “avoid climbing a
ladder as often” reasons then go ahead and just buy Phillips Instantfit
tubes, stick em in your existing fixture and be done.
I also learned that I should go buy some extra spools of 18awg wire of all
colors to have when I’m working on rewiring shit like this. I got stuck at a
few points because I was forced to re-use wires I’d cut out of the fixture.
And that’s it! I have light in my shop again; hope this helped you folks
thinking about converting over yourselves.
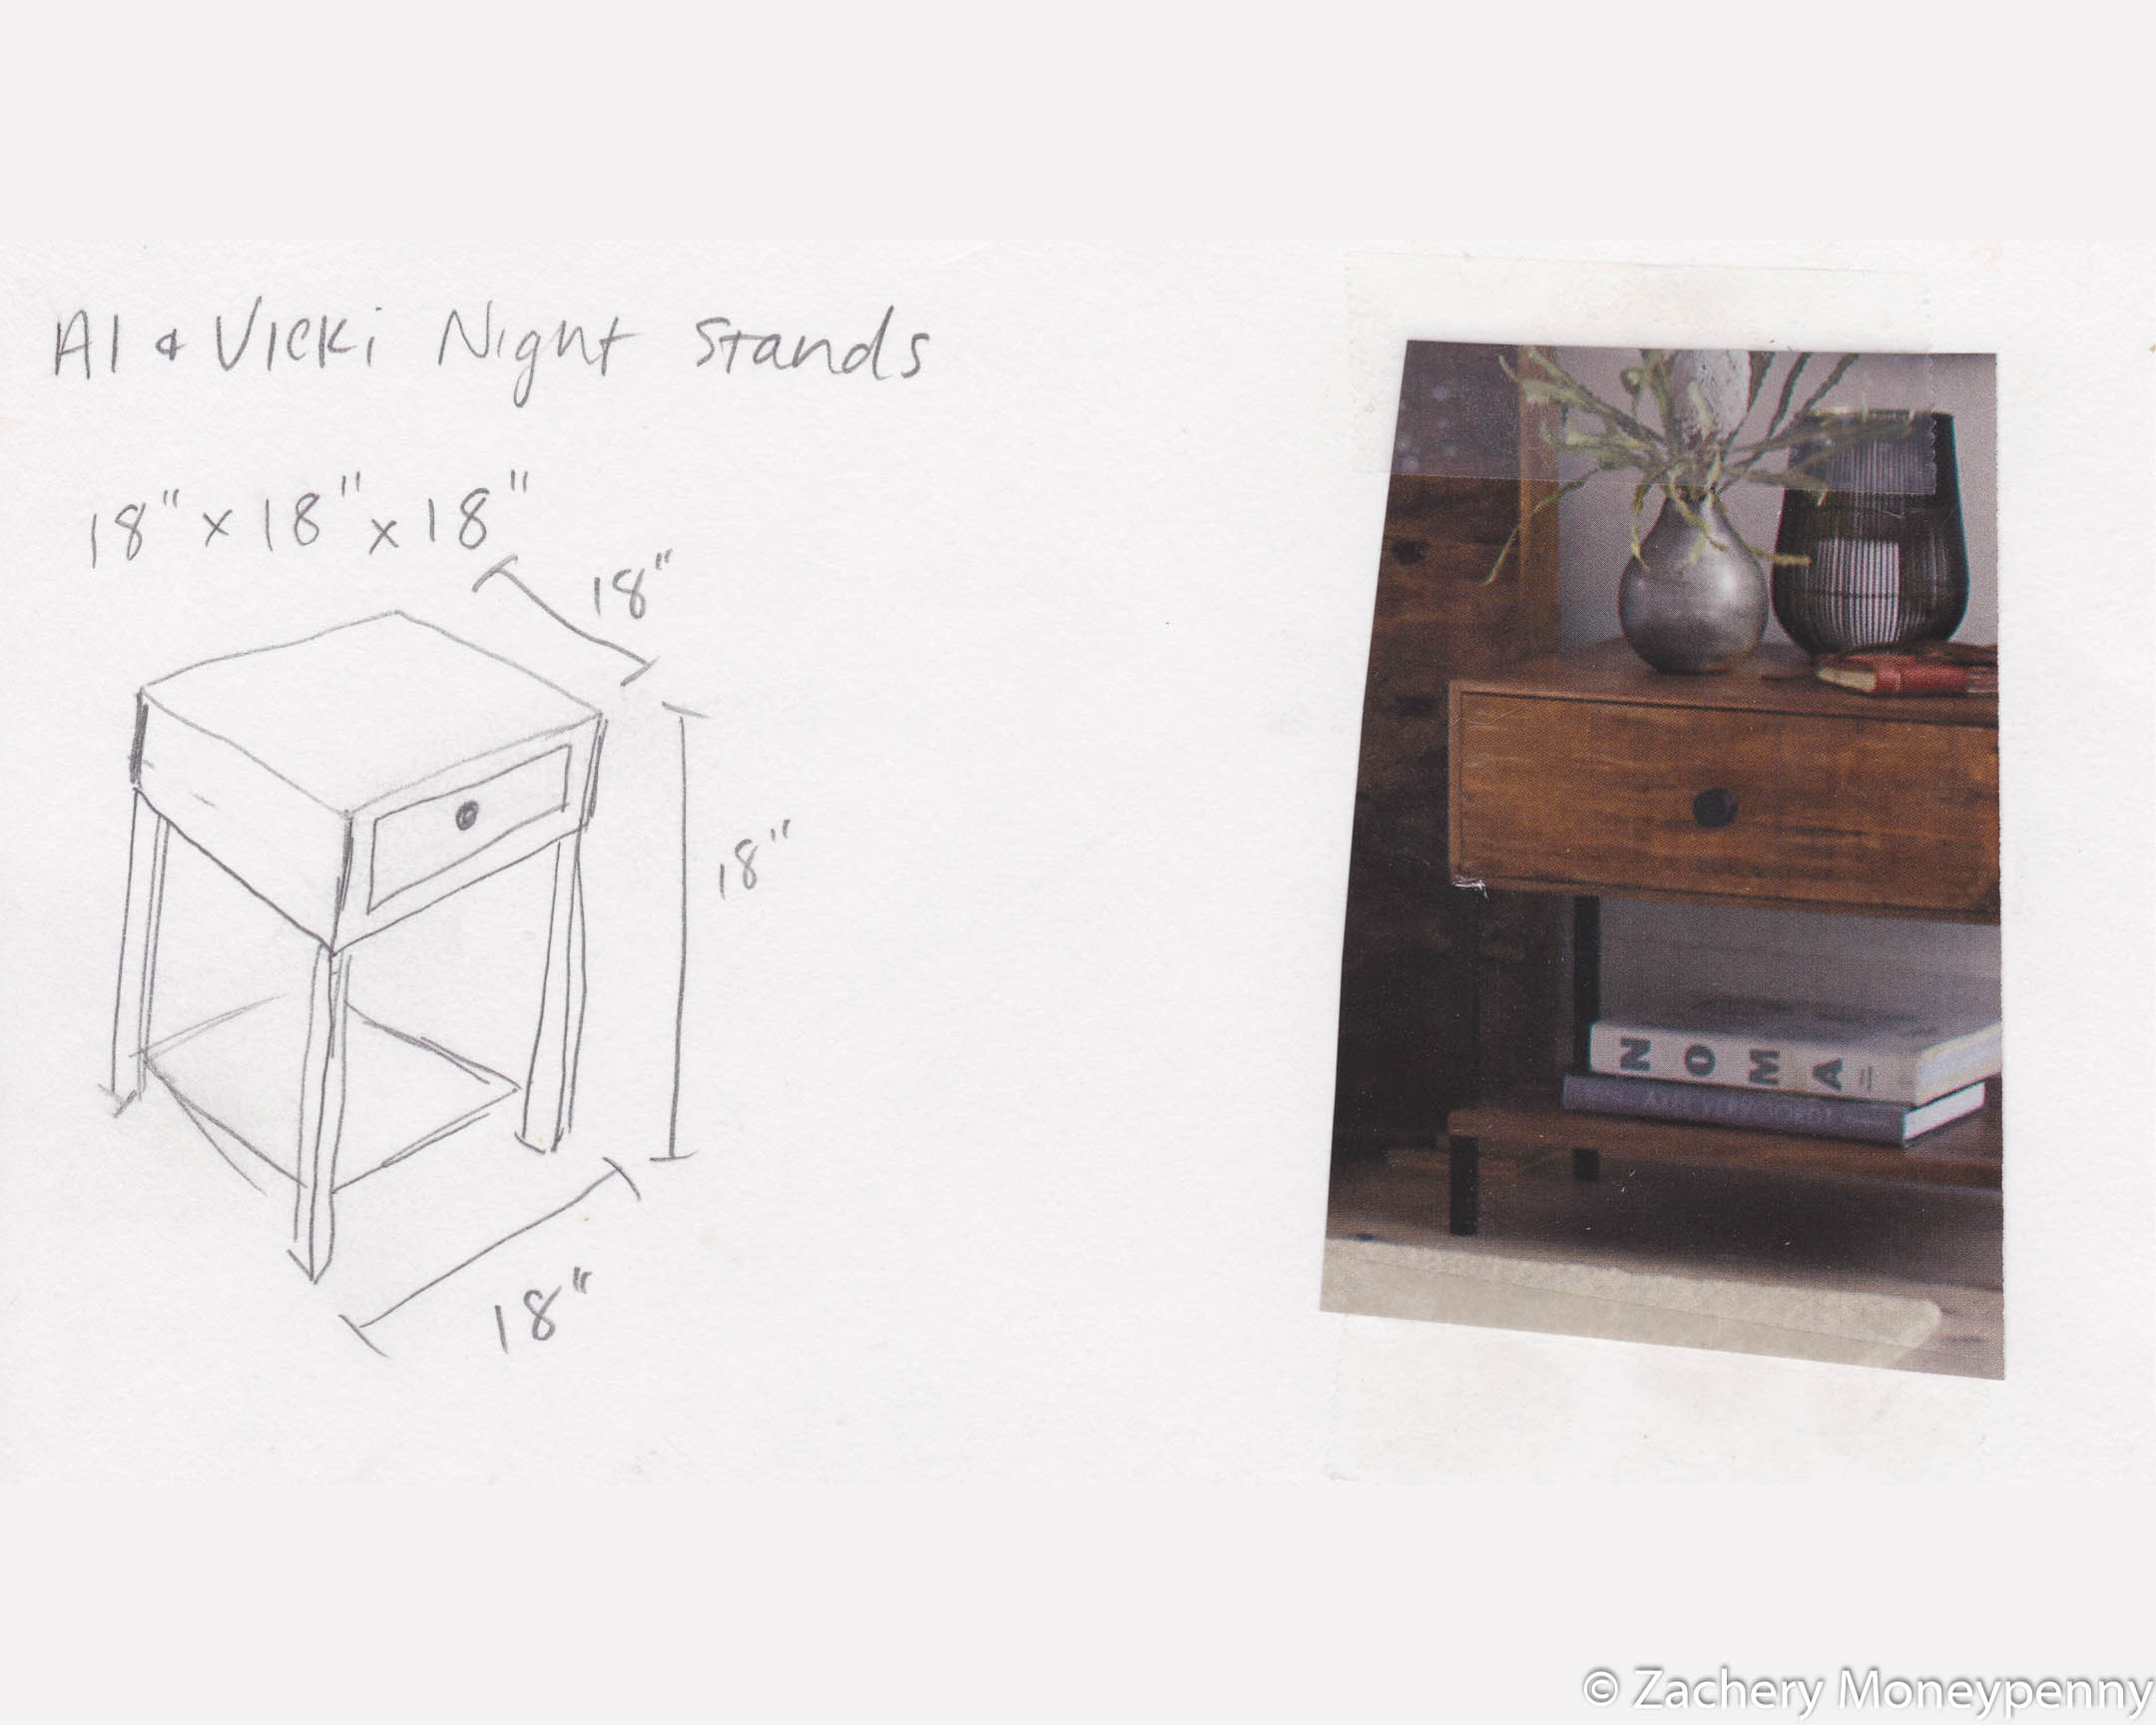
Let’s talk about the next project I’ll be working on! A set of nightstands
for my in-laws’ master bedroom.
Last fall my wife’s parents brought a stack of unused hardwood
tongue-in-groove flooring to my shop. They asked if I could use
it to make a set of nightstands for their master bedroom.
Design
They had a design in mind from a magazine, so I clipped it into my
sketchbook and then started thinking about the dimensions and general
approach I could take.
Design sketch and inspiration
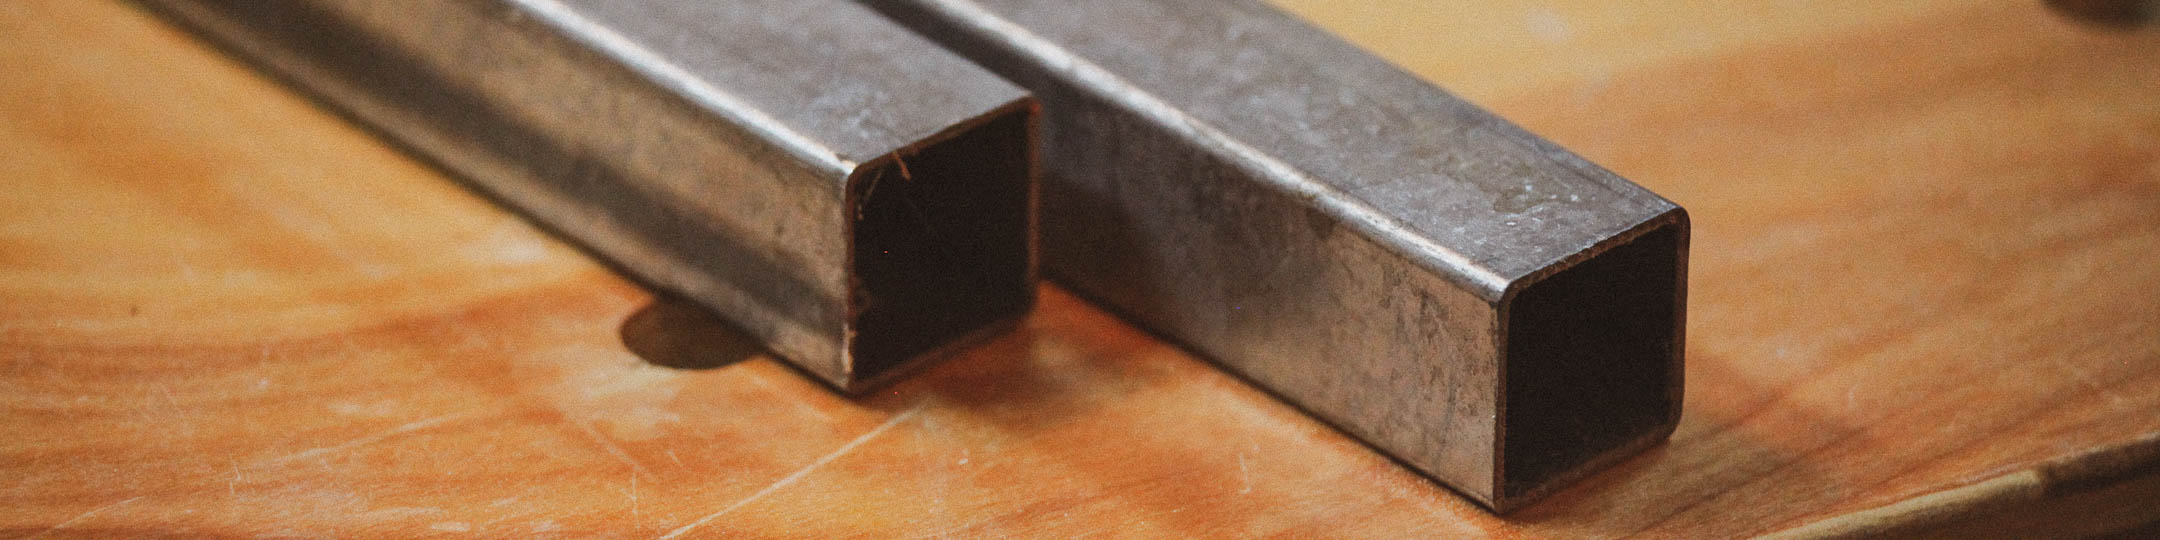
I thought it would be interesting, and a learning opportunity, to use square
metal tubing for the legs to more closely match the inspirational design.
Eventually I’d like to learn how to weld, but the way I’m thinking of this
design I likely won’t need to: my plan is to simply cut the four legs to
length and then attach them to the top box with L-brackets. I’m also planning
on attaching the lower shelf to the legs from beneath with L-brackets.
It’s not cler to me yet how I’m going to cut the tubing; I have an angle
grinder with a metal cutting disc, but I’d rather do it with a chop saw in
order to keep everything nice and straight so I don’t have to try to grind it
to a flush meeting with the bottom of the drawer box.
Wood
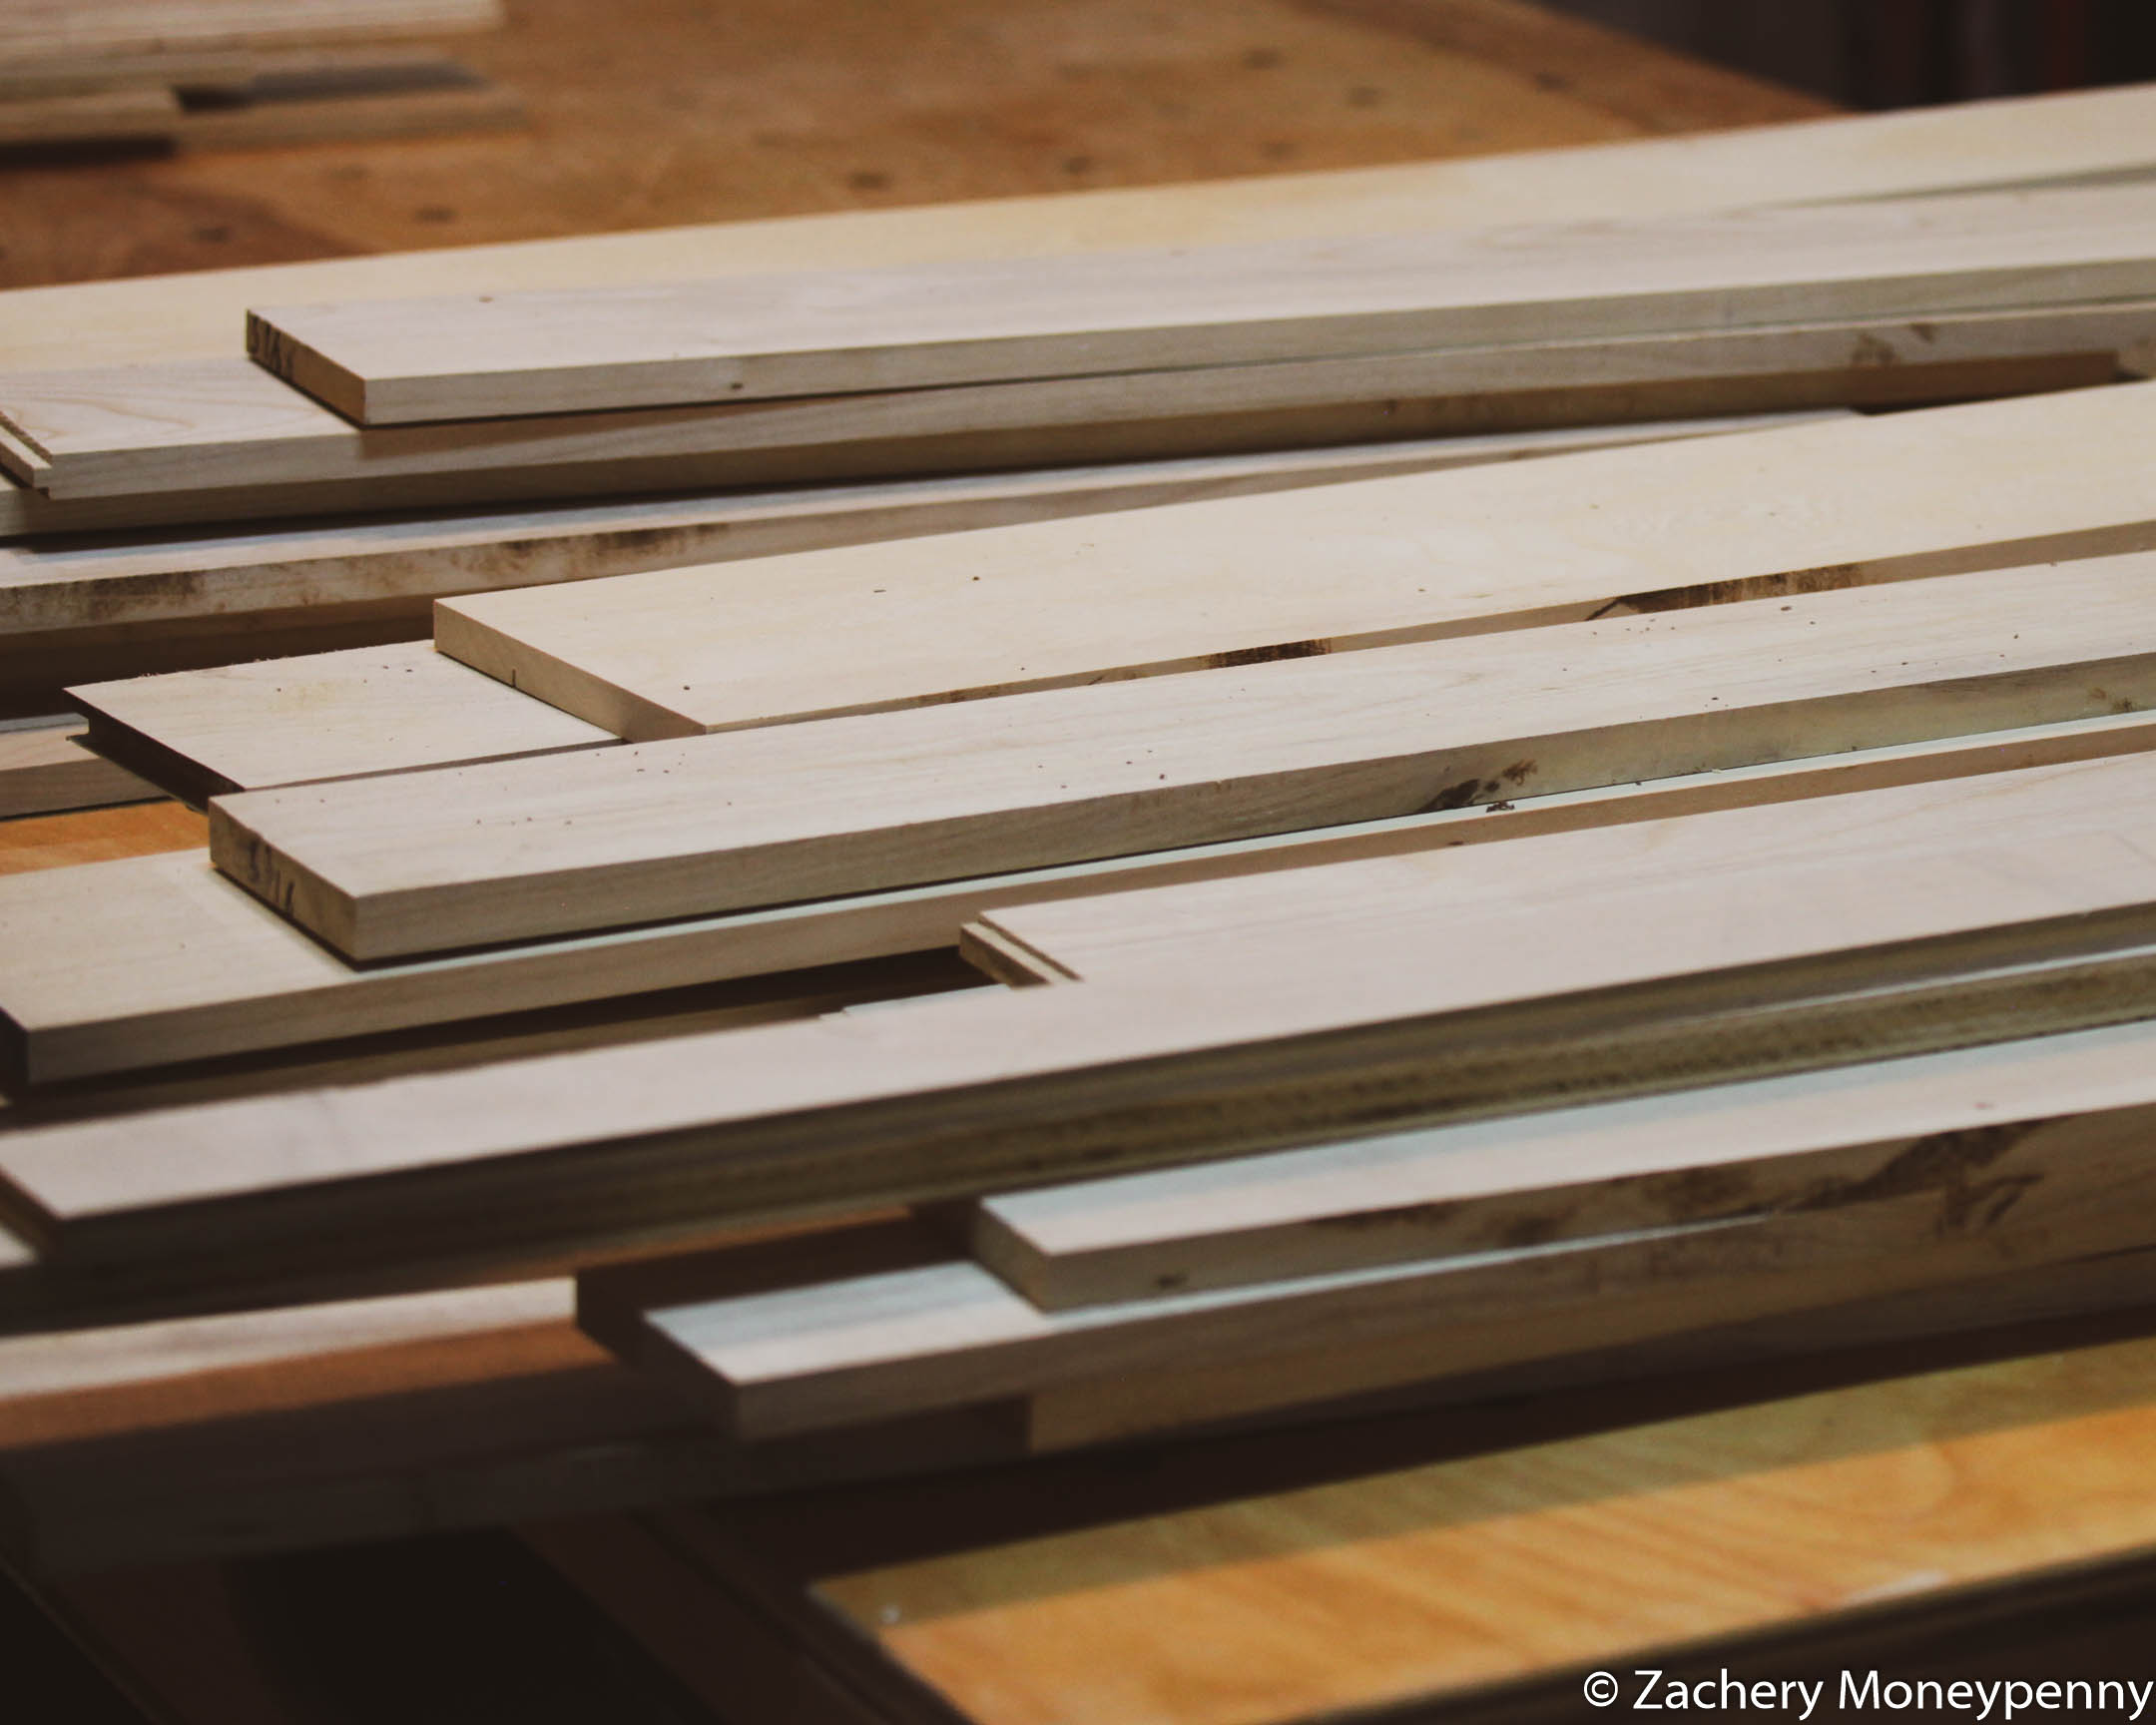
My in-laws re-did the flooring in their house some time ago and had a lot of
extra tongue-in-groove wood after the first floor was finished. My
father-in-law used some of it to build a headboard for their bed, which is
why they’d like me to use the same wood to make the nightstands.
I honestly, truly do not know what kind of wood this is.
I started prepping it by cutting off the tongues and grooves and then running
it through my jointer and planer enough to get the varnish off the top. What
I found was that I appeared to actually have two different types of wood? Or
at least wood from two very different parts of the tree. One was a grayish
light brown while one was a yellowish color. I asked about this and my
father-in-law was suprised as he thought it was all one type.
Rough-milled wood, stacked for inspection
I was asked not to finish the pieces once they were done- my father-in-law
will take care of that part. But that means that I need to cobble both colors
of wood together into some frankenpieces, assuming he’ll stain them to the
same color or try to create two different colored nightstands.
The plan is to use this hardwood for the drawer box, lower shelf and drawer
front of each nightstand. The drawer itself will be baltic birch, likely
assembled with pocket screws.
Next Steps
This project has been on the back burner since before the holidays; the
changing table took precedence recently.
I’ve noticed that some of the milled wood has started to bow, which makes it very hard to start gluing up panels.
My plan is to go through and find the pieces that stayed straight after
milling and see if I have enough to glue up the six panels I need (top
and bottom of each drawer, plus lower shelf).
If I don’t have enough wood then I’ll need to go back to the source: my father-in-law’s basement.😄