In order to improve the storage and functional options in my home gym, as a lifter, I want better cable storage and a plyo box.
Since I’ve gotten back into weightlifting I’ve spent a lot of time in the unfinished part of my basement. Spending five hours a week in a room with concrete floors and no walls makes me start to do Fantasy Interior Design in between sets.
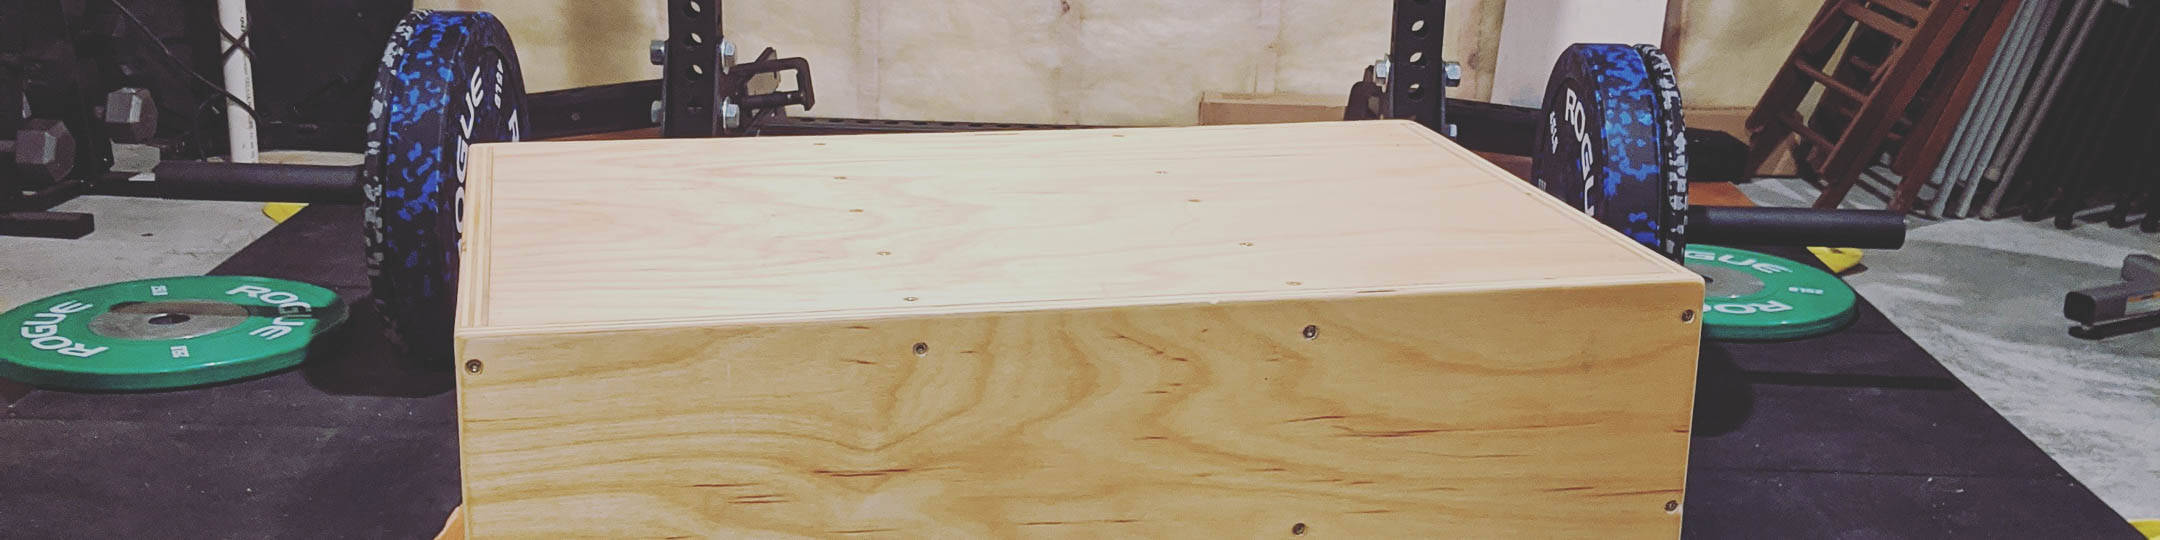
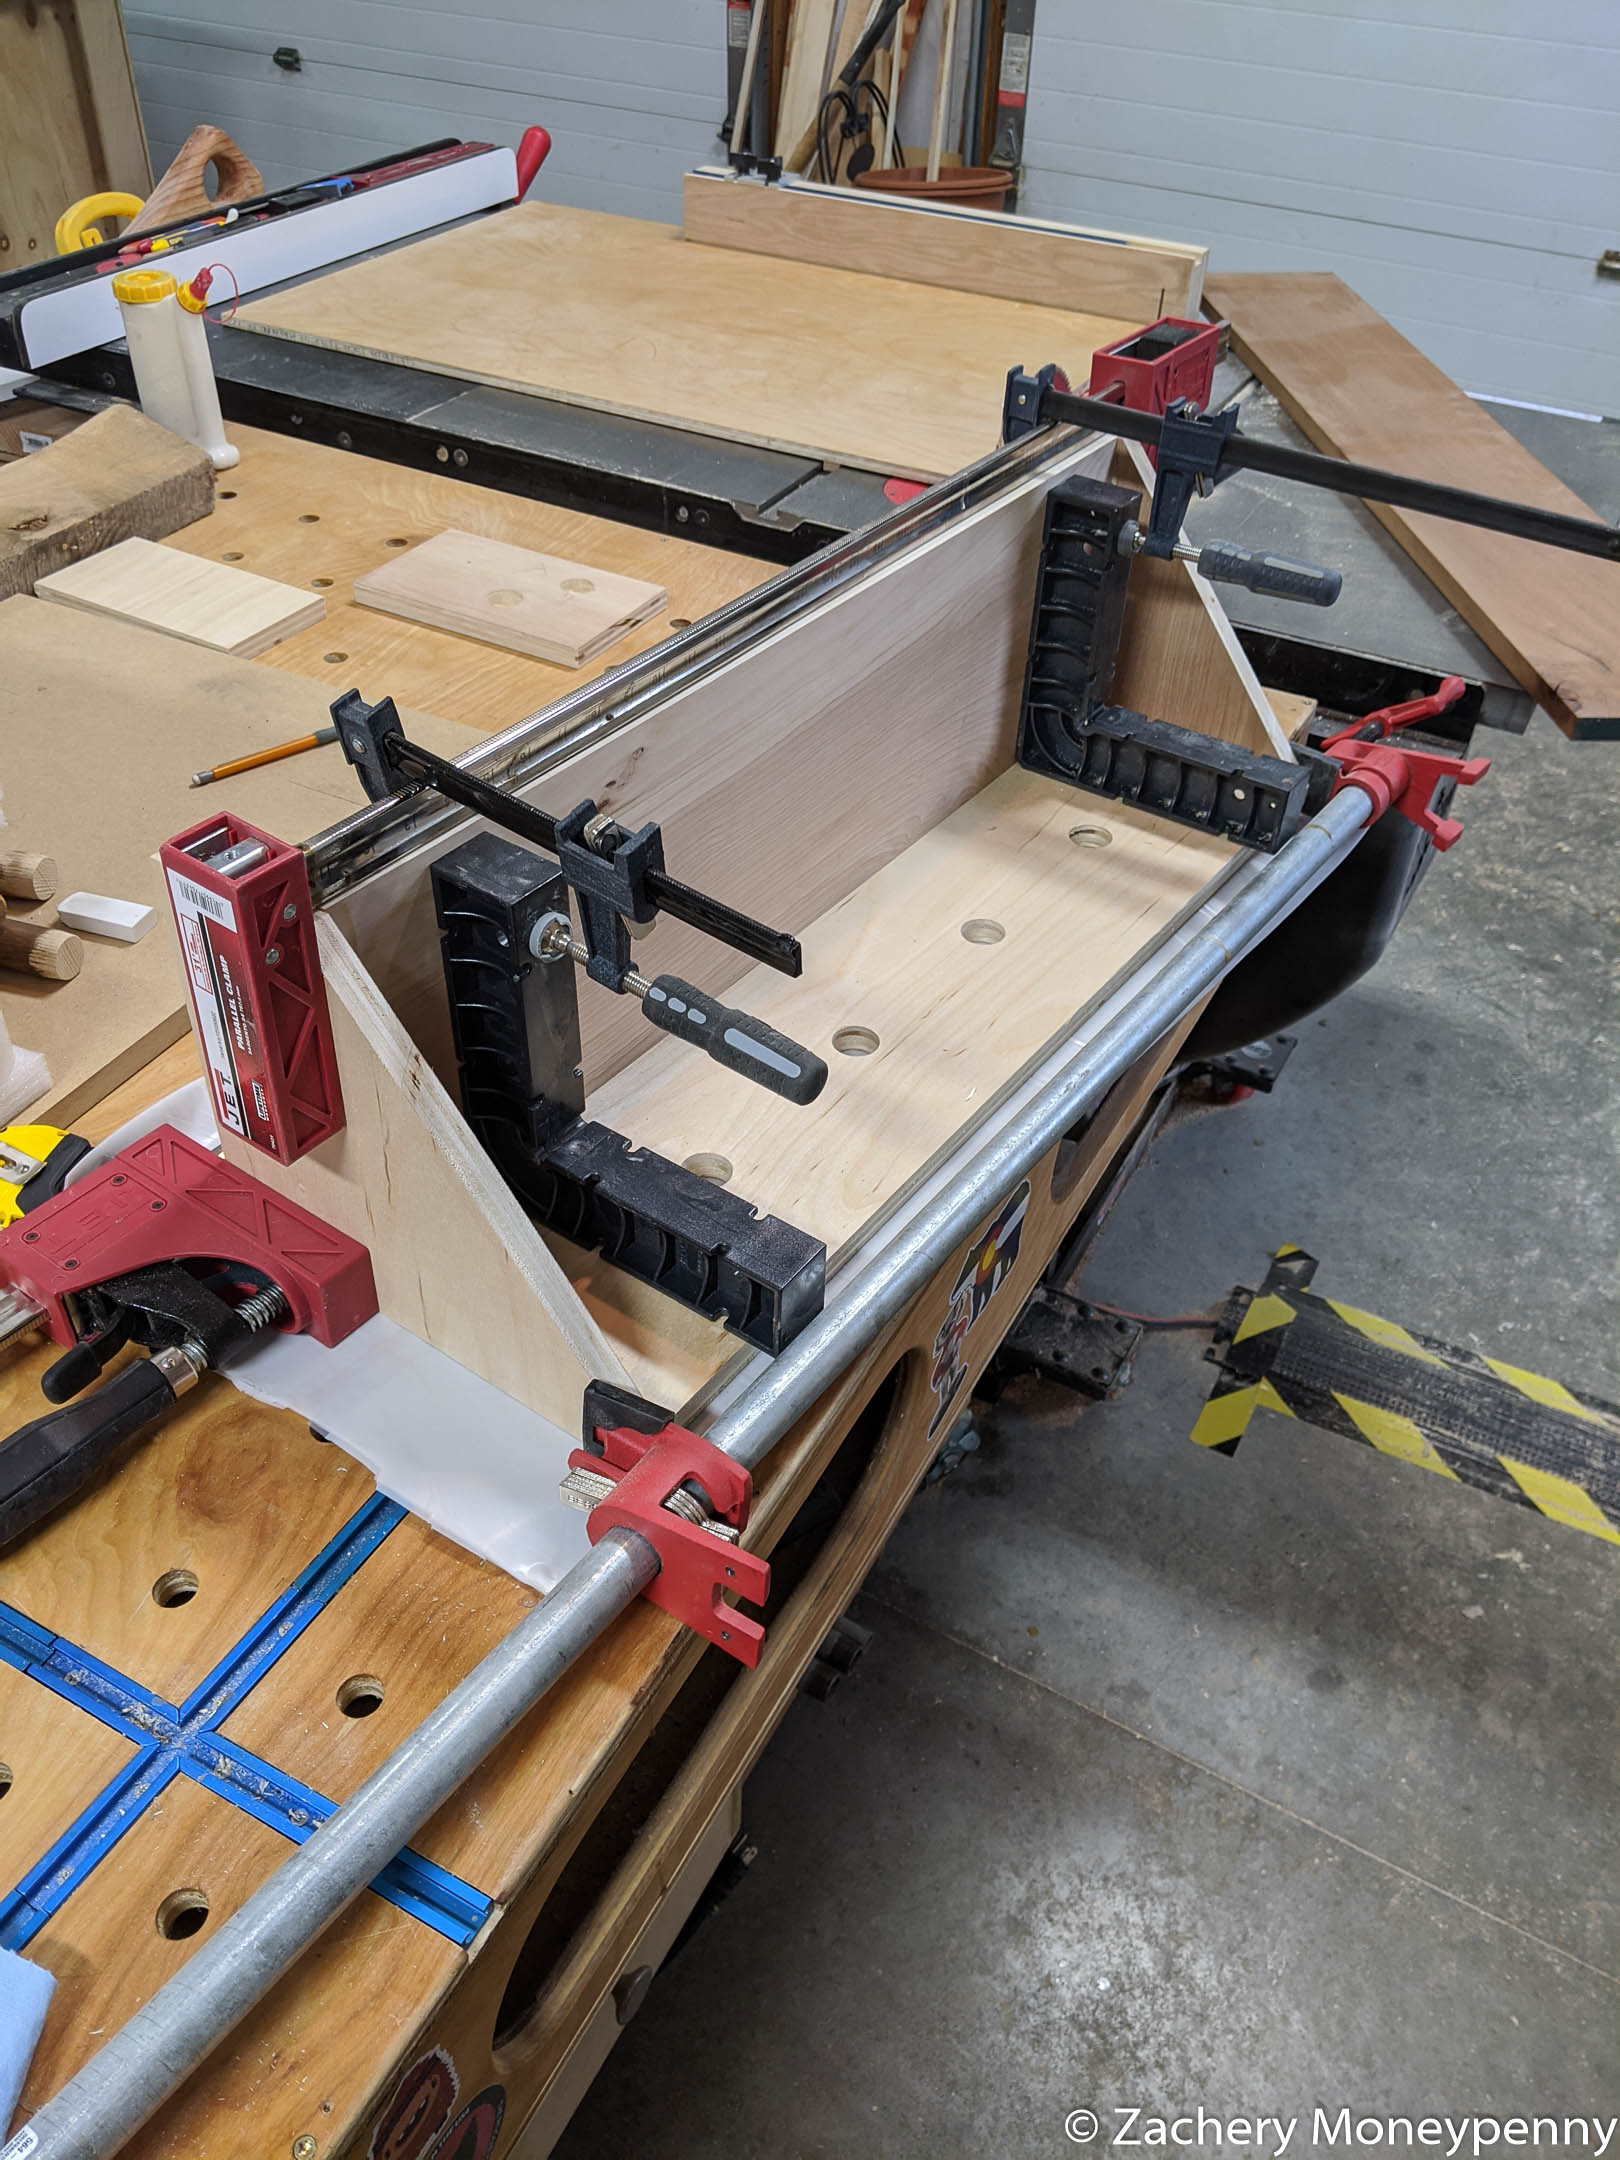
In between jobs I did a week-long project to build a new set of cabinets out in my shop, and I ended up with one full 4’ x 8’ sheet of ¾” birch plywood left over. I’d been wanting a plyo box for workouts for awhile, mainly for box squats and step-ups. Rogue sells a CNC-cut one for $135 plus shipping (!) but I wasn’t about to buy when I could build.
There are a variety of build videos on youtube for making plyo boxes; I liked the one below specifically because of the effective cut-list diagram at 13s into the video; it helped for easy breaking down of the plywood sheet.
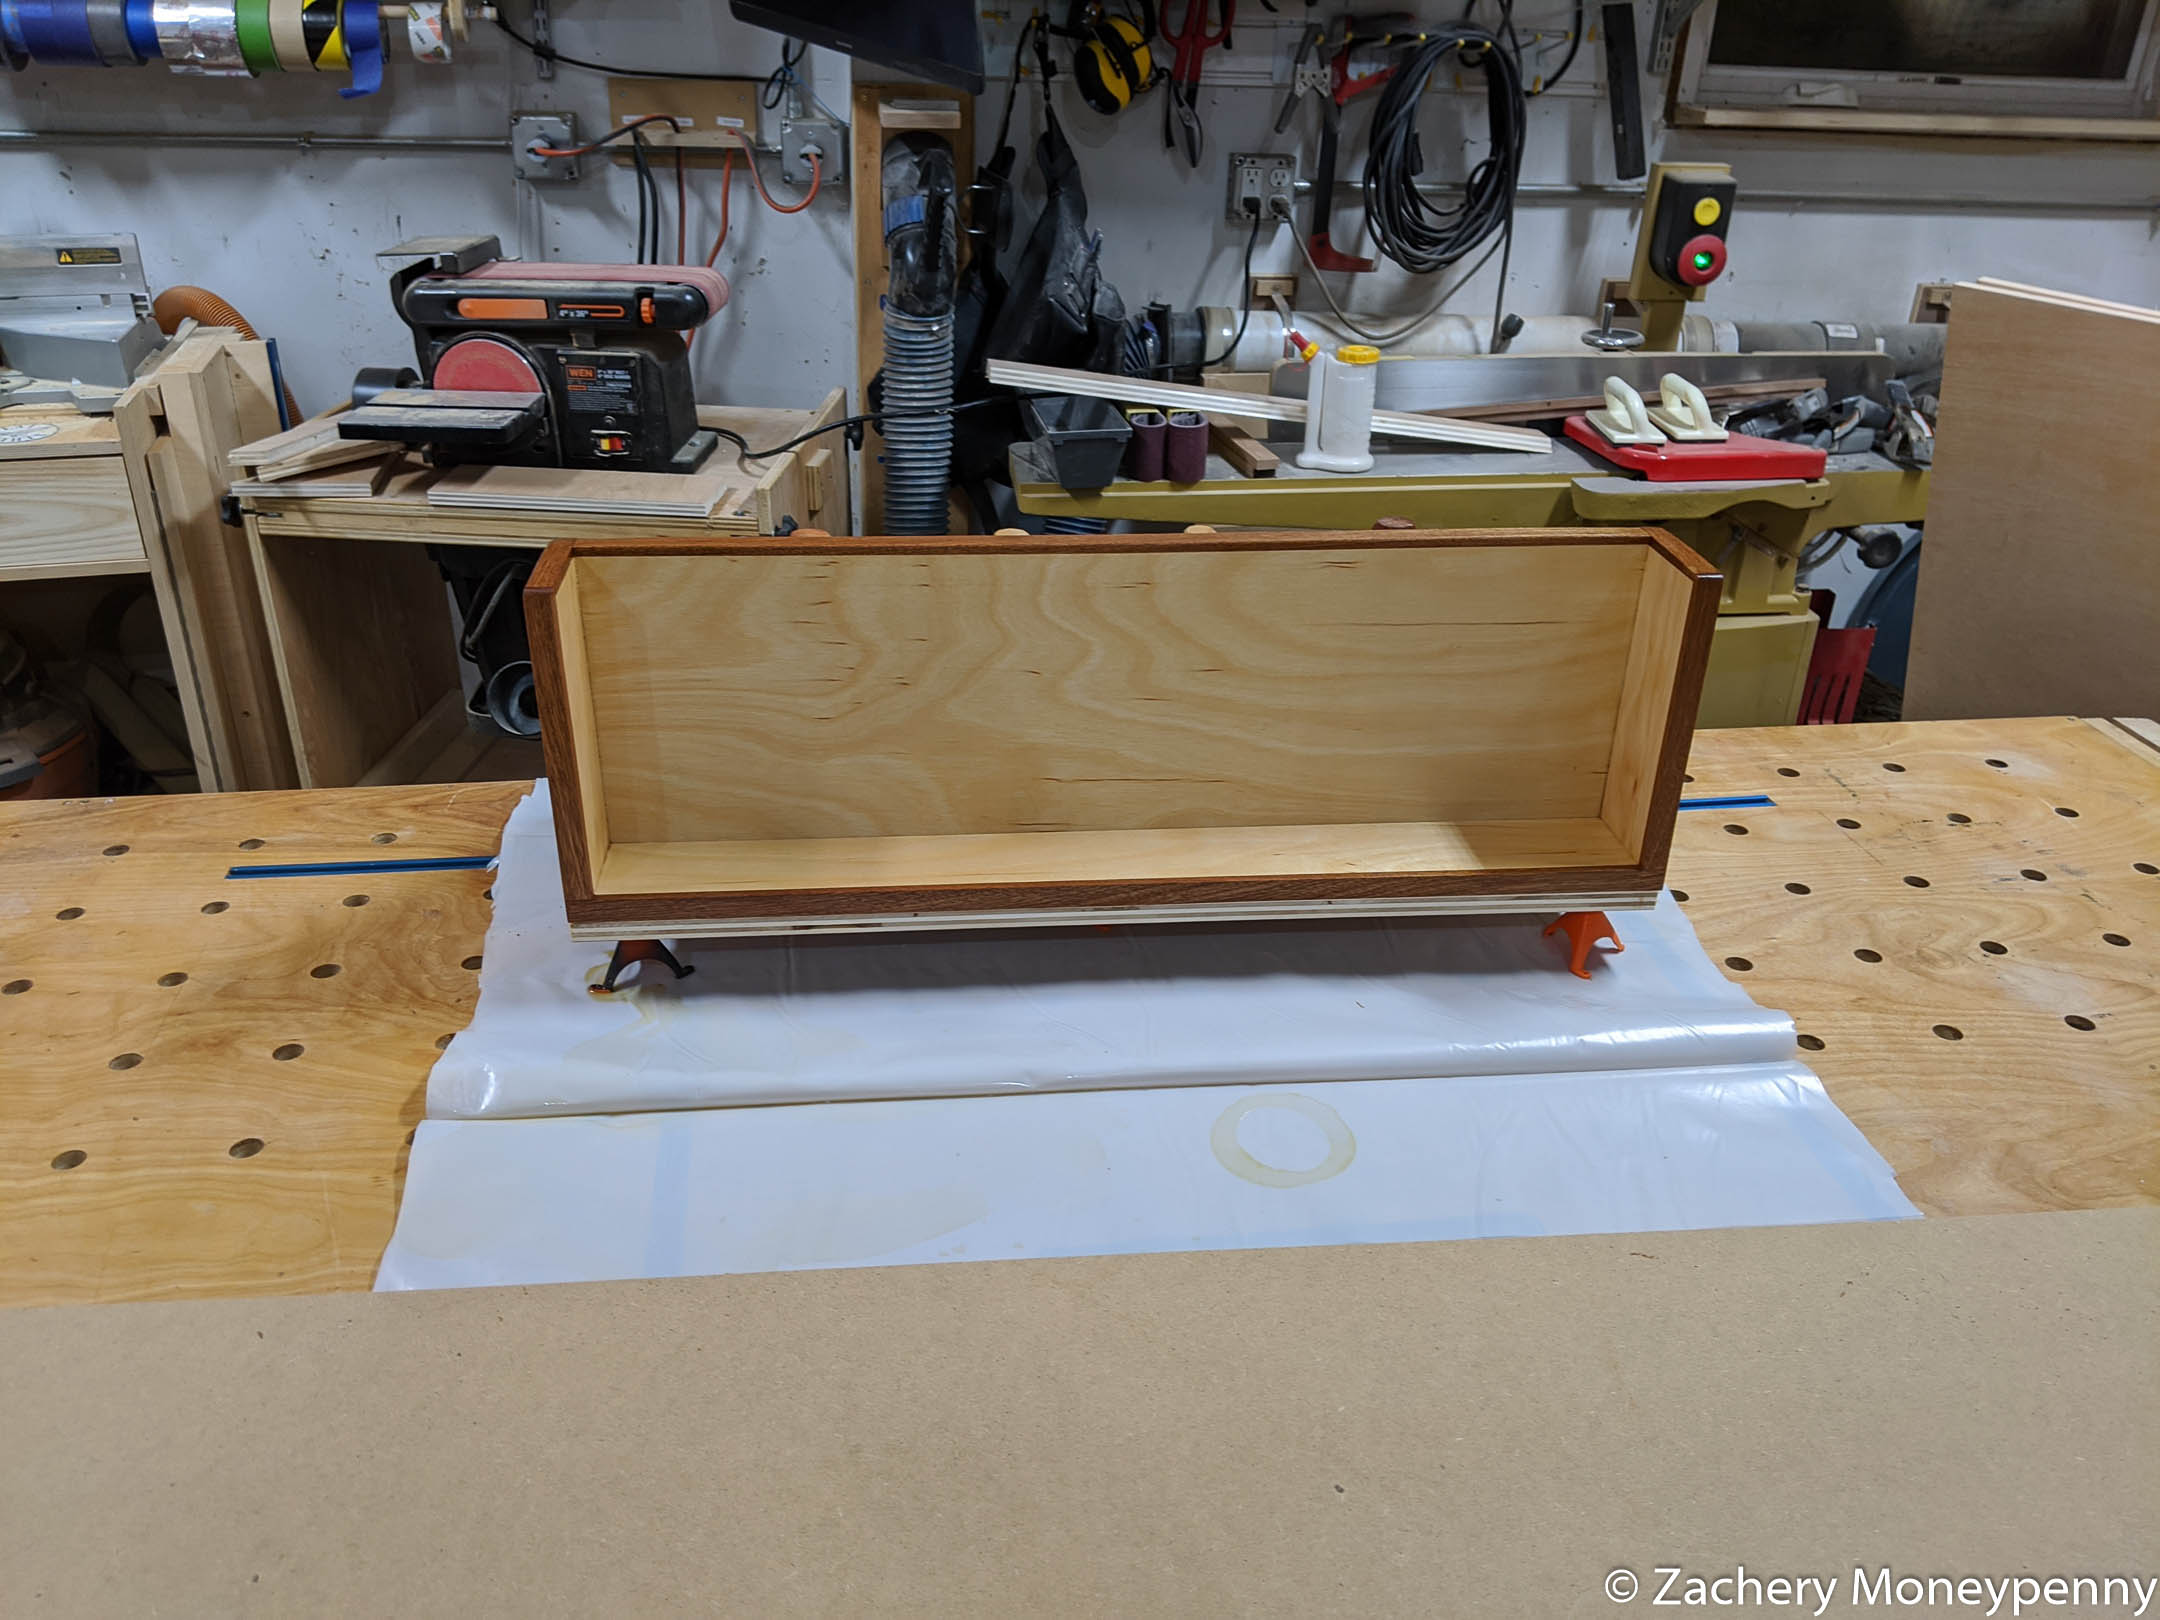
It went together easily, though when I tried to add a whazz stencil I didn’t apply the stencils correctly and got quite a bit of paint bleed. The stencil pieces are just paper, and I didn’t think to mask with blue painter’s tape first and then tape stencil over and cut out the tape to match the stencil. I’d do that next time to get a much better effect.
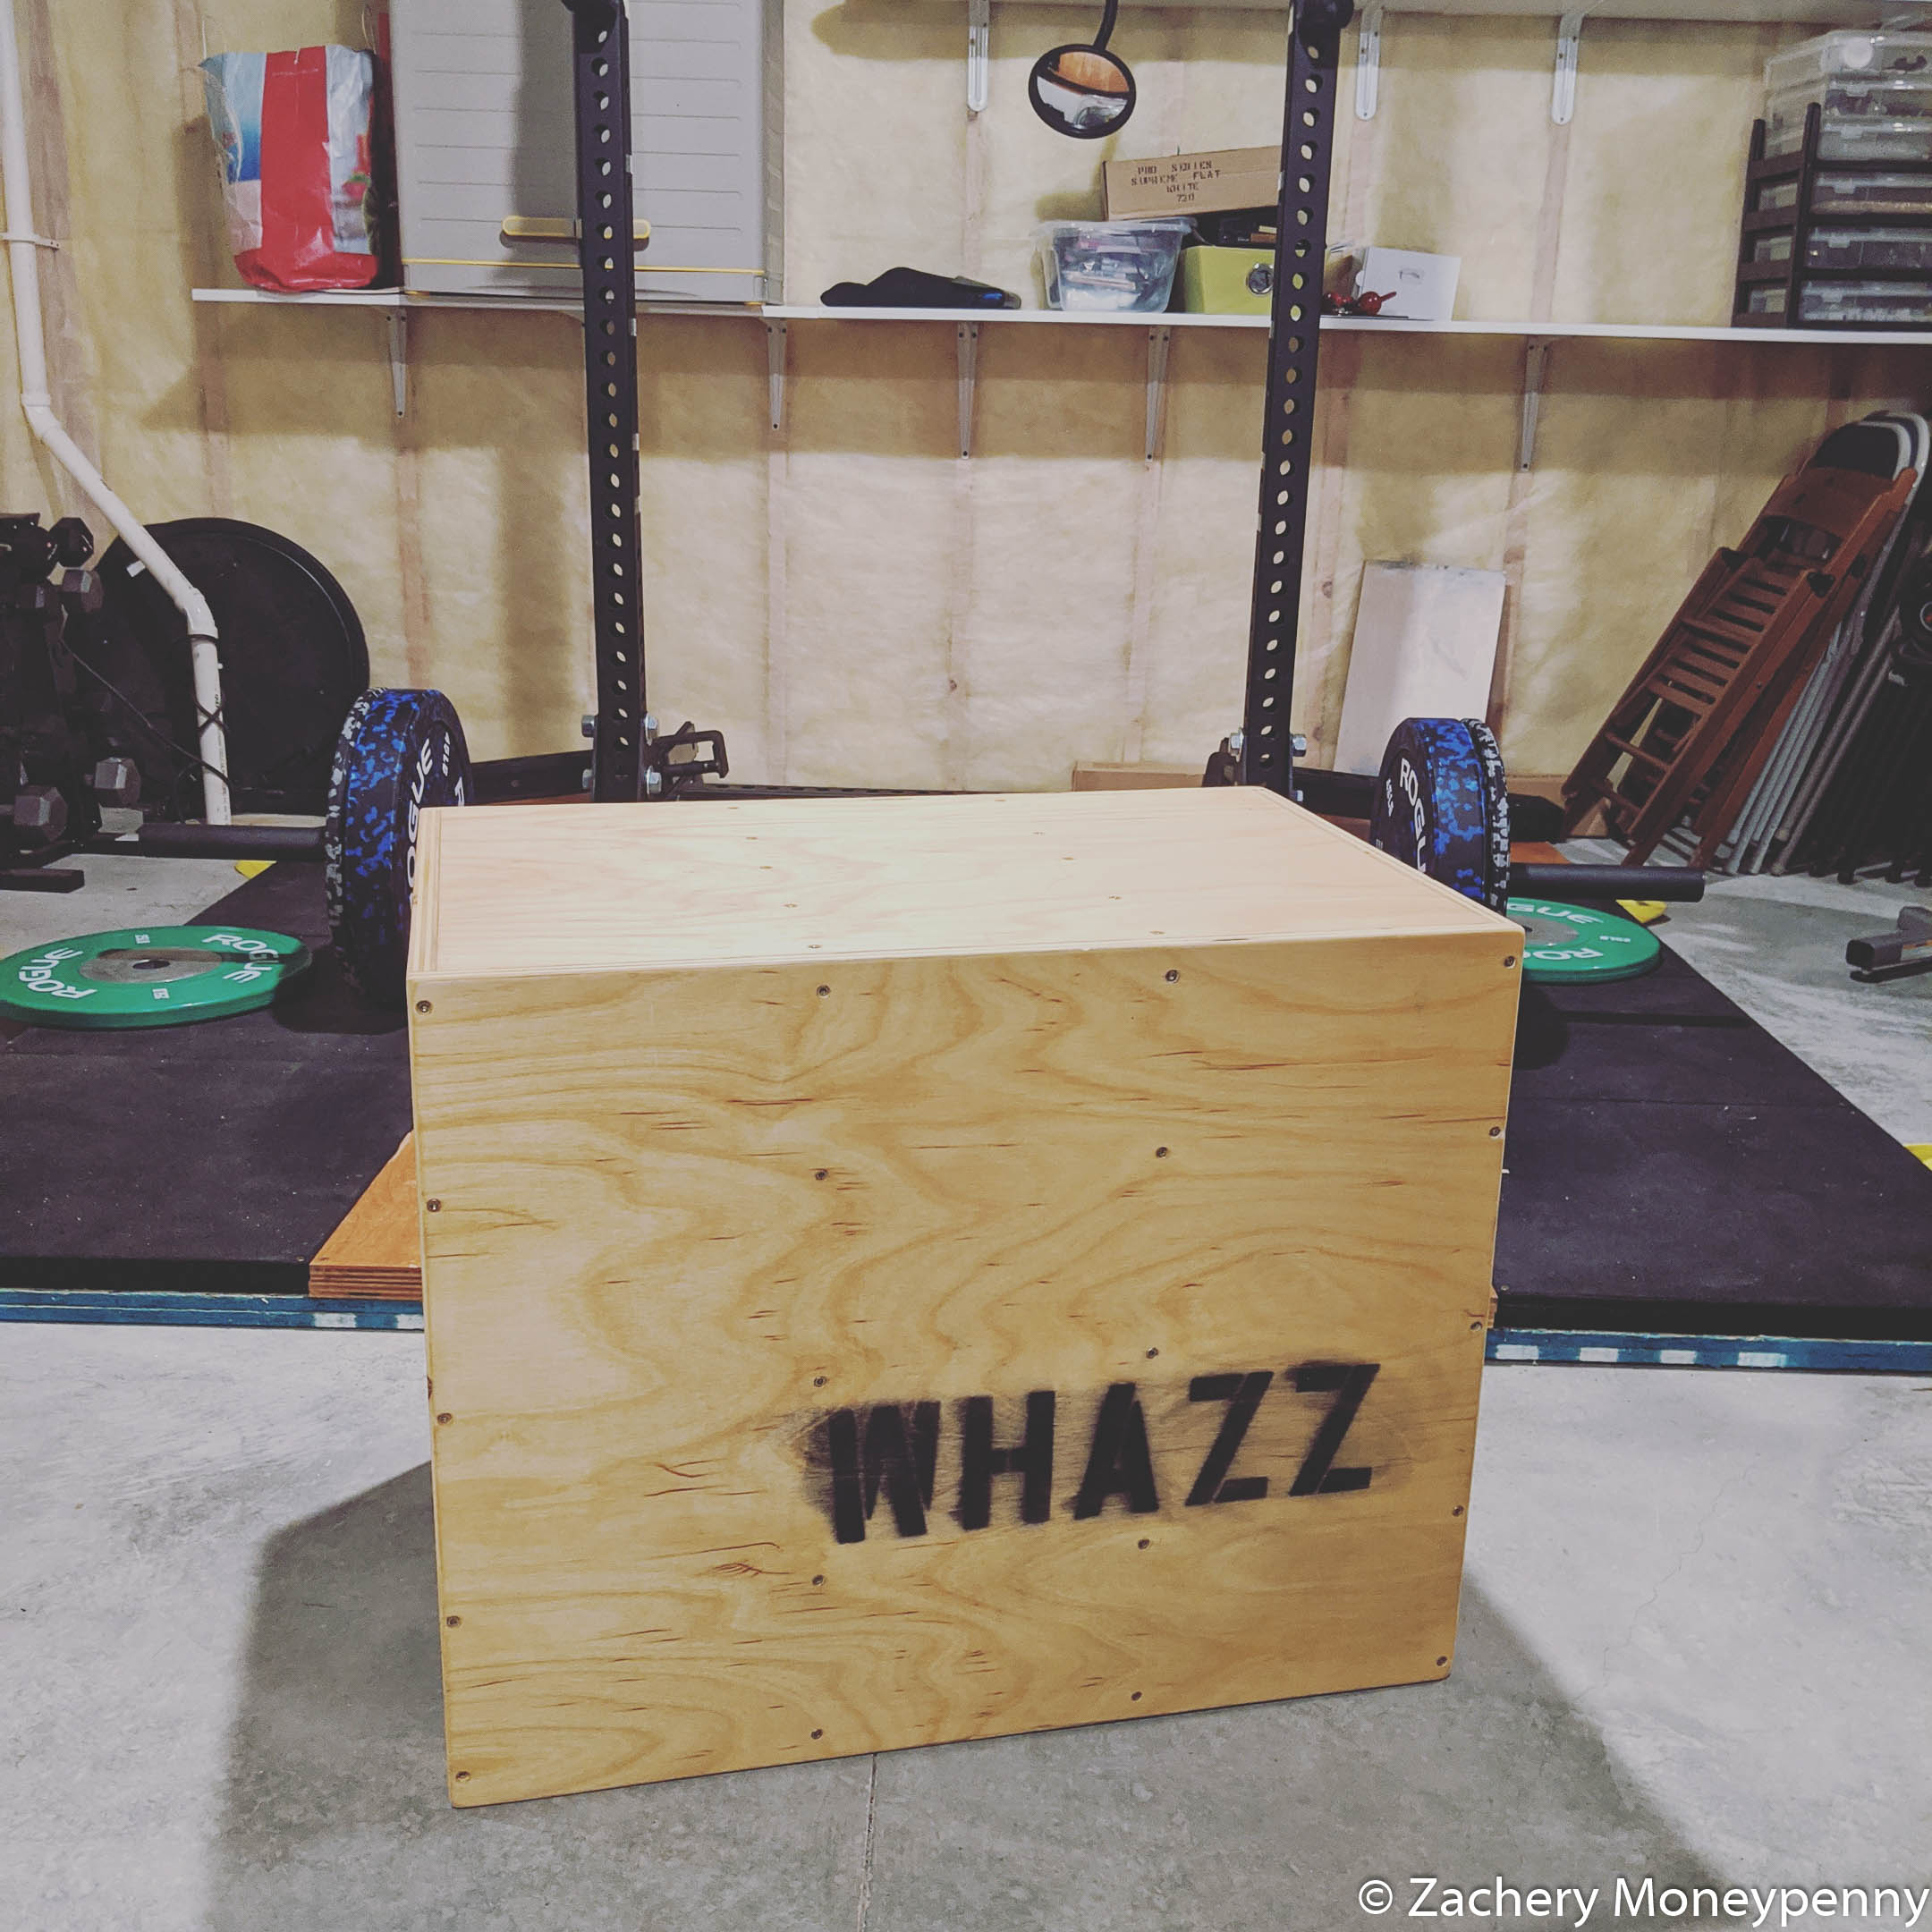
Once the stencil dried I added two coats of Watco Exterior Finish, both because it was on-hand and because I expected it would get some rougher treatment. I’m going to wait until it’s seen a bit of use and then decide whether to add a few coats of polyurethane.
Once that was done, I still had some plywood scrap leftover, and a problem to solve.
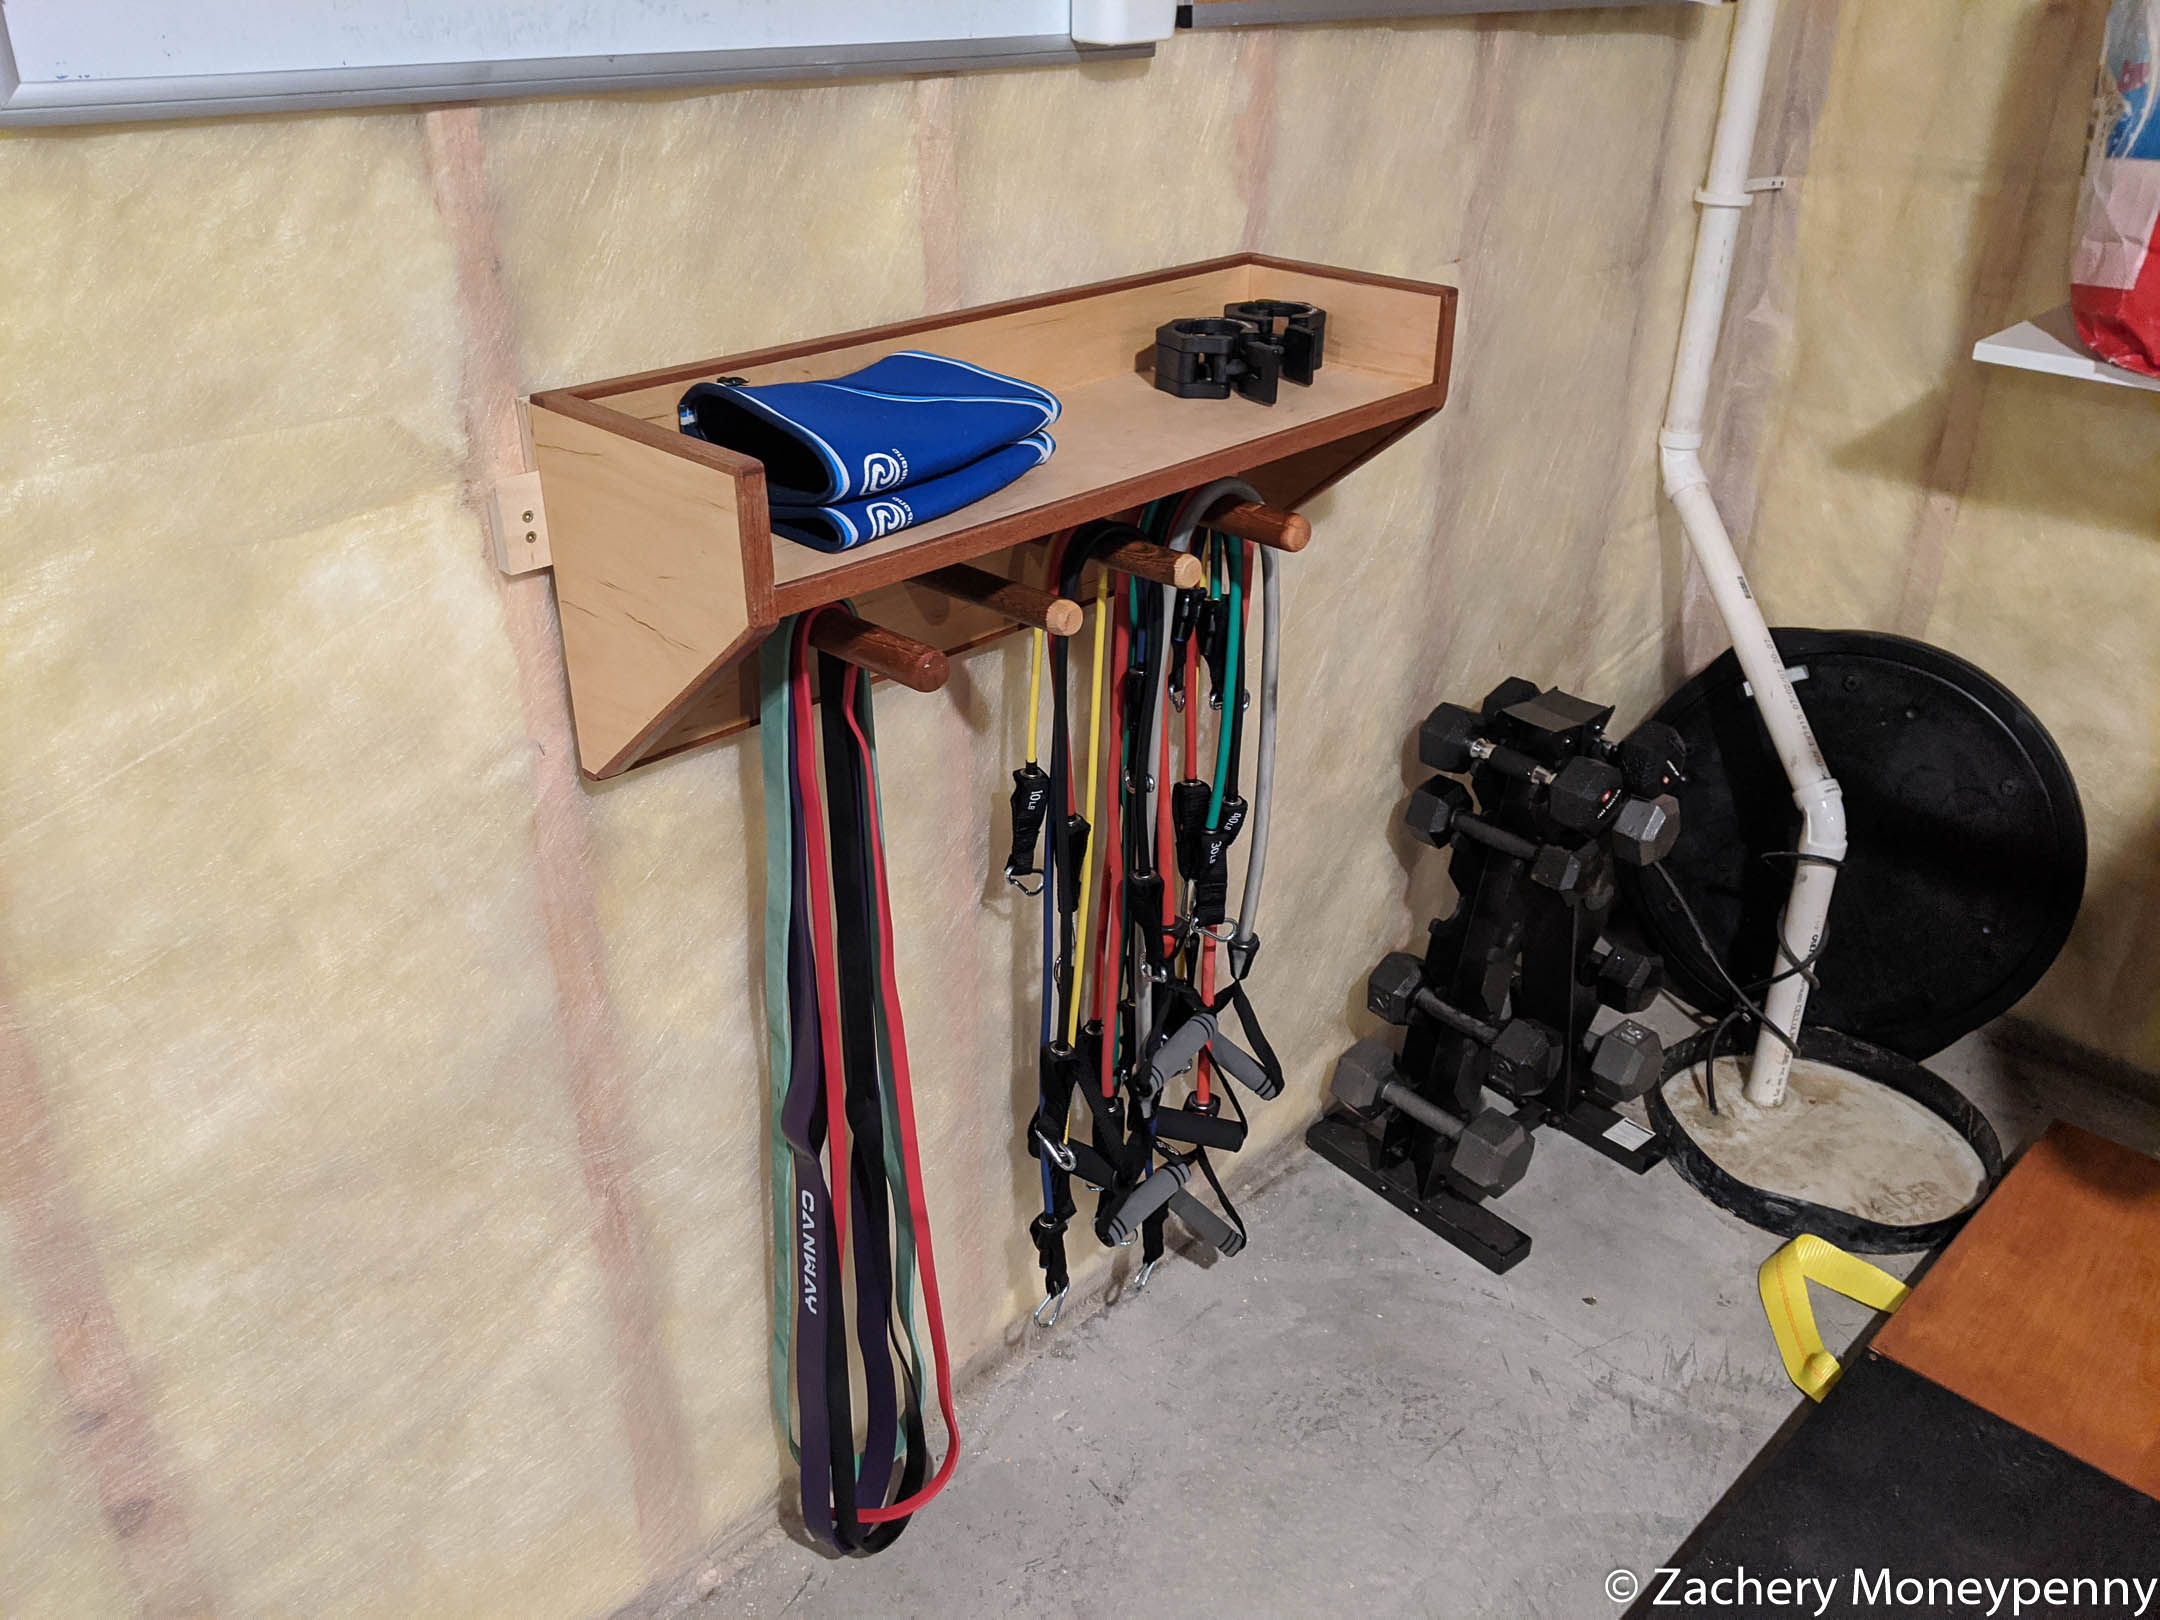
I have a variety of bands that my wife and I use for different exercises, and as I’ve accumulated them I just throw them over the multi-purpose storage rack. Now, however, there are a ton of bands draped over the thing and they’re getting in the way.
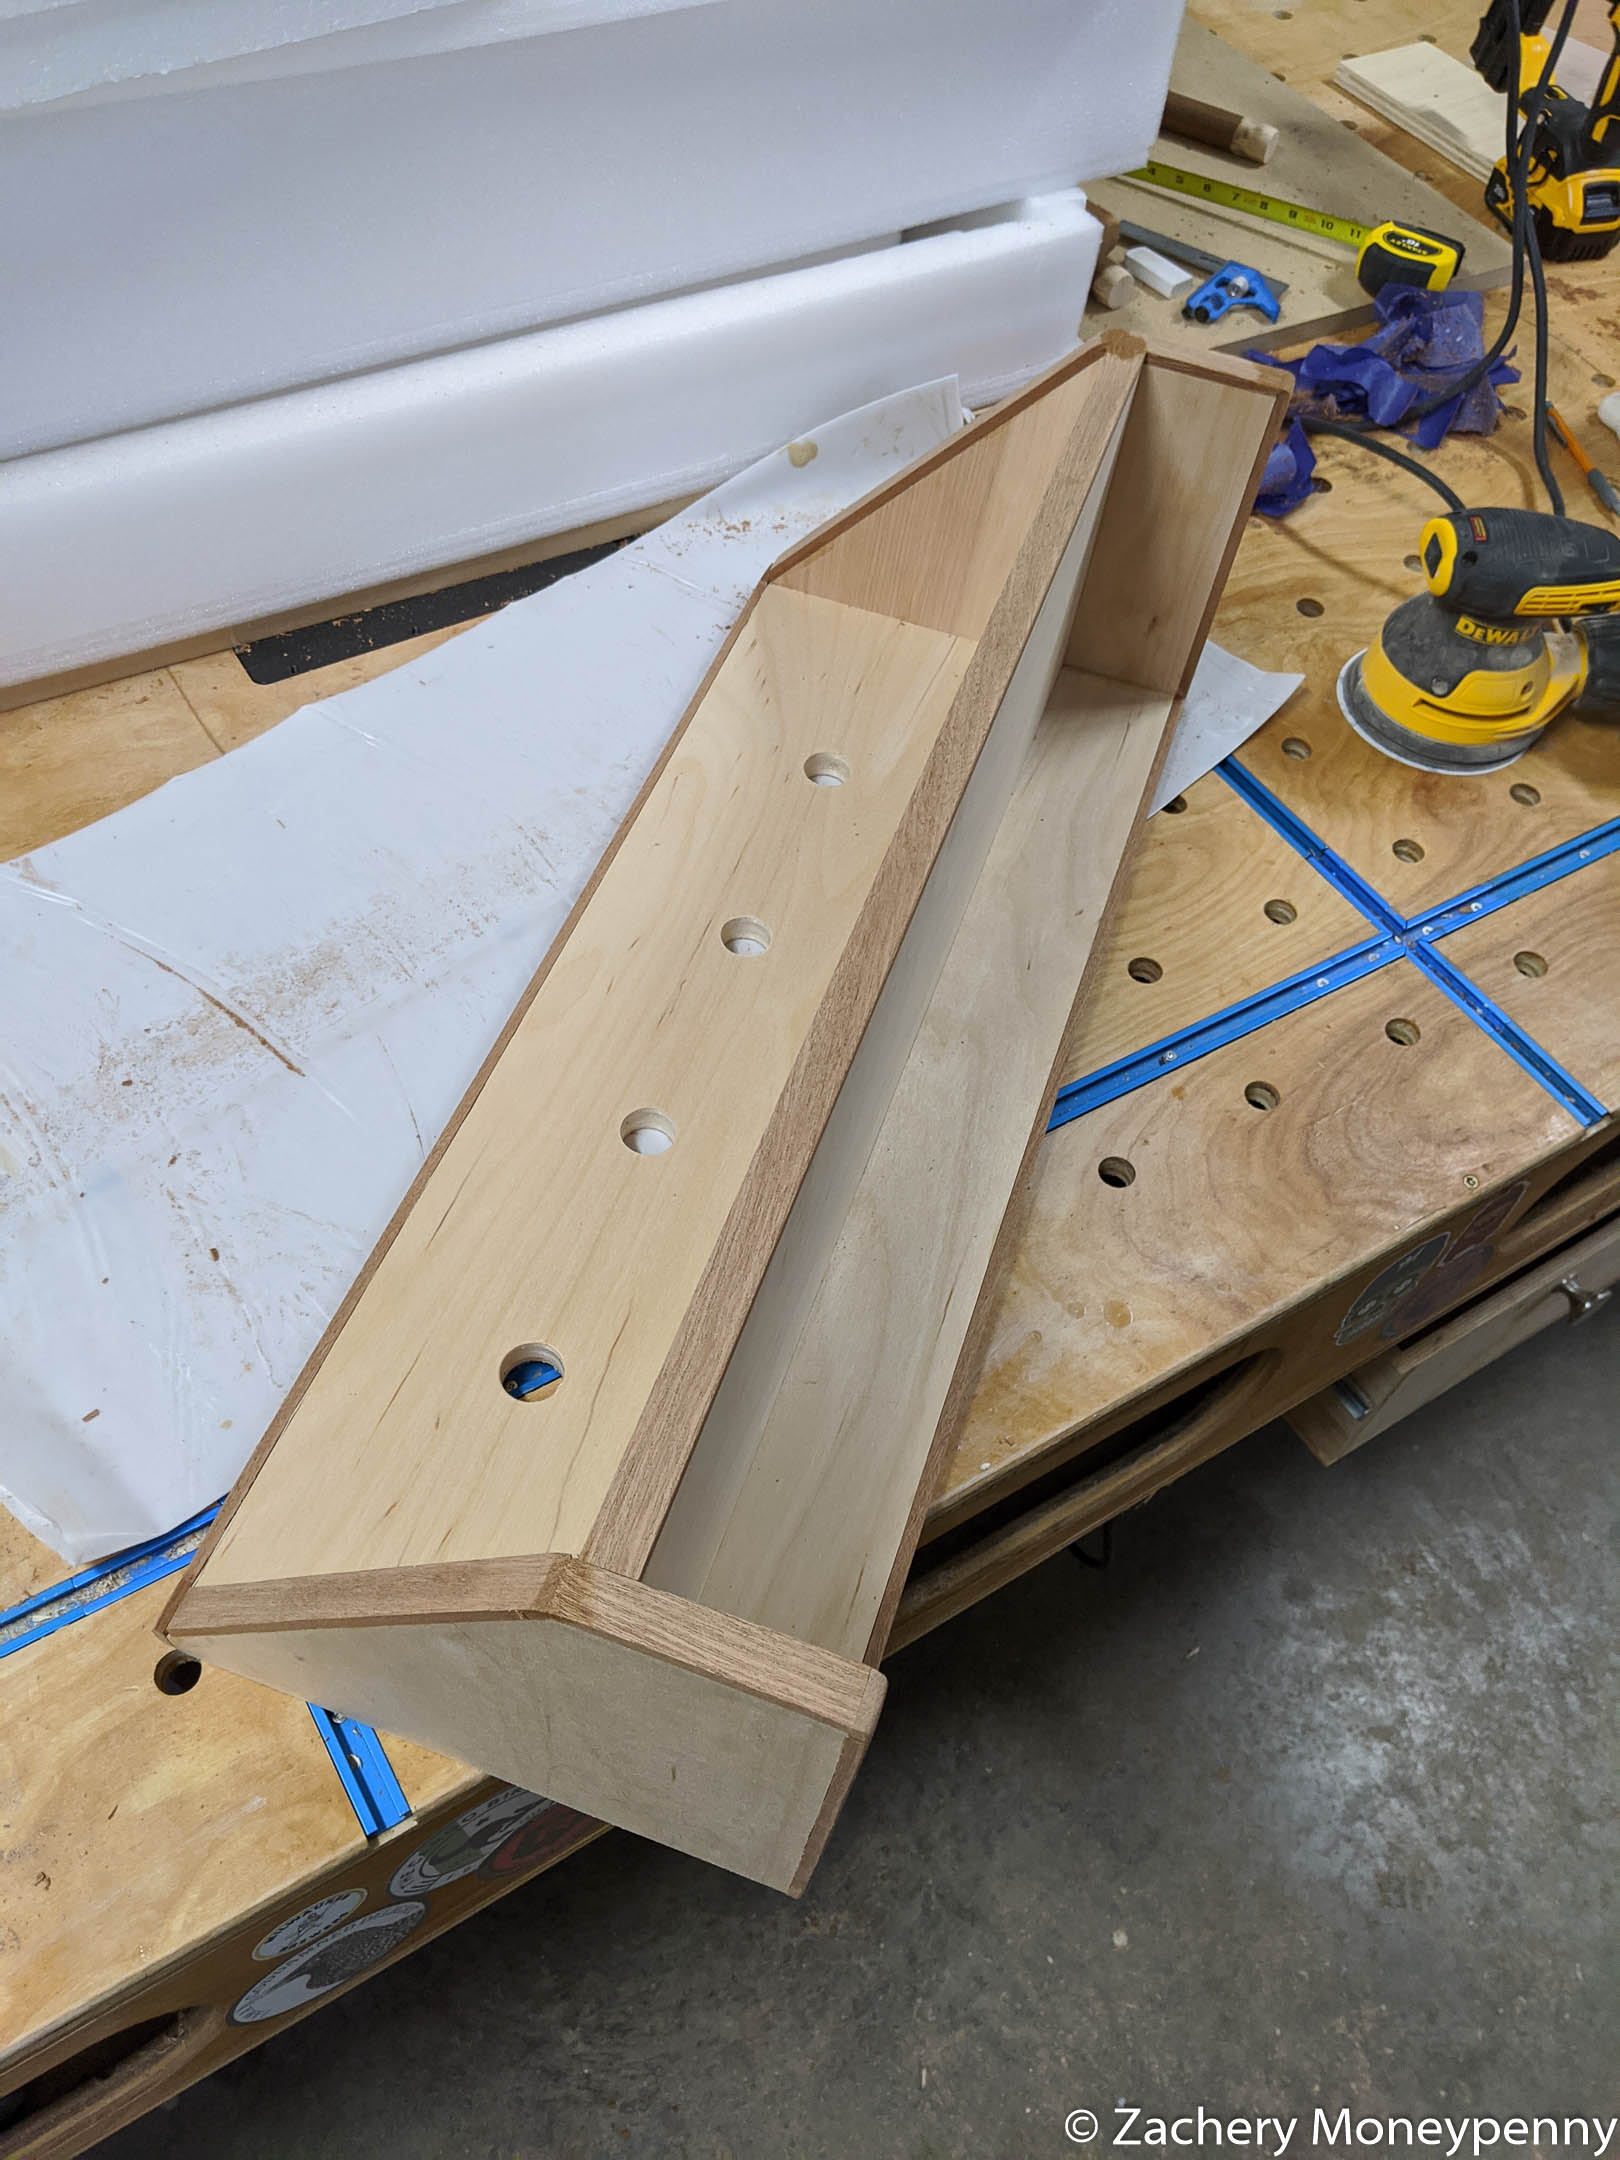
I sketched out a simple wall rack to hold them, and thought it would be nice if I could get a small shelf on there also, to hold notebooks, drink cups, bar collars, and markers for the dry erase board. Basically a little work center for in-between sets.
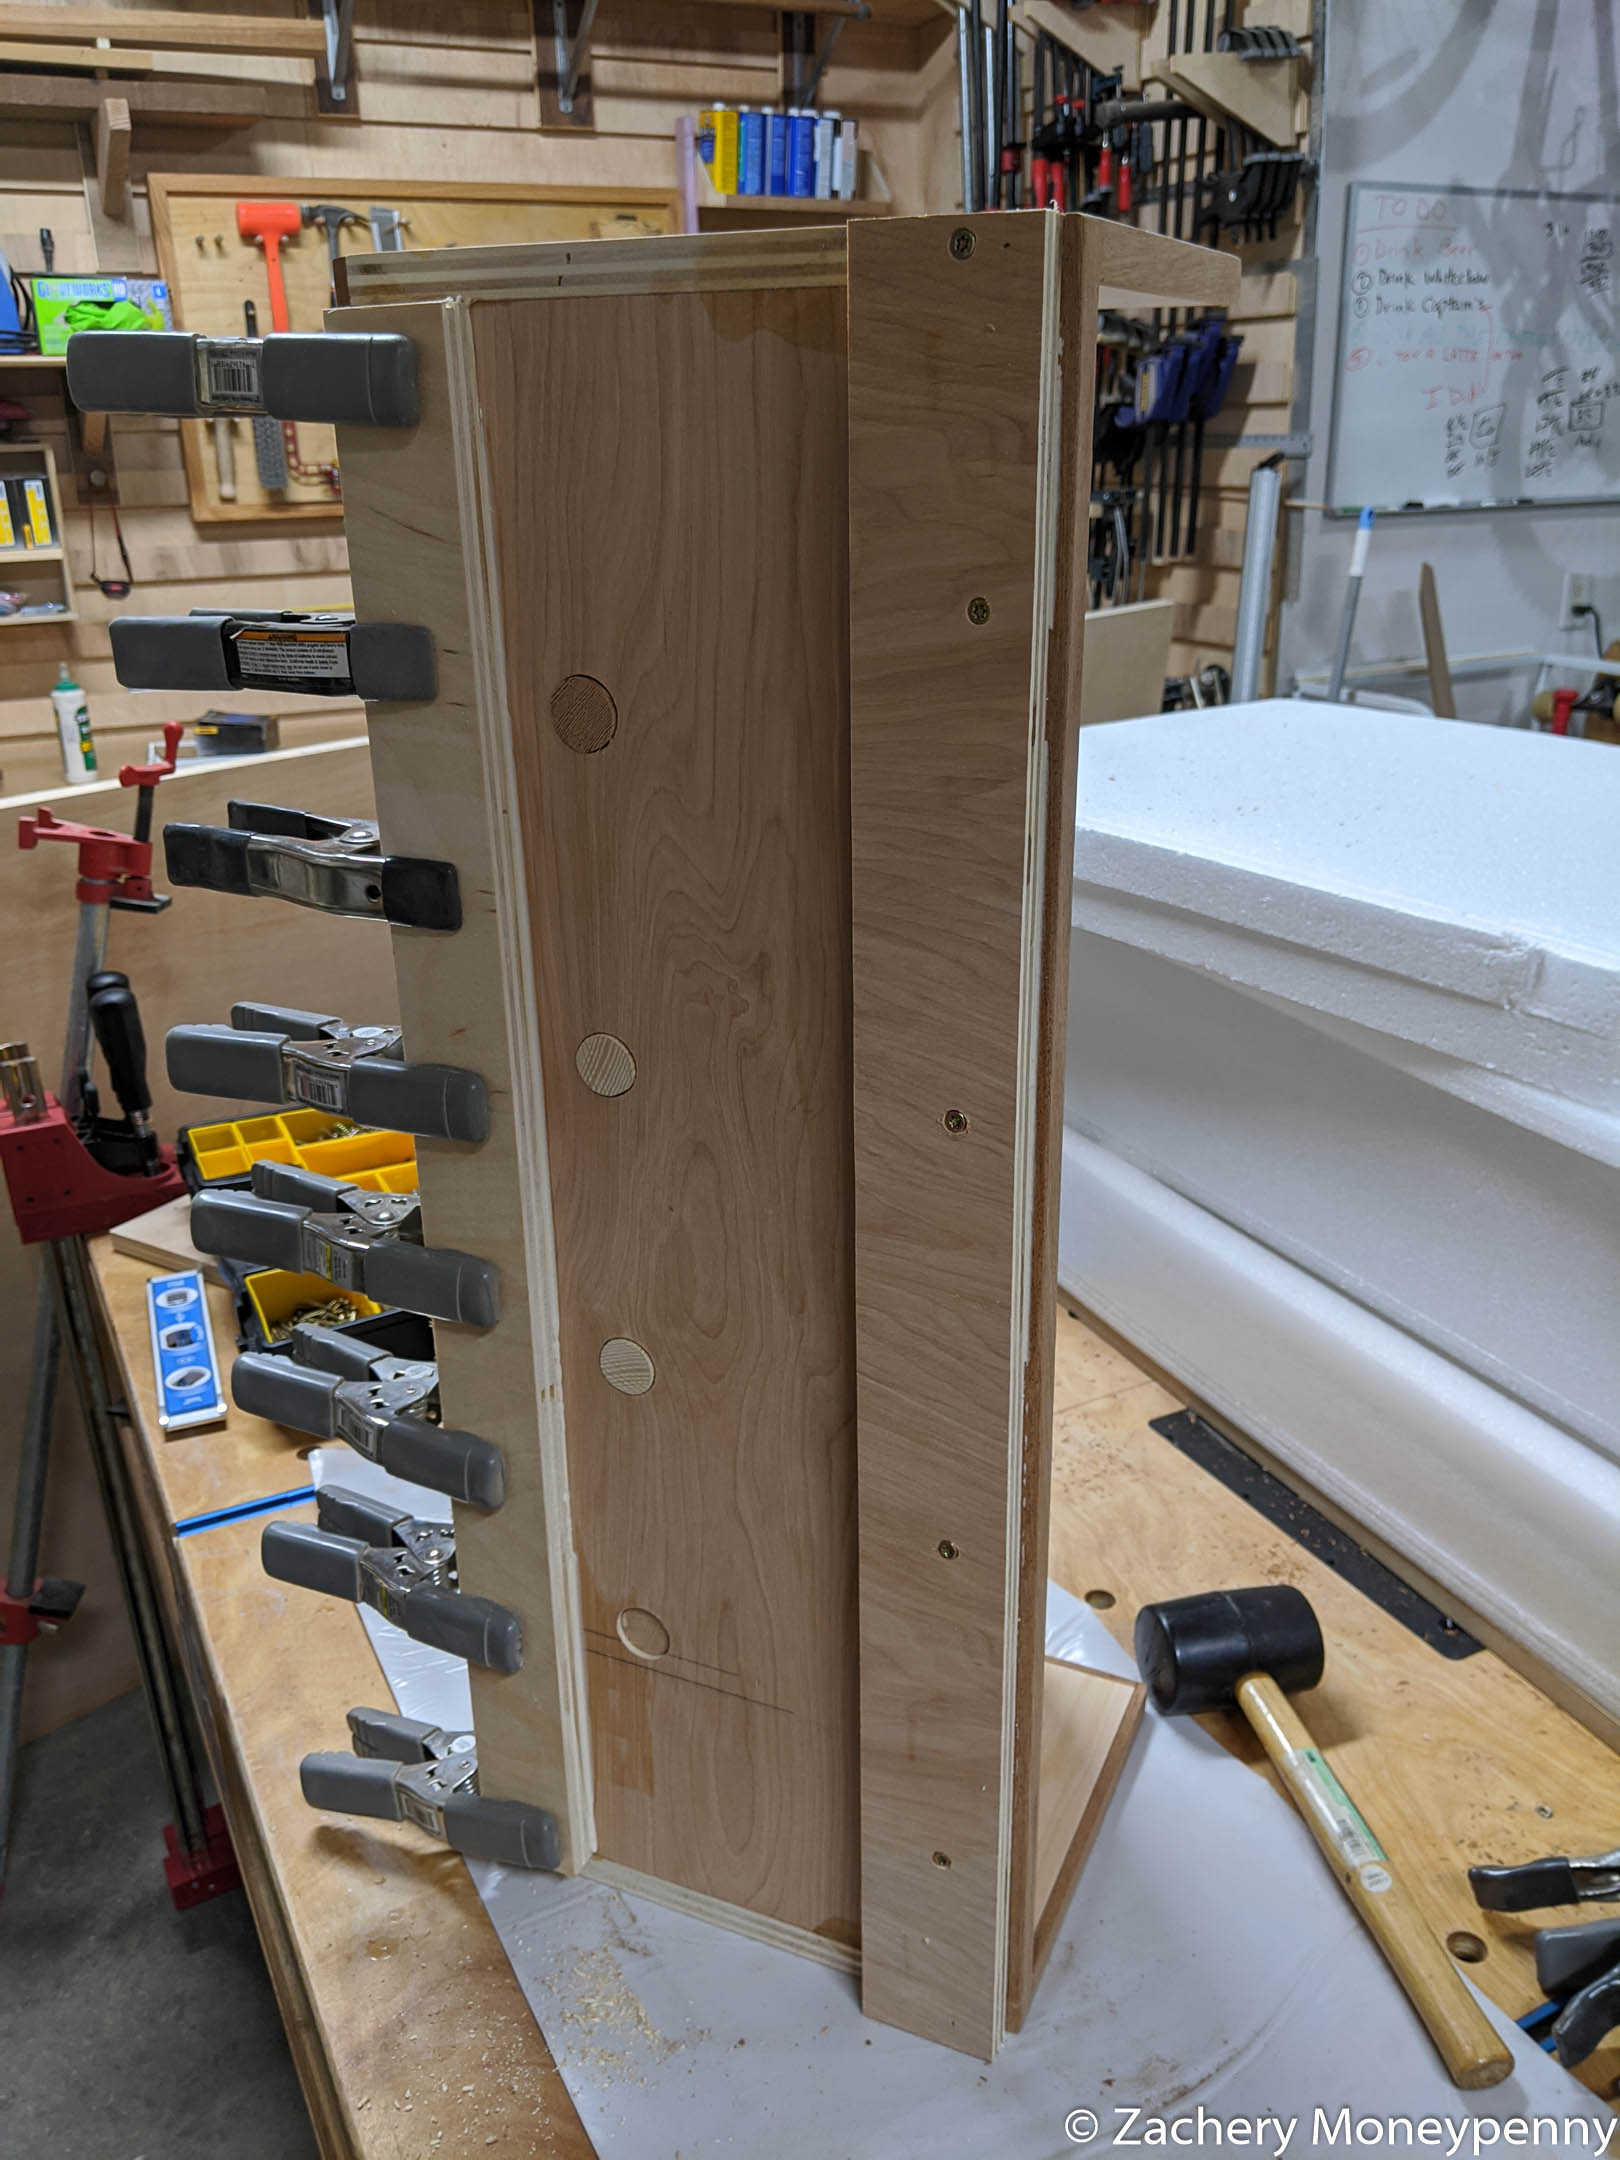
The size and shapes were largely dictated by how much scrap I had, so I fit the dimensions to the pieces of plywood rather than the other way around. I also wanted to trim it with some kind of dark hardwood but I’m loathe to start chopping up the nice 8/4 walnut for a project like this. I had some spare sapele from a box I made awhile back, though, and it worked perfectly.
I cut dados in the sides and back to hold the shelf in a little better, then glued everything up after using a Forstener bit to drill out the holes for the pegs to hold the bands.
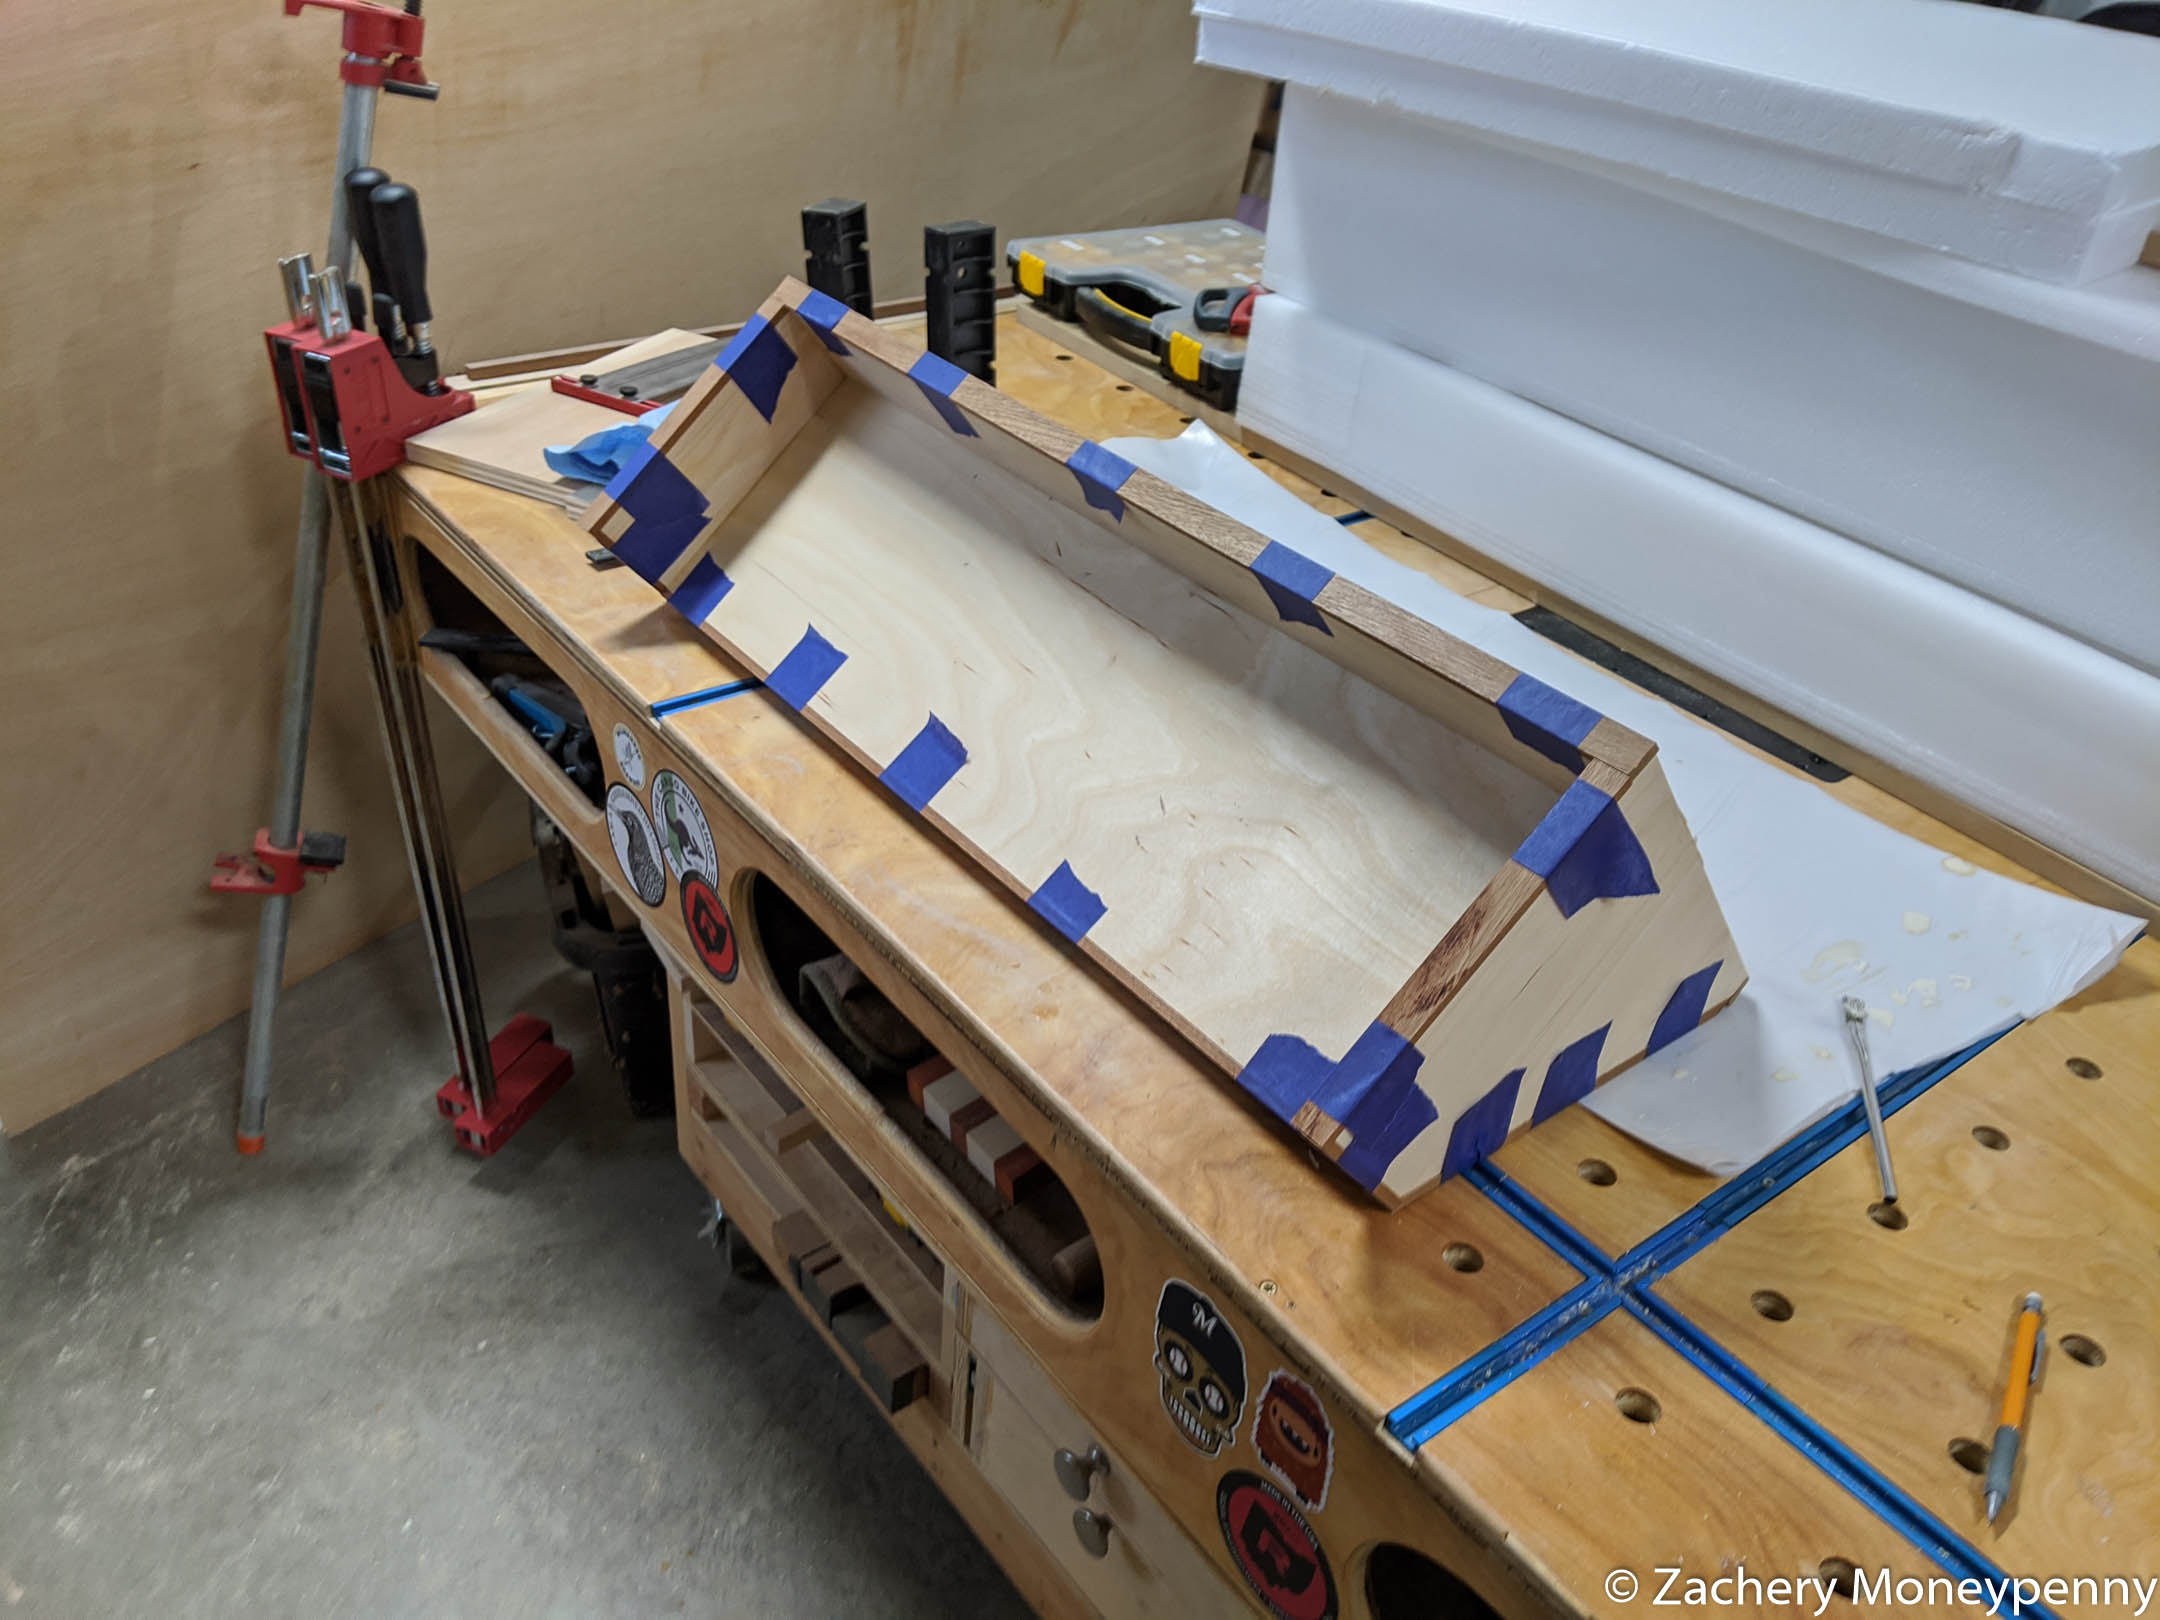
The sapele was already planed to just over ¾” thick, so I ripped ¼” thick strips. This worked well because it was slightly wider than the plywood edges. I glued them on then flushed them up with a flush trim bit in my hand router.
Before starting the sanding process, I mixed some glue and sapele sawdust from cutting the trim to length with my dovetail saw and filled in anywhere the banding did not meet flush. This worked great to hide some places where my precision in cutting the banding wasn’t as high as I would have liked.
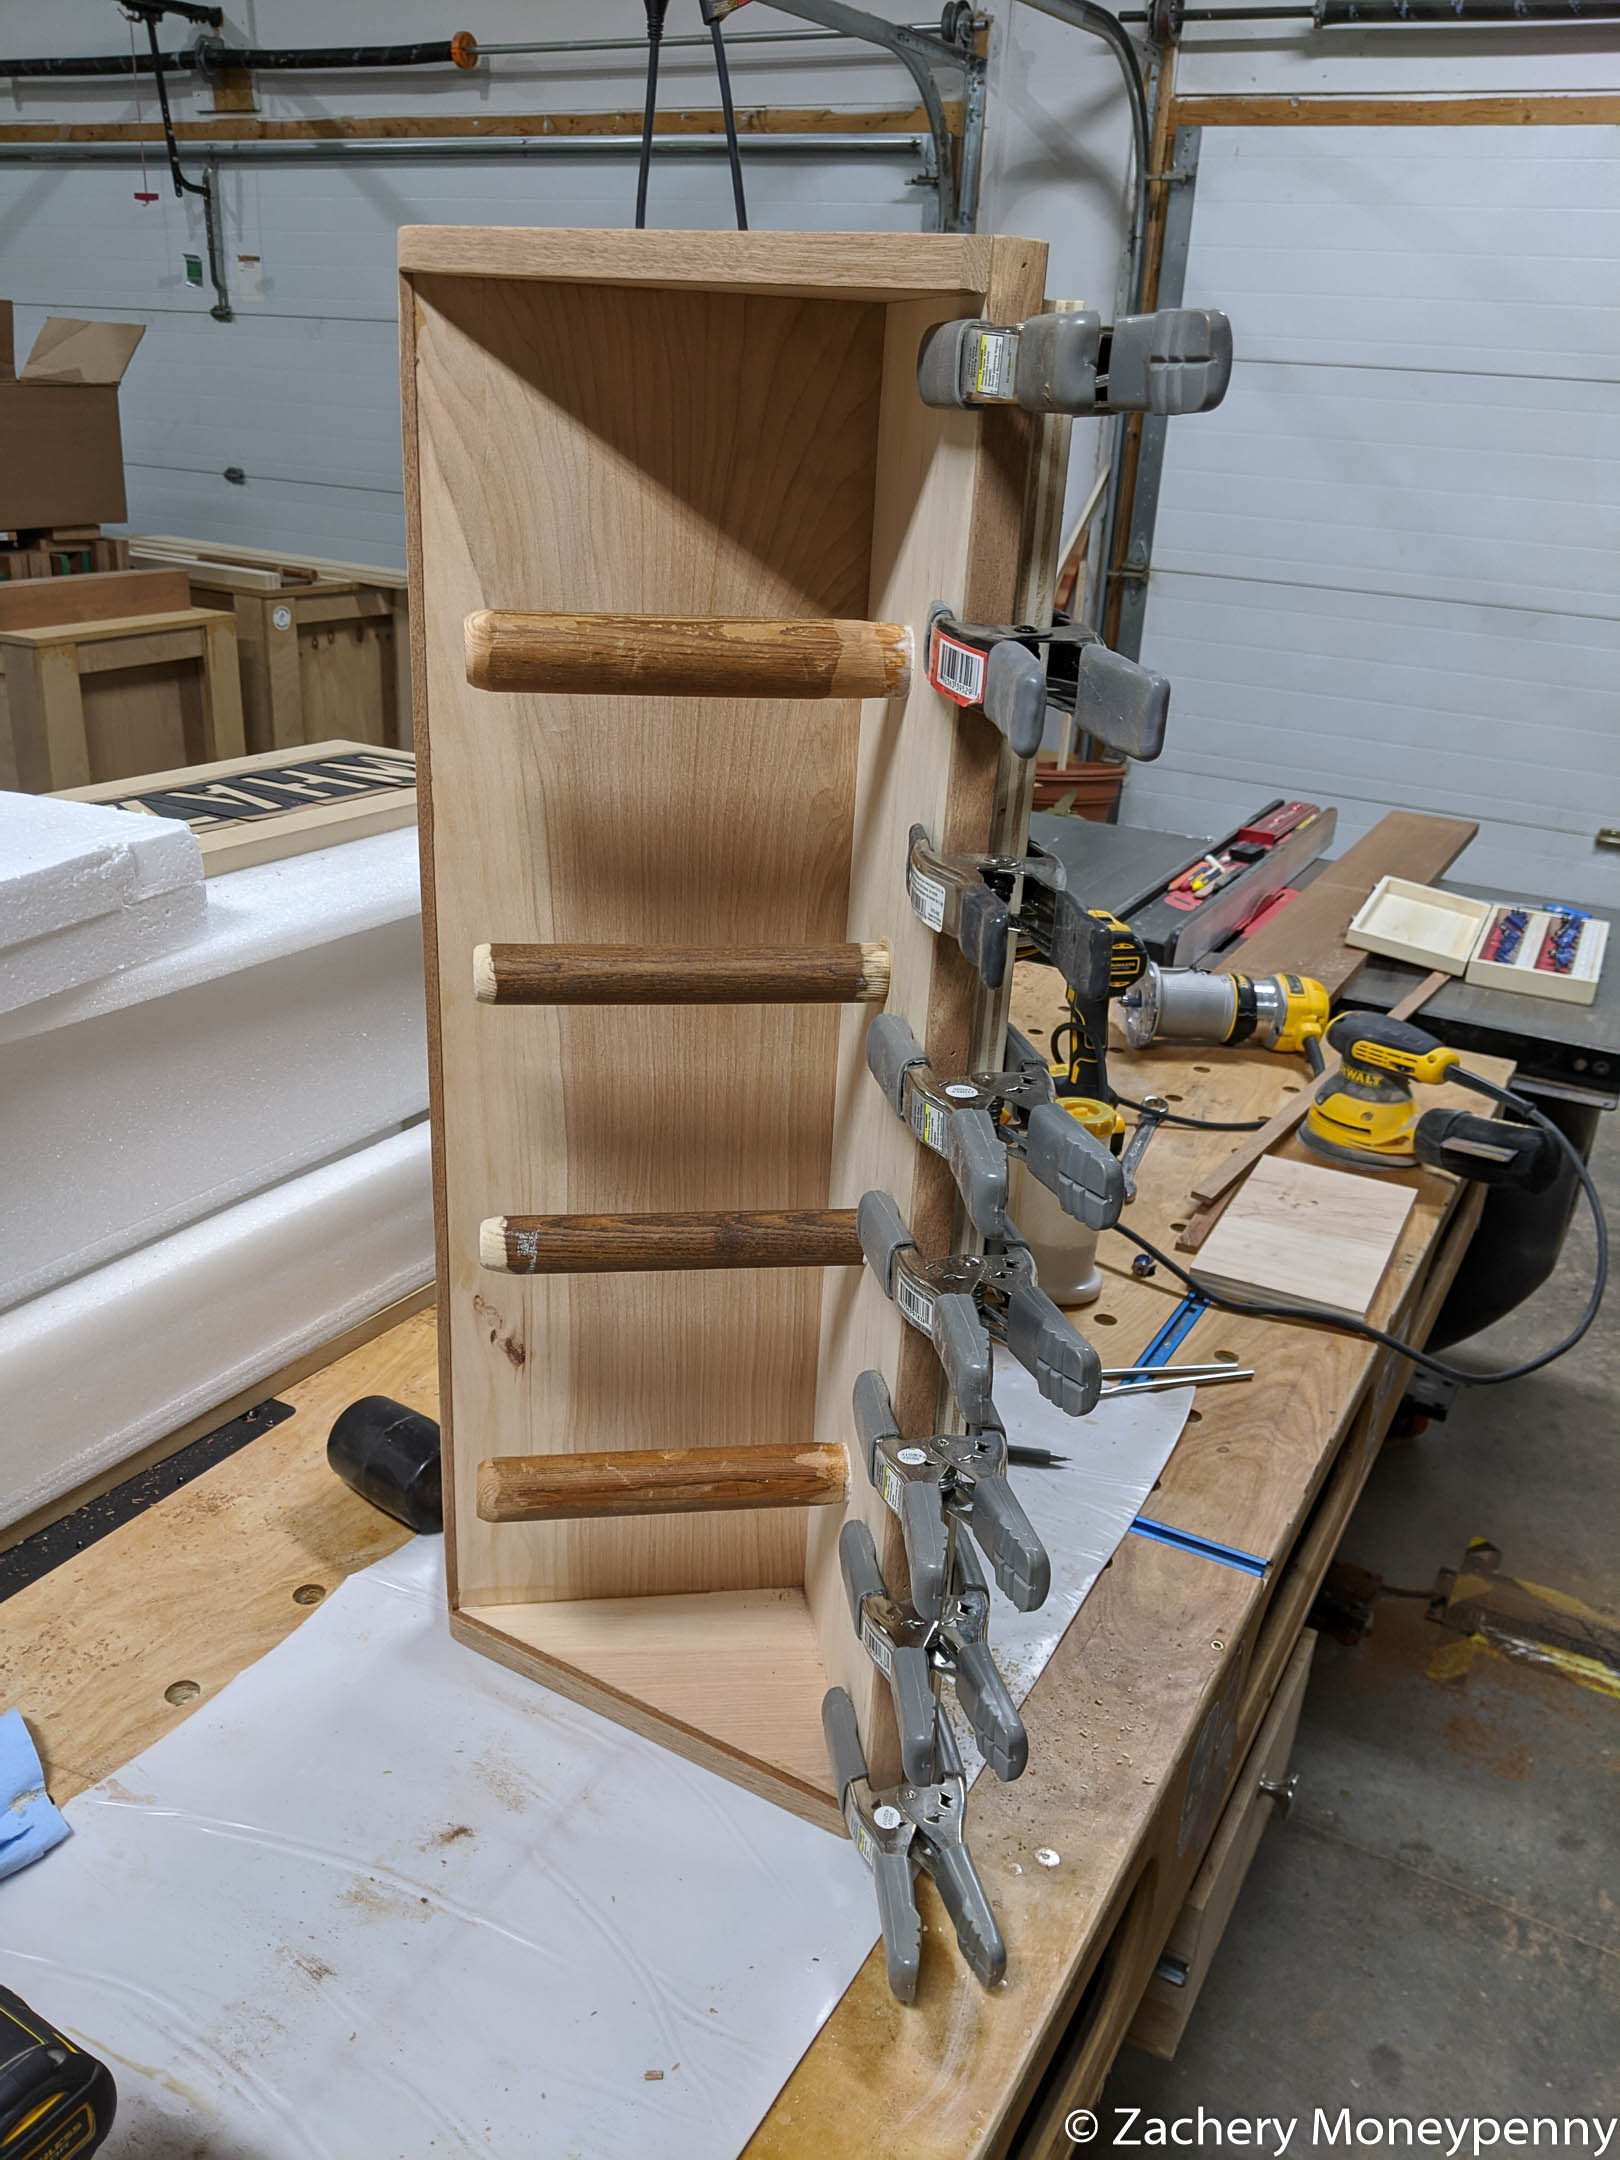
A few years ago someone gave my a couple of old closet rods. Over time I’ve cut them to lengths at the bandsaw when I needed rods for hanging items in the shop. This was an opportunity to nearly finish off that stock, but I didn’t have enough to match them and the rods I had left were two different diameters. I unfortunately didn’t find that out until I’d already drilled holes of the smaller size across the bottom of the rack, and so I needed a way to fit a 1½ inch rod into a 1⅛ inch hole. I ended up using my disc and belt sanders to narrow one end of each rod until it fit in the hole, then glued all four in, using a speed square to make sure each was perpendicular to the base.
Finally, I added a french cleat to the rear of the rack. Since my studs are exposed in the basement, it would be easy to mount the wall side of the cleat and then the rack could easily be hung. I liked that method because then it would be easy to move around in the basement if we decide to fiddle with the gym equipment layout.
I didn’t do a ton to finish this; I went with two coats of 1.5 pound cut shellac and then a coat of spray lacquer over the top. Similar to the plyo box I’m going to see how that holds up given its use in the basement and if I need to beef up the layers of finish I can take it back in the shop and hit it again.
And that’s it! Each of these items was a one-day build in and of themselves, and I was able to turn that extra sheet of plywood into some functional additions to our home gym! Coming soon: EZ curl bar rack made out of laminated ½” plywood I have in the shop!