
In mid-2017 I bought around 100 board feet of 8/4 cherry from Craigslist. The seller was up-front that it had some checks and wasn’t the highest quality, but I thought I’d be able to use it for the craft table I was planning to build.
Once we started to get closer to the due date for our second child, however, I realized I could repurpose the cherry for a new changing table for the nursery. For our first child we’d used a long dresser to put the changing pad on, but things were generally dicey with the pad sliding around. We decided this was a great opportunity for me start my first piece of custom furniture.
Design
I wanted to mix in walnut alongside the cherry I already had, so I started with a google image search on cherry and walnut dressers for design ideas.
I also googled changing tables and saw some broad design ideas I liked there as well. In particular, my wife and I became fixated on the idea of a pull-out hamper to use for dirty clothes. I also knew I wanted to try to make flush drawer fronts to practice for another project I have coming up.
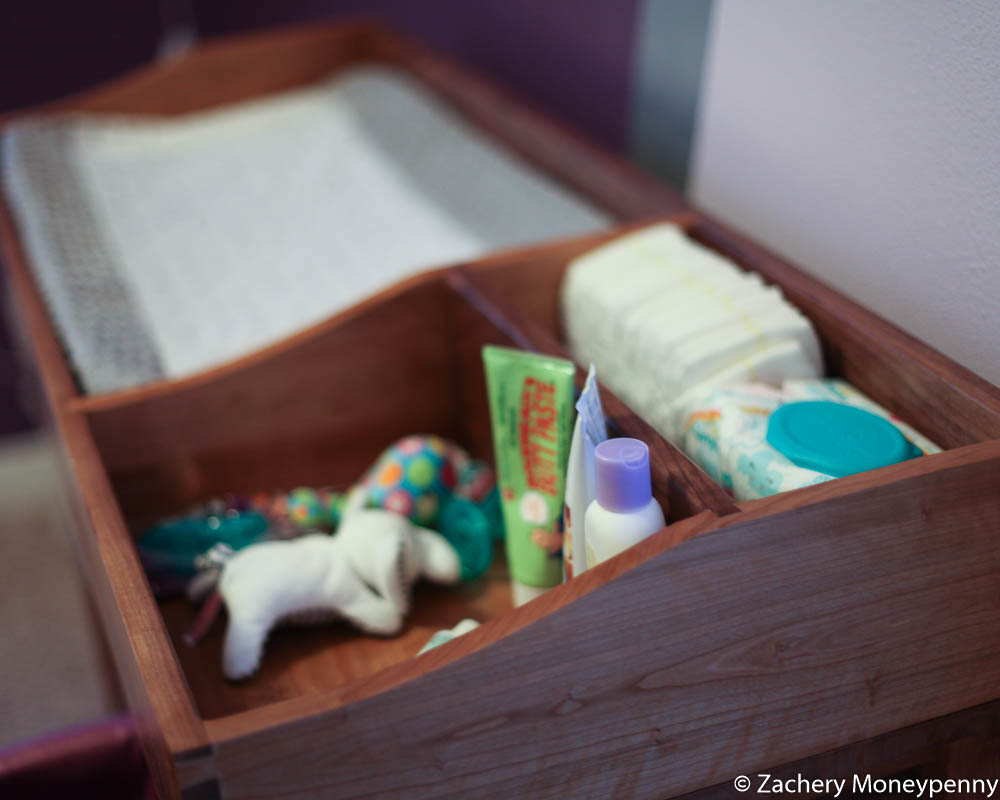
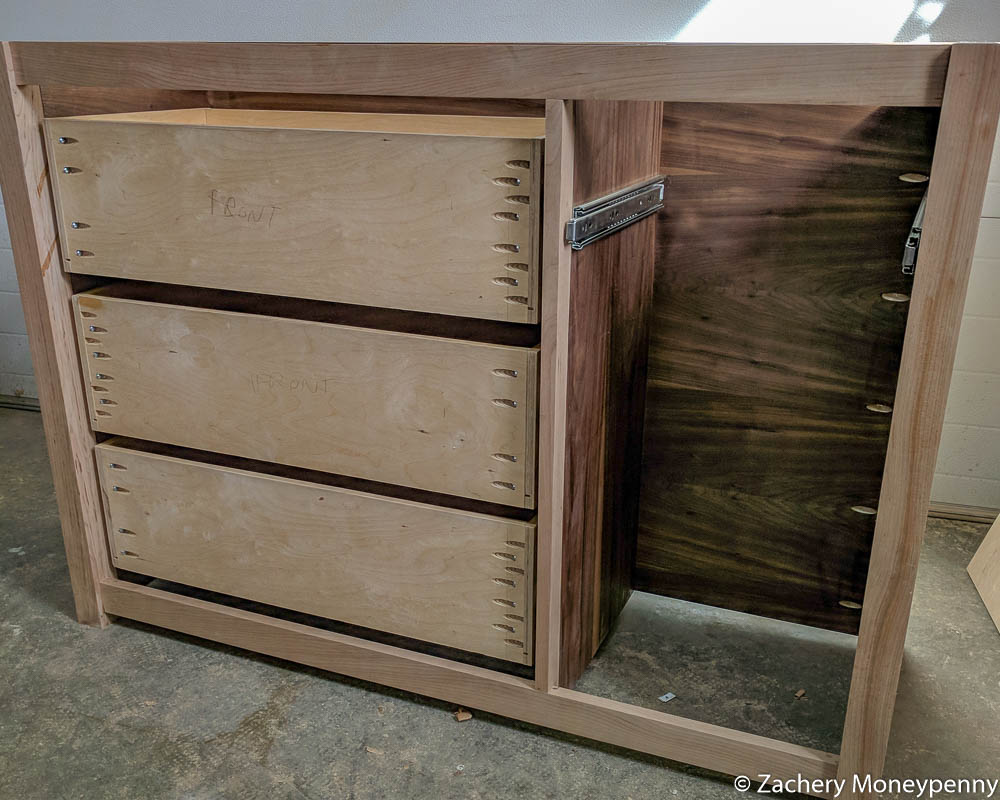
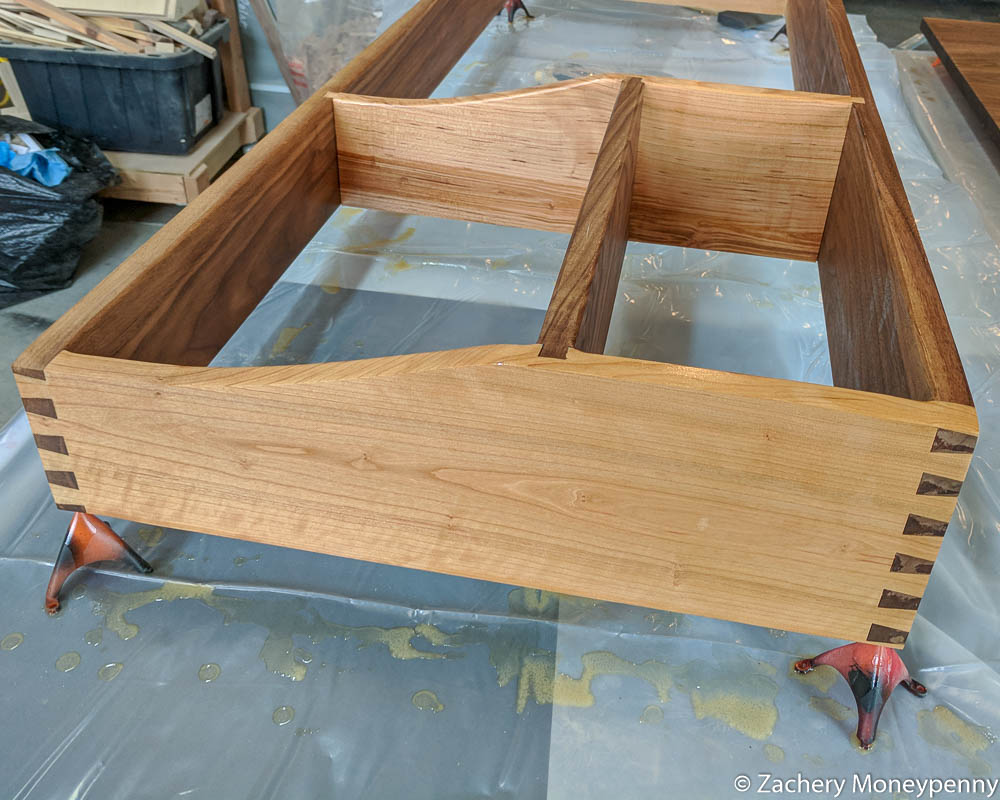
What we ended up with was a dresser design with three drawers on the left and one tall drawer on the right for the pull-out hamper. A removable organizer top was also a major part of the design so that we could remove it when the kid got older and just use the piece as a dresser.
Wood
I had the cherry for the frame, and the plan was to use 3/4” walnut plywood for the side and back panels. My original plan was to use walnut for the drawer fronts and for the organizer top, but due to the sheer amount of walnut needed I ended up reworking the organizer top design to use a mix of walnut and cherry.
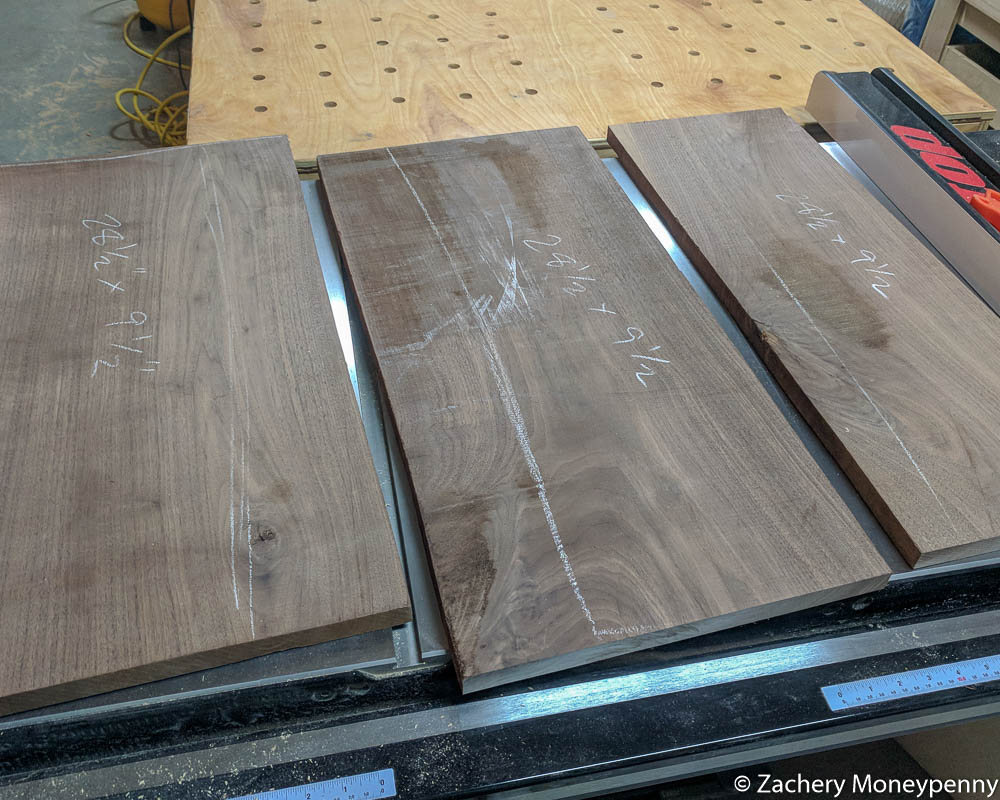
I found a local lumber place that sold S2S walnut and was able to find a couple of nice, wide boards that I could use for the fronts. They were also able to order the walnut plywood I needed for the panels and the baltic birch I needed to make the drawers.
Frame
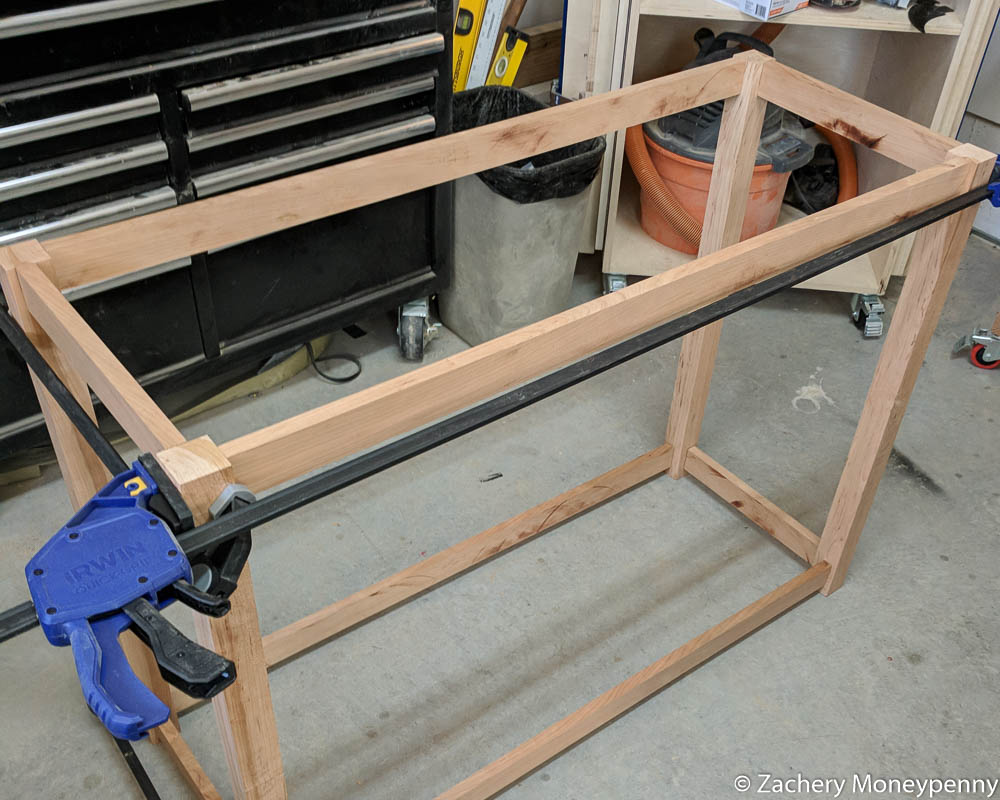
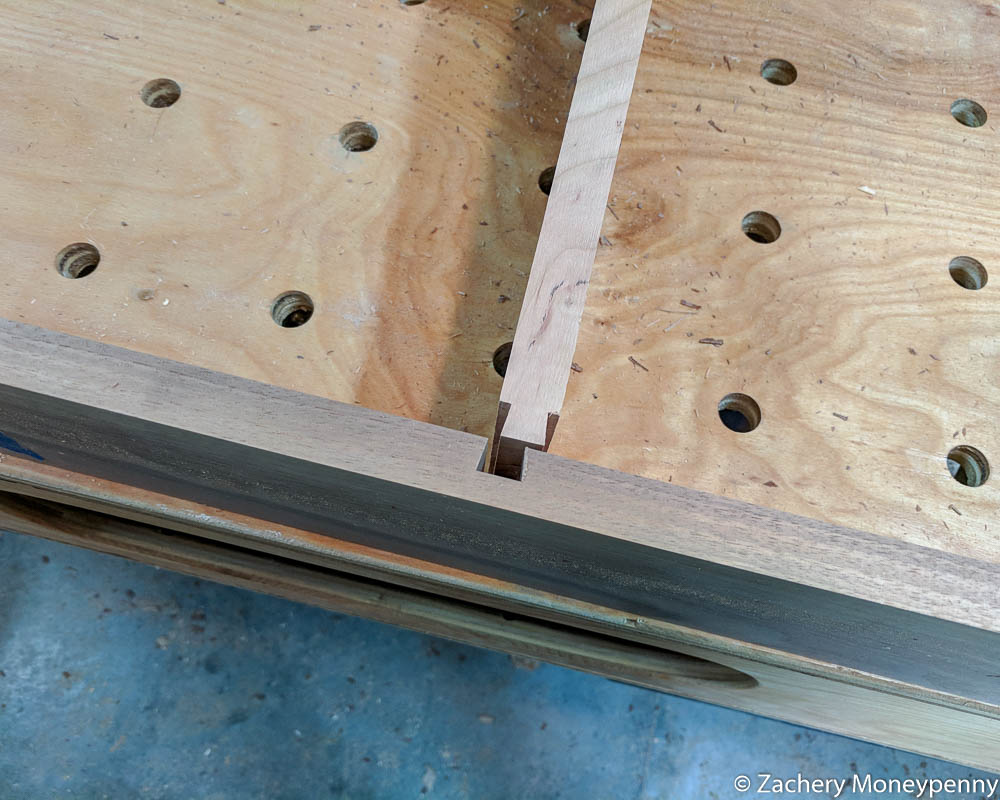
There were a lot of firsts on this project, but a major one was the mortise and tenon joinery I used for the legs and rails of the dresser frame.
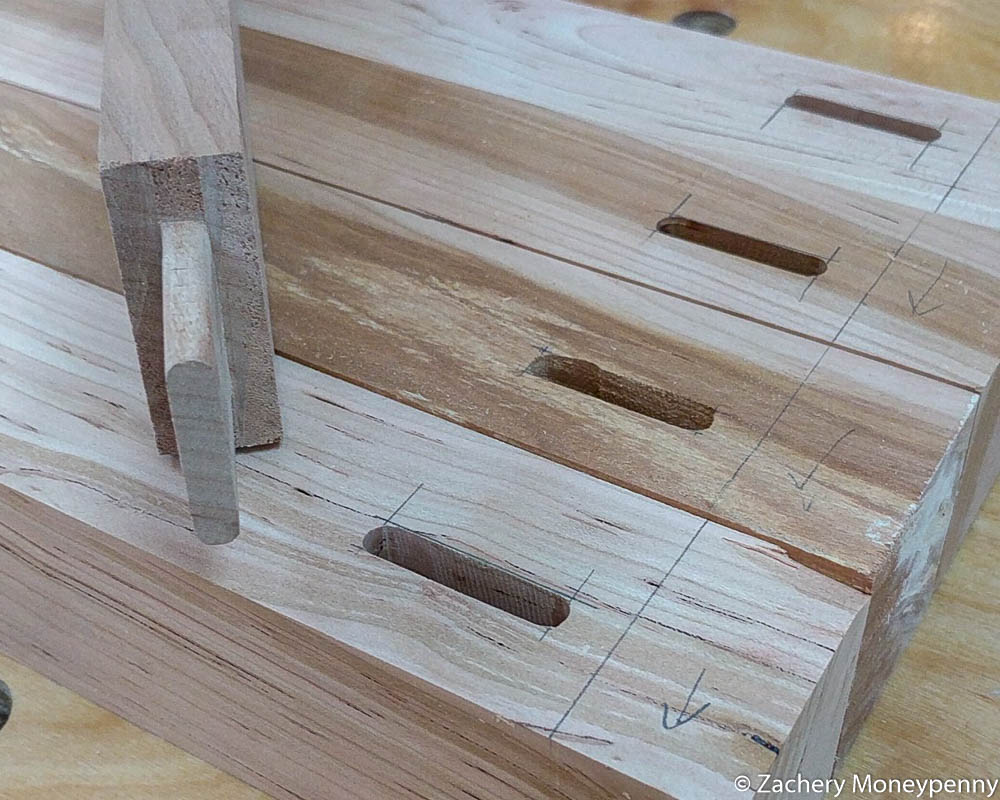
As you can see above, I used a router to make the mortises and then rounded over the tenons to fit. It was an eye-opening experience and I think it turned out well. Specifically, I was afraid I had gone to far and the joints were too loose, but once I added glue and clamped them up it was a nice solid fit.
You may also notice a chunk out of the front leg in the above picture. A small splinter turned into a bigger chunk on one pass through the jointer, but I didn’t have any spare stock at that point 😰 so I ended up making sure that was a back leg and the splintered corner faced in.
Once the legs and rails were glued up I turned my attention to the panels. Here is where another design mistake turned up: I had measured out the rail placement to be set back from the “front” of the legs such that the panel would be flush with the inside faces. I thought about cutting a rabbet on the inside corners of the legs to allow for the panels to be wider than the opening between the legs, but due to time constraints I opted not to. The result was that, due to chip out from the sizing cuts on the table saw there are some visible imperfections where the panels meet the legs. It’s definitely something I’d do different next time.
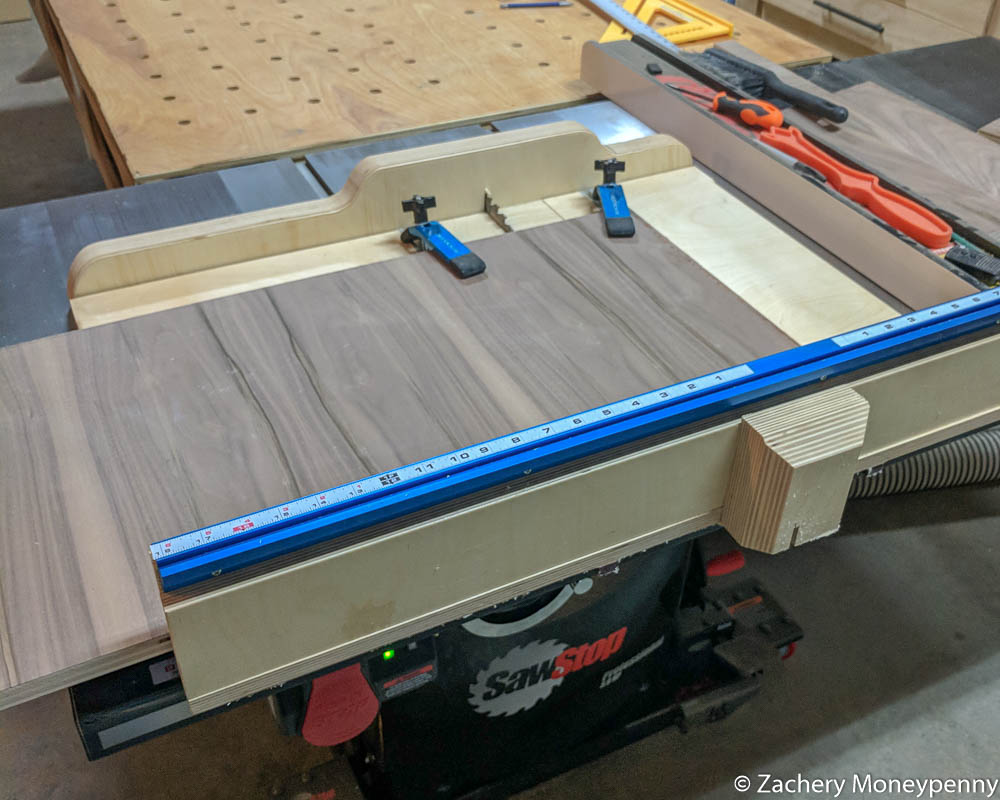
It was only after I had such a bad outcome on the panel sizing that I bought a new finishing blade for my table saw. (infinite sigh) But, the crosscut sled I built a few weeks back really helped on this part, so huray!
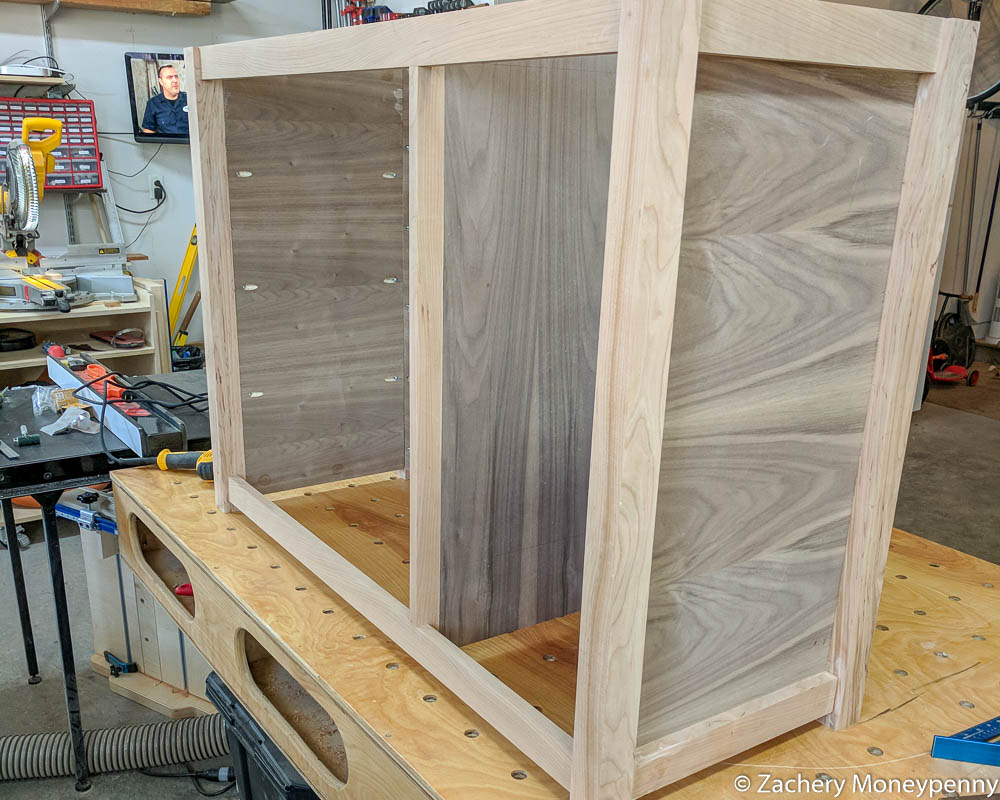
The next challenge was that I needed some sort of internal support between the pull-out hamper and the other drawers. The first plan was to put just enough horizontal supports to be able to screw the drawer slides into, but then I realized I needed a cherry divider in the front to act as separation between the drawer fronts anyways. I also ended up with some extra walnut plywood, so I cut a small cherry shim to match the thickness of the plywood, and then attached it to the top and bottom front rails.

All of the panels (including the internal divider) used pocket holes to attach to the legs.
Drawers
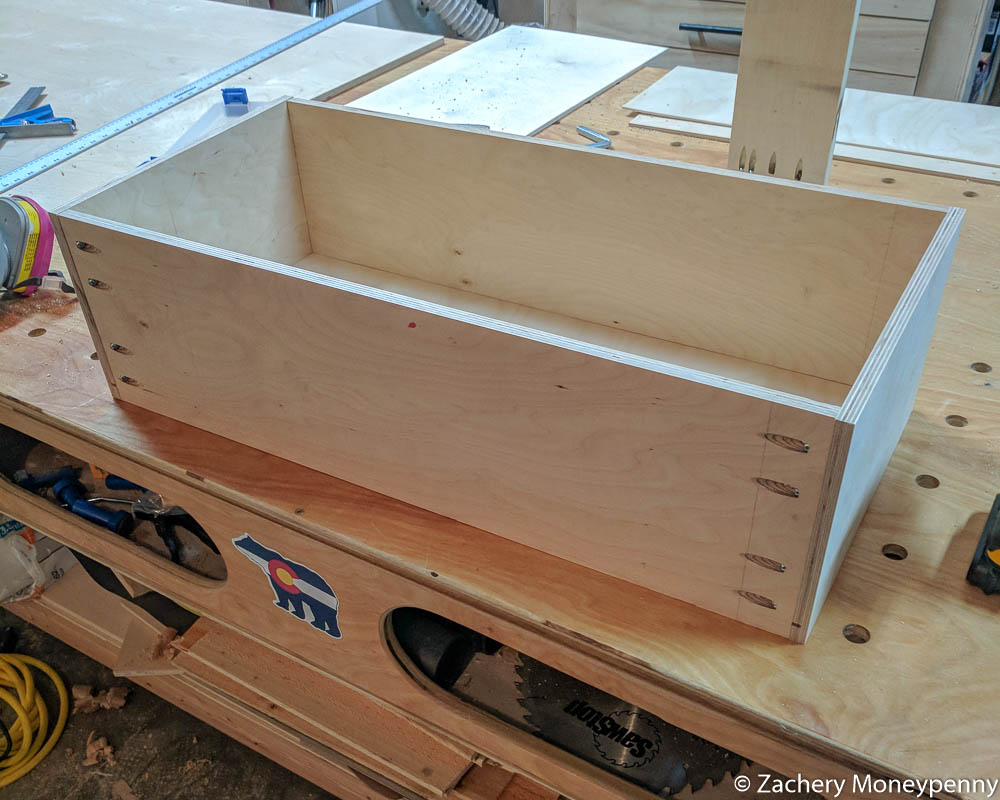
The drawers are made from 1/2” baltic birch, with 1/8” bottoms. I used pocket holes to assemble them and then added birch edge banding to the tops.
I milled the walnut boards down to the opening for the drawer fronts. This was tough as I didn’t want to overshoot the opening; the plan was for an 1/8” gap between the fronts and frame.
I cut them to rough size and then just before finishing, once I had the drawers installed, I snuck up on the fit in order to try to maintain that gap.
It turns out I had mis-set the depth of the pocket hole jig for the side panels, and the screws were proud of the plywood panels by about 1/16”. This interfered with the planned spacing of the drawer slides, though it didn’t affect the placement and spacing of the drawers themselves.
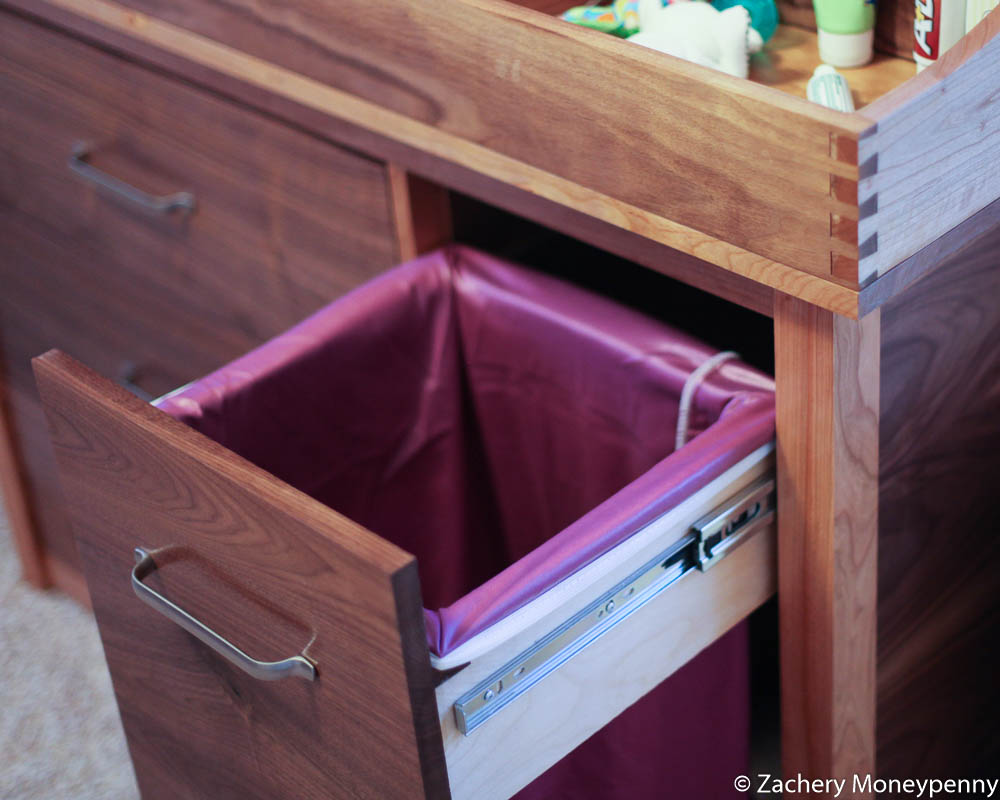
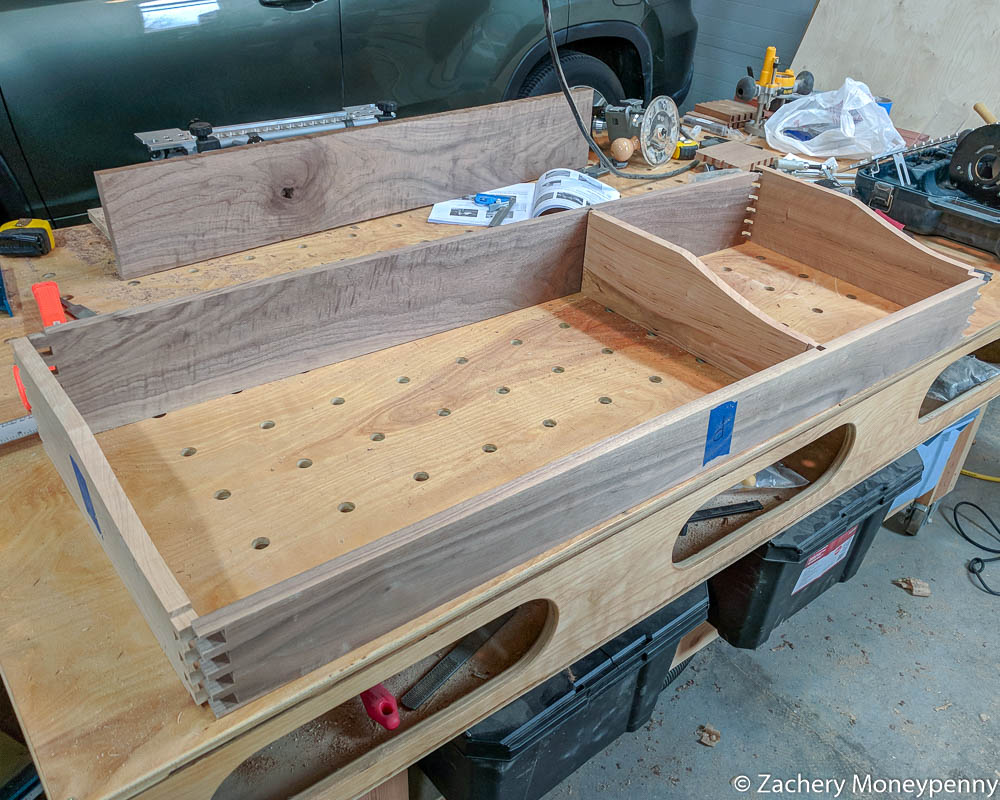
I freestyled the design of the pull-out hamper drawer. What I came up with hinged on the idea that we’d use the same cloth bags as we use for our cloth diapers that have elastic mouths. I figured I could create a simple drawer frame without a bottom, then finish the top with a walnut rim with rabbets cut to stretch the bag elastic over.
It’s a little tough to see in the above picture, but the rabbet faces downwards on the sides and rear, and upwards in the front. This is because the drawer front will attach there and it would be impossible to stretch the bag underneath. So instead I created a channel facing upwards on the front for the elastic to settle into.
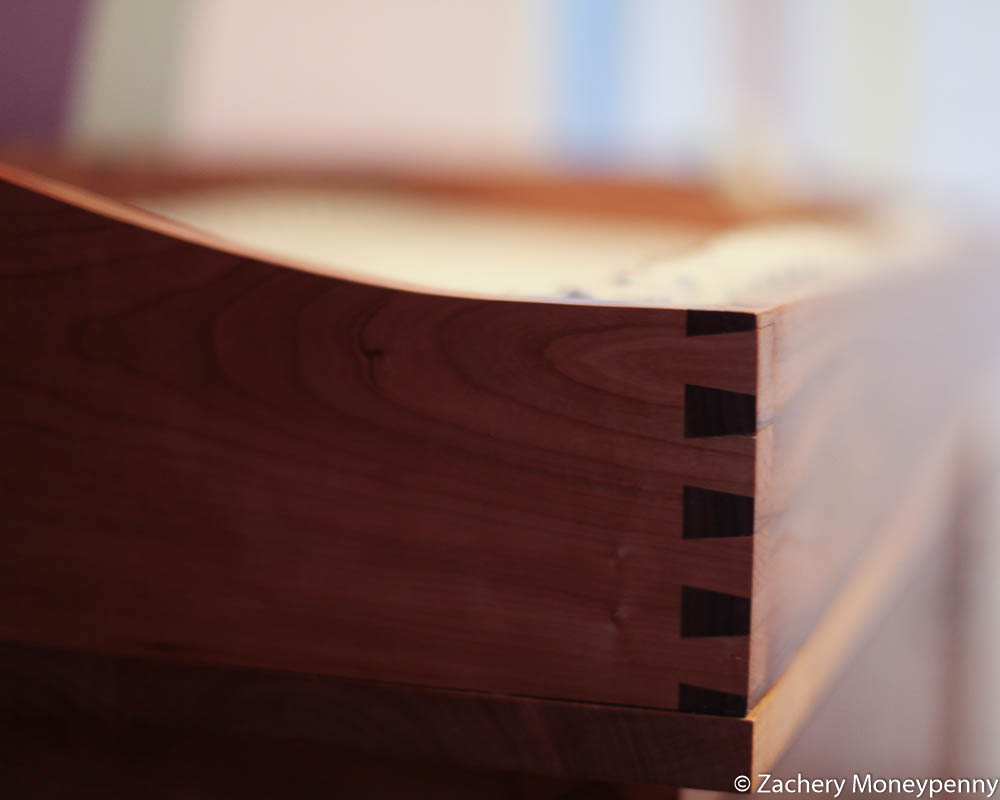
Organizer Top
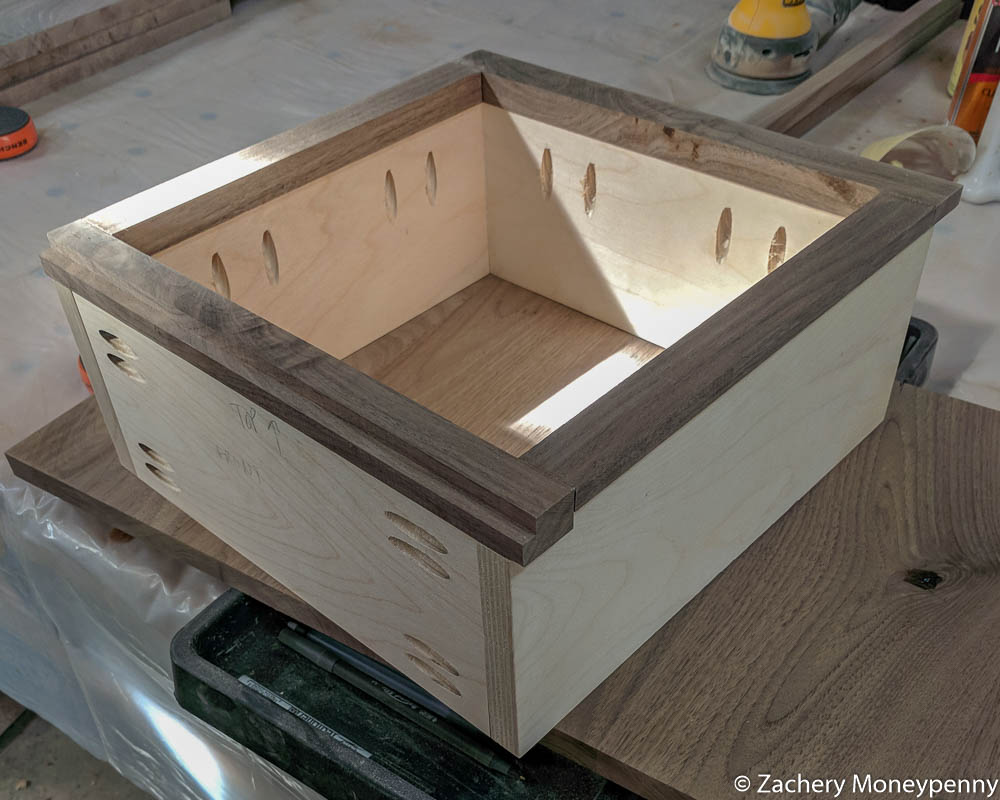
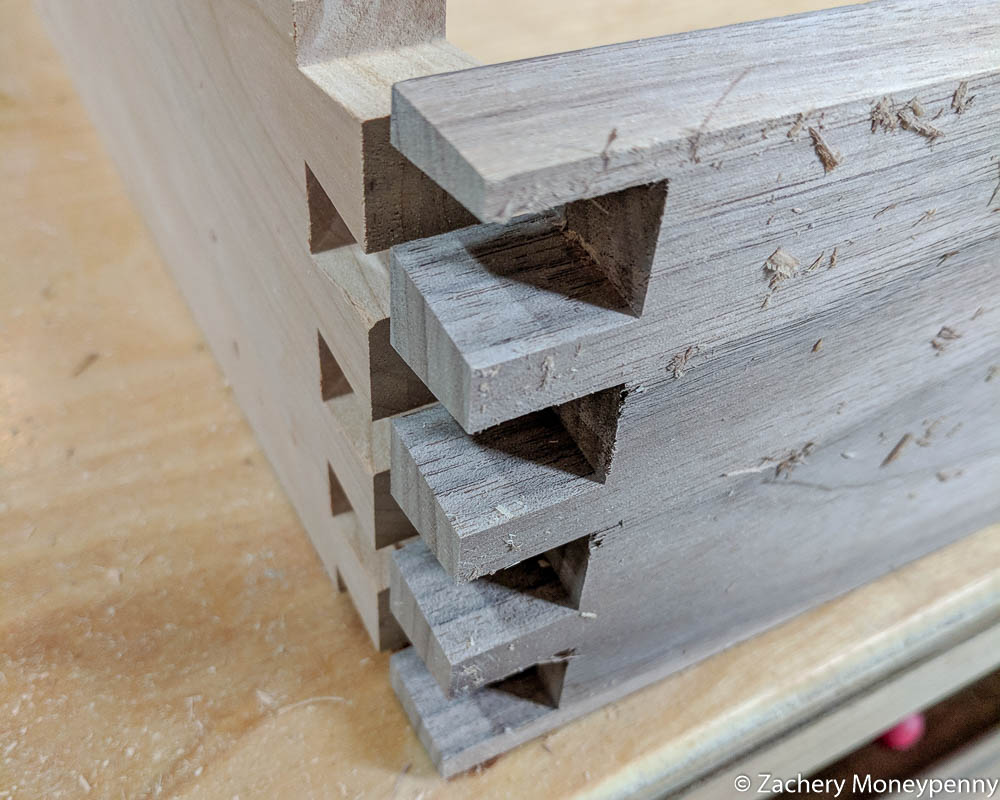
The other major first for me in this build was that I wanted to join the
rails of the organizer top with dovetails: through dovetails at the corners
and sliding dovetails where the middle dividers connected. I had neither the
tools nor the practice to hand-cut these dovetails, so in the interest of
time I purchased the PORTER-CABLE
4216 Super Jig to use my router for doing the dovetail cutting.
Of course, I still had to practice with the jig, and the initial practices did NOT go well.
Time was not on my side! This baby was due on April 5th no matter whether I learned to use the dovetail jig in time or not. I also had limited walnut stock to use for the four foot long front and back rails of the organizer top.
The front-left corner turned out the best, but unfortunately the front-right was the worst, with small gaps facing forwards. For my initial foray into dovetailing I consider it a success, but all in all it made me want to learn how to hand-cut dovetails in the future, so I have more control over the fit.
The sliding dovetails for the dividers actually worked great! The jig was super helpful and easy-to-use for those cuts.
I was also very impressed with the alternating usage of cherry and walnut in the organizer top construction. I ended up using walnut for all side-to-side rails and cherry for all front-to-back rails. Once the finishing started they really popped.
I drilled 3/8” holes into both the dresser top and the organizer top, and then used 1/2” long wooden dowels to secure the organizer to the dresser. For now I did not use glue; the idea is that when the child is older we can remove the organizer top then flush cut the dowels and refinish the dresser top, at which point it will just be a dresser with a built-in hamper.
Finishing
Before I started the finishing process I created one sample board each of walnut and cherry. I then divided each into thirds with some electrical tape and applied three different types of finishes to see which my wife and I liked the best.
We tried Rust-Oleum
Clear Shellac, Minwax
Clear Brushing Lacquer
, and a combination of Watco
Cherry Danish Oil
and Watco
Walnut Danish Oil
. Each was applied with four coats, with light
sanding in-between with #0000 steel wool.
We discounted the danish oil almost immediately- it didn’t really show the true color of the wood well. The shellac versus the lacquer ultimately came down to the shellac being a bit more glossy so we went with that. I have a lot more to say about what I learned about finishes down in the Reflections & Learning section.
The first three coats got knocked down with #0, #000, and #0000 steel wool. For the fourth coat I switched to 600 grit sandpaper.
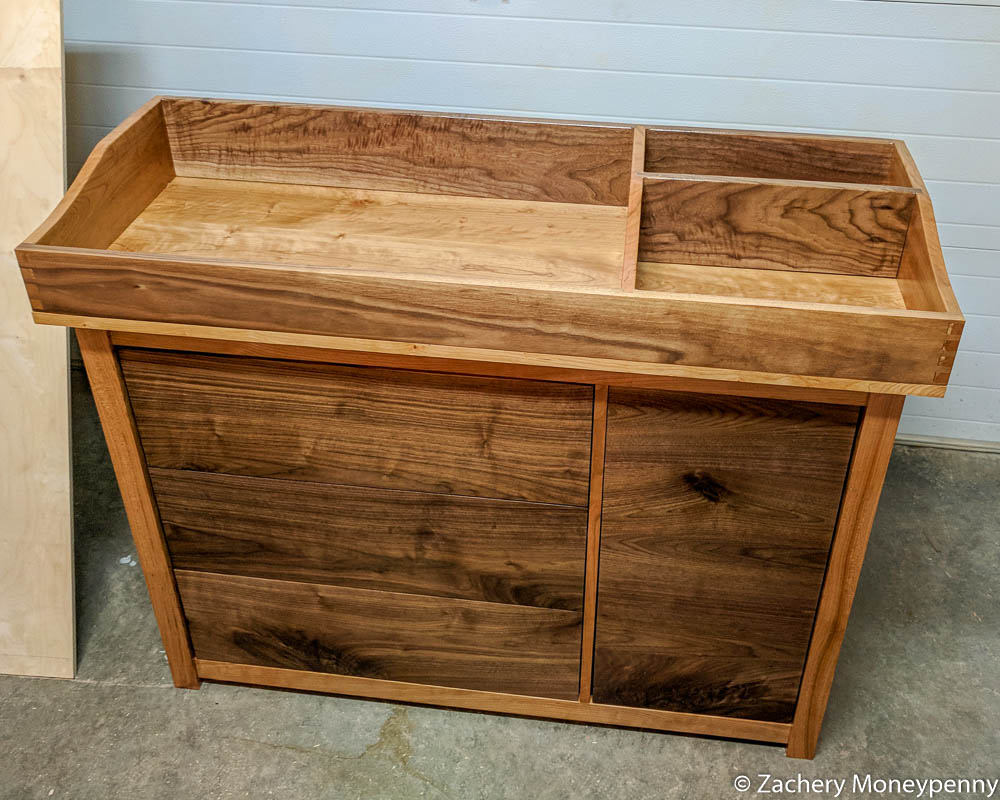
It took about a week to get through the finishing process. After that we had to wait a few days because we were so indecisive on drawer pulls. We looked at quite a few places online: Amazon, Woodcraft and others didn’t quite have the look we were going for. Then I remembered back to the olden days of “going to a mall” that Restoration Hardware sold kinda fancy drawer hardware.
Due to the boxy nature of the piece, I was looking for drawer pulls with nice curves. We found some very nice ones we both liked and then settled in for what turned out to be a short wait.
The final step was to go over the whole surface with Briwax
Furniture Wax Polish using a Norton
Sanding Pad
.
Reflections & Learning
This was my very first piece of inside-the-house furniture. Every time I’ve walked into the nursery since finishing it I have this strange mix of pride and shame. (For the record, the Pride is much larger than the Shame.) I finally understand when crafts-people say that they see the defects in their work that other folks don’t even notice.
All of those defects I can see, however, are chances for me to learn something for the next project I work on (and there are a lot on the horizon). Below are some thoughts about things I would do differently next time.
- Fit wood to the project, rather than project to the wood. I had a ton of cherry that I decided to use for this project, but it was difficult to find pieces of the right grain and color for the components I required. Next time I’d go shopping for wood to fit the specific project.
- Don’t be in a hurry to buy expensive wood. At the lumber shop, the worker showed me where the S2S walnut was and then stood there while I looked at a giant pile of lumber. This made me nervous that I was wasting his time and while I did get some really nice pieces, I also got pieces that were useless for furniture due to the knots. This was really expensive wood! Next time I need to take my time and rummage for the pieces that exactly fit the furniture I’m building.
- Don’t build flush drawer fronts. I should have built face frames all around each drawer for this project. I don’t yet have the experience and skill to exactly make the exact 1/8” gap between all drawers and the surrounding frame, and due to starting at the bottom when installing the drawer fronts I ended up with a compounding error that resulted in a 1/4” gap between the top drawer and the frame. It’s noticeable, and in fact the most noticeable defect to me.
- Hand-cut the through dovetails. Due to time and tool constraints this wasn’t feasible for this project, but the next time I need dovetail joints I’ll likely hand-cut them. I’d still use the Porter Cable jig for sliding dovetails, though. That worked great.
- Explore different finishes. I’d used shellac for various shop projects and
hidden-from-view stuff for the house (over-cabinet shelving, for instance).
Even in the short time since I finished this project, however, I’ve found
some more intriguing options from a combination of YouTube videos and talking
with friends. I’m already going to try Tried and True
and General Finishes Arm-R-Seal
on some upcoming projects.
- Sharpening Party. Before I started the project I hauled out my Tormek
T-4
and finally learned how to use it. I sharpened all my chisels and hand planes, which made all the difference when I went to clean up tenons and flatten the dresser top. In fact, I really need to have another Sharpening Party now…
- I need more clamps. The eternal lament.
April 8th, 2018