You may have already started seeing sewing project posts on the blog as I bought a sewing machine in March 2020. At first my focus was sewing masks for family and friends during the height of the covid-19 Stay At Home order, but soon I was eager to try making my own clothes. As I accumulated supplies and tools that I needed to embark on my first clothing project (the Men’s Shirt!) I realized it wasn’t going to cut it to pile everything on my dining room table forever. I mean, during quarantine we’re not having anyone over for dinner but eventually we will again 😄.
Design
Two things occurred to me, in this order:
- Jimmy Diresta had already built a box for his own sewing supplies that I thought looked great, and
- I had purchased a beautiful piece of walnut at the Habitat for Humanity Restore in late February that would be perfect for a box.
My plans was to hew pretty closely to the design Jimmy built on the video, with a couple of changes:
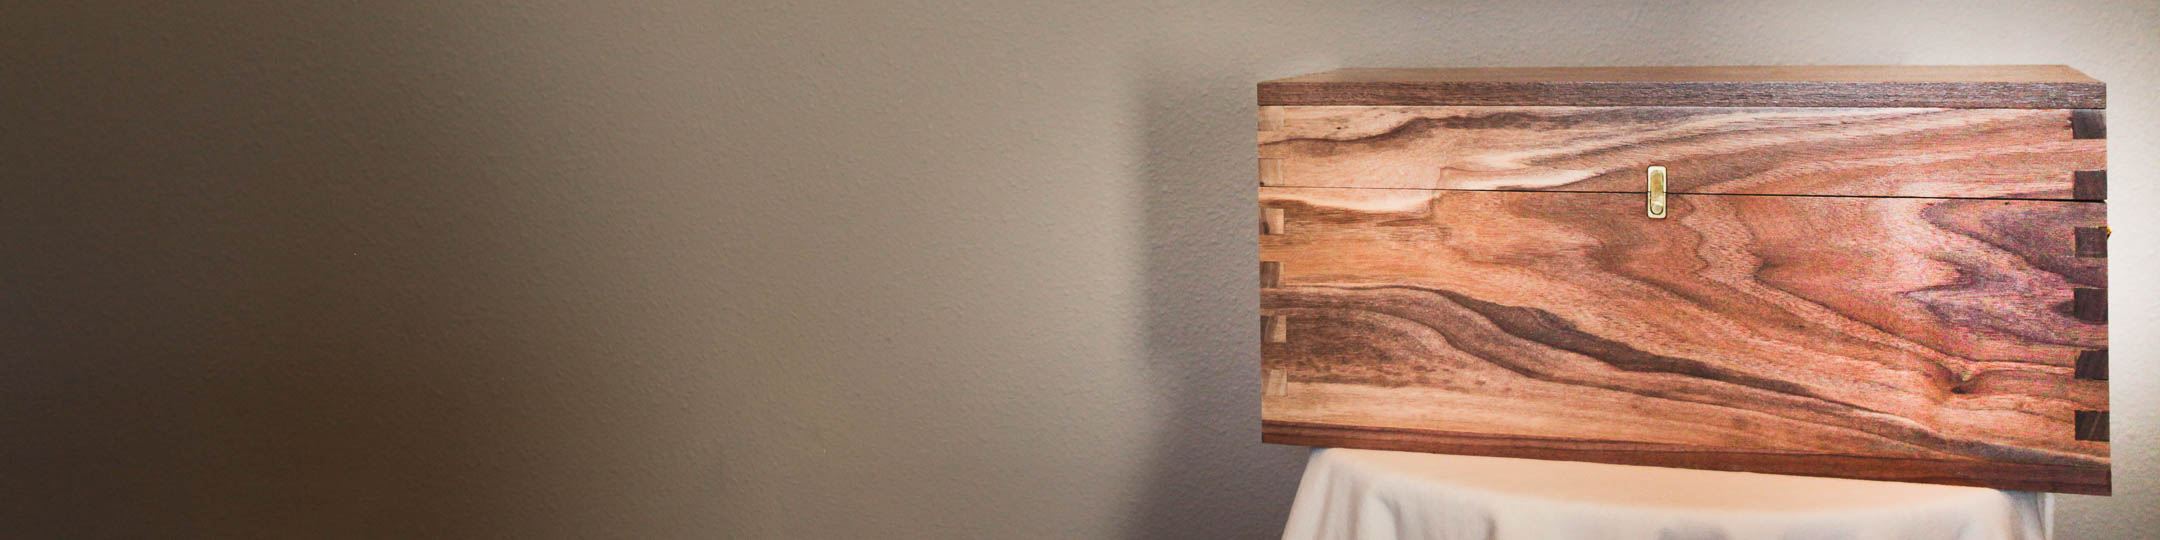
- Use brass nails along the perimeter of the top of the box.
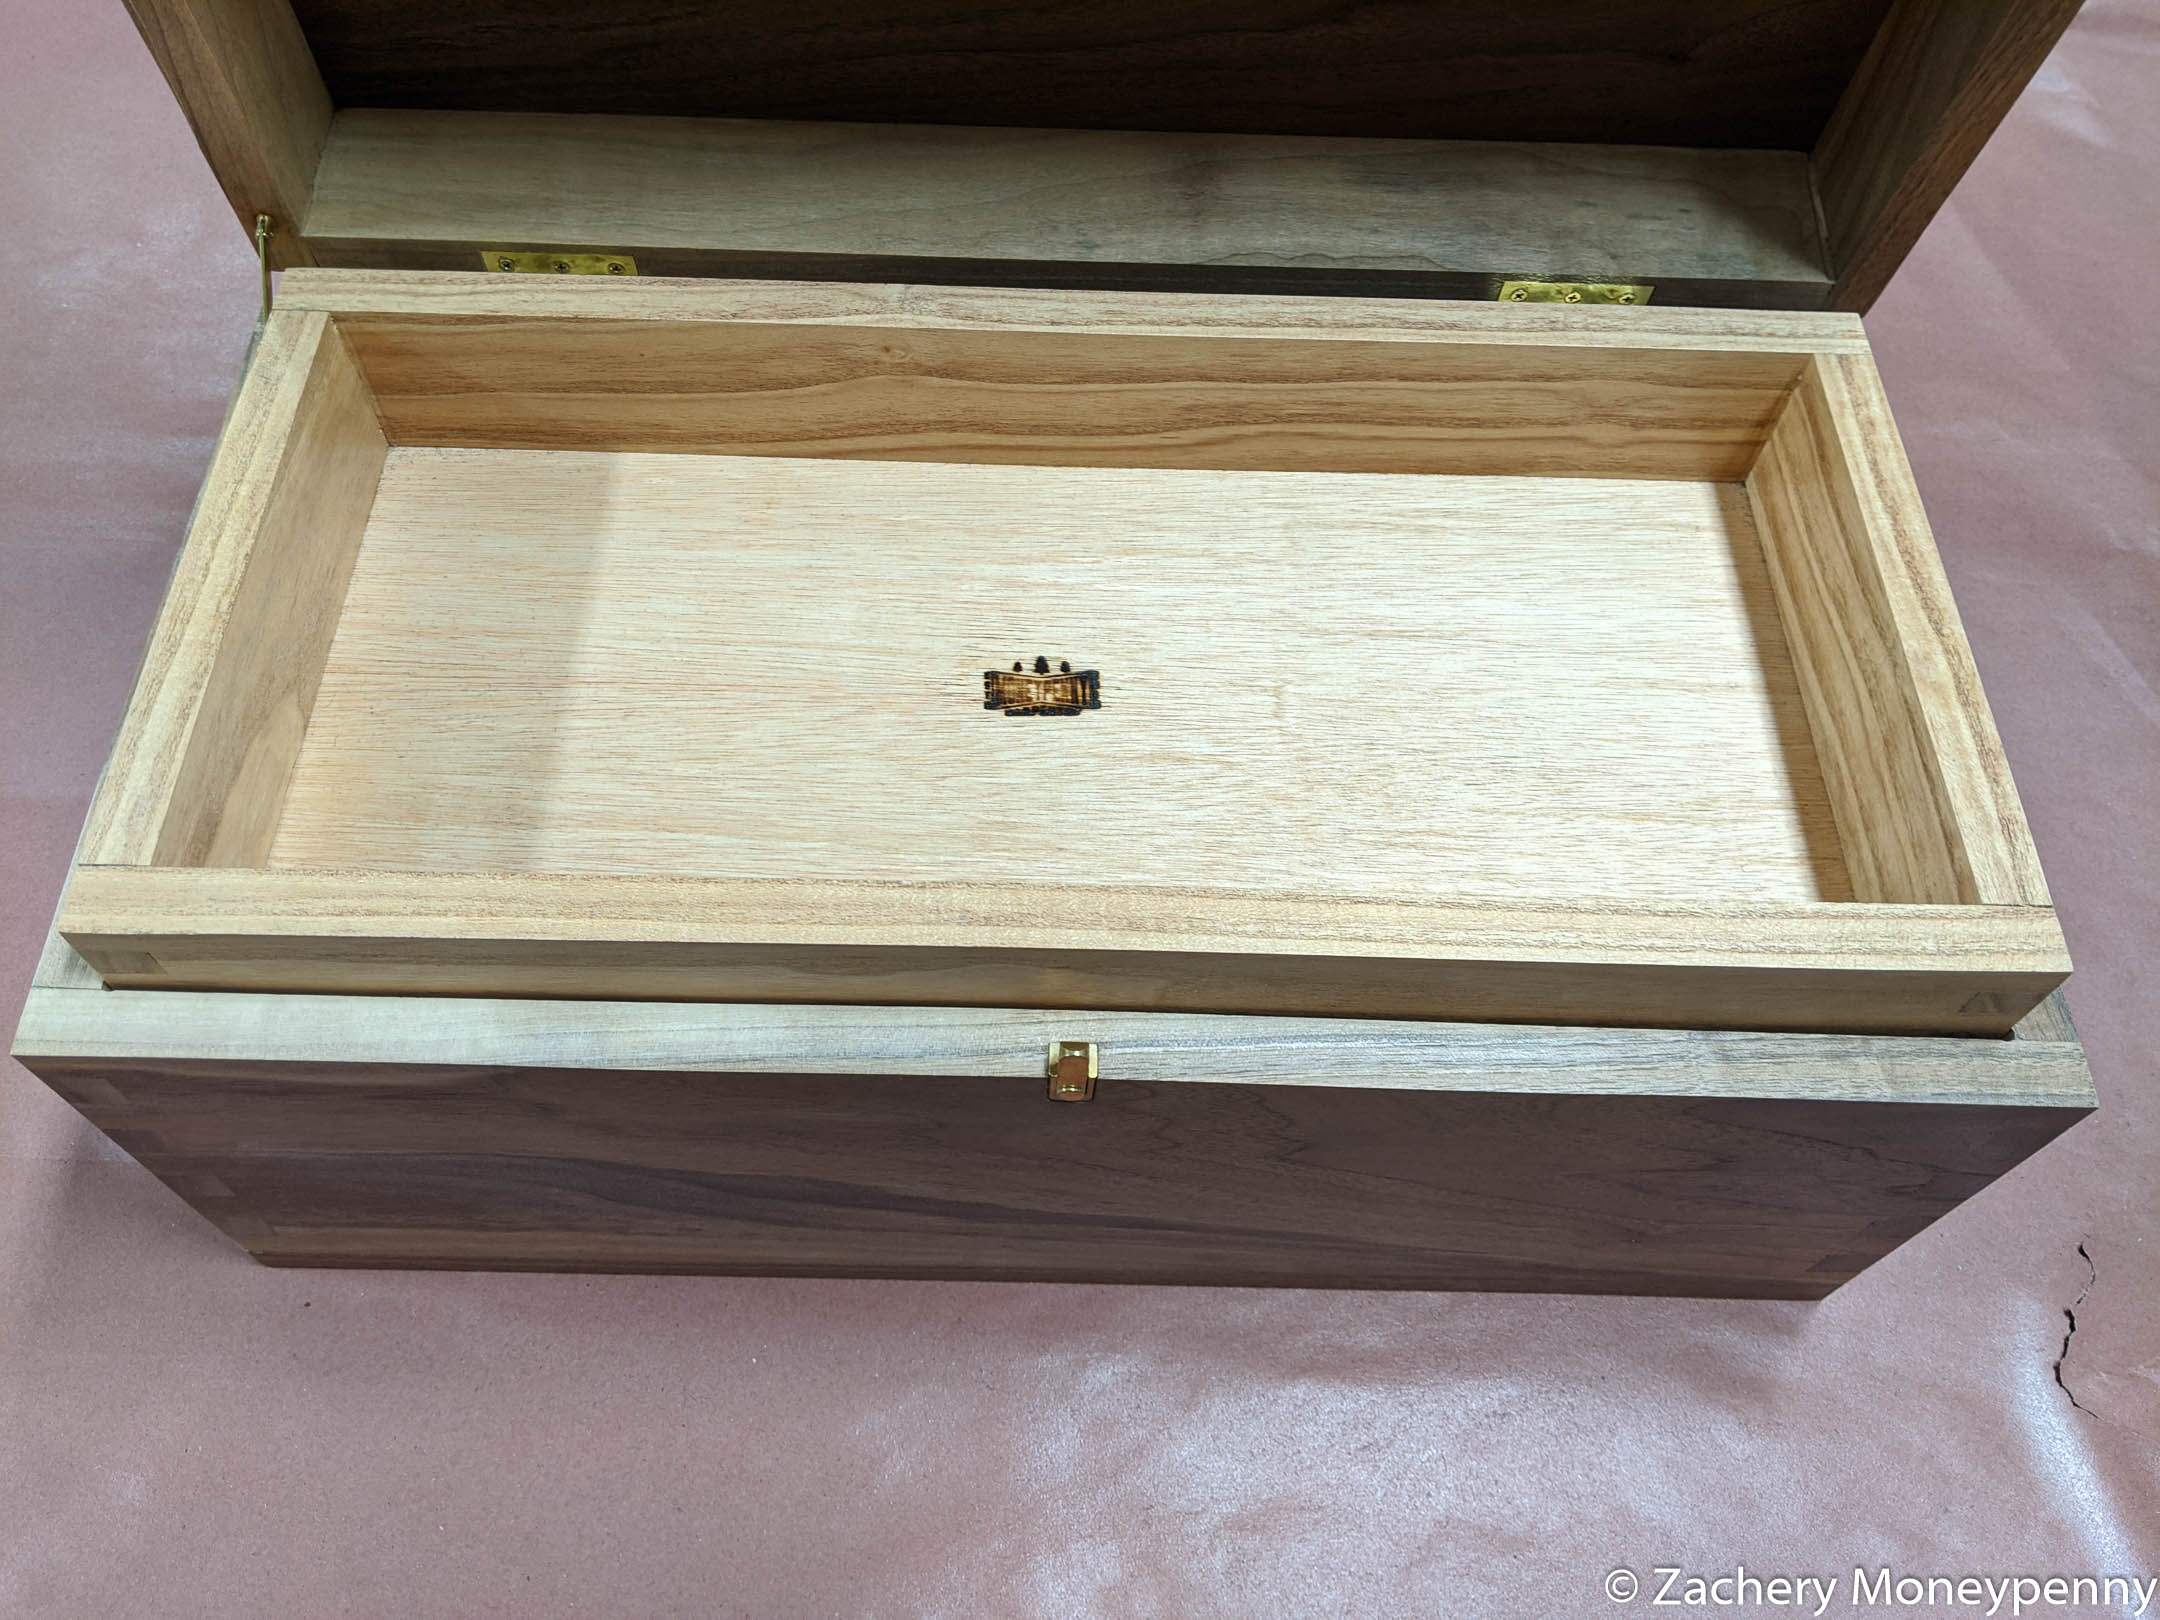
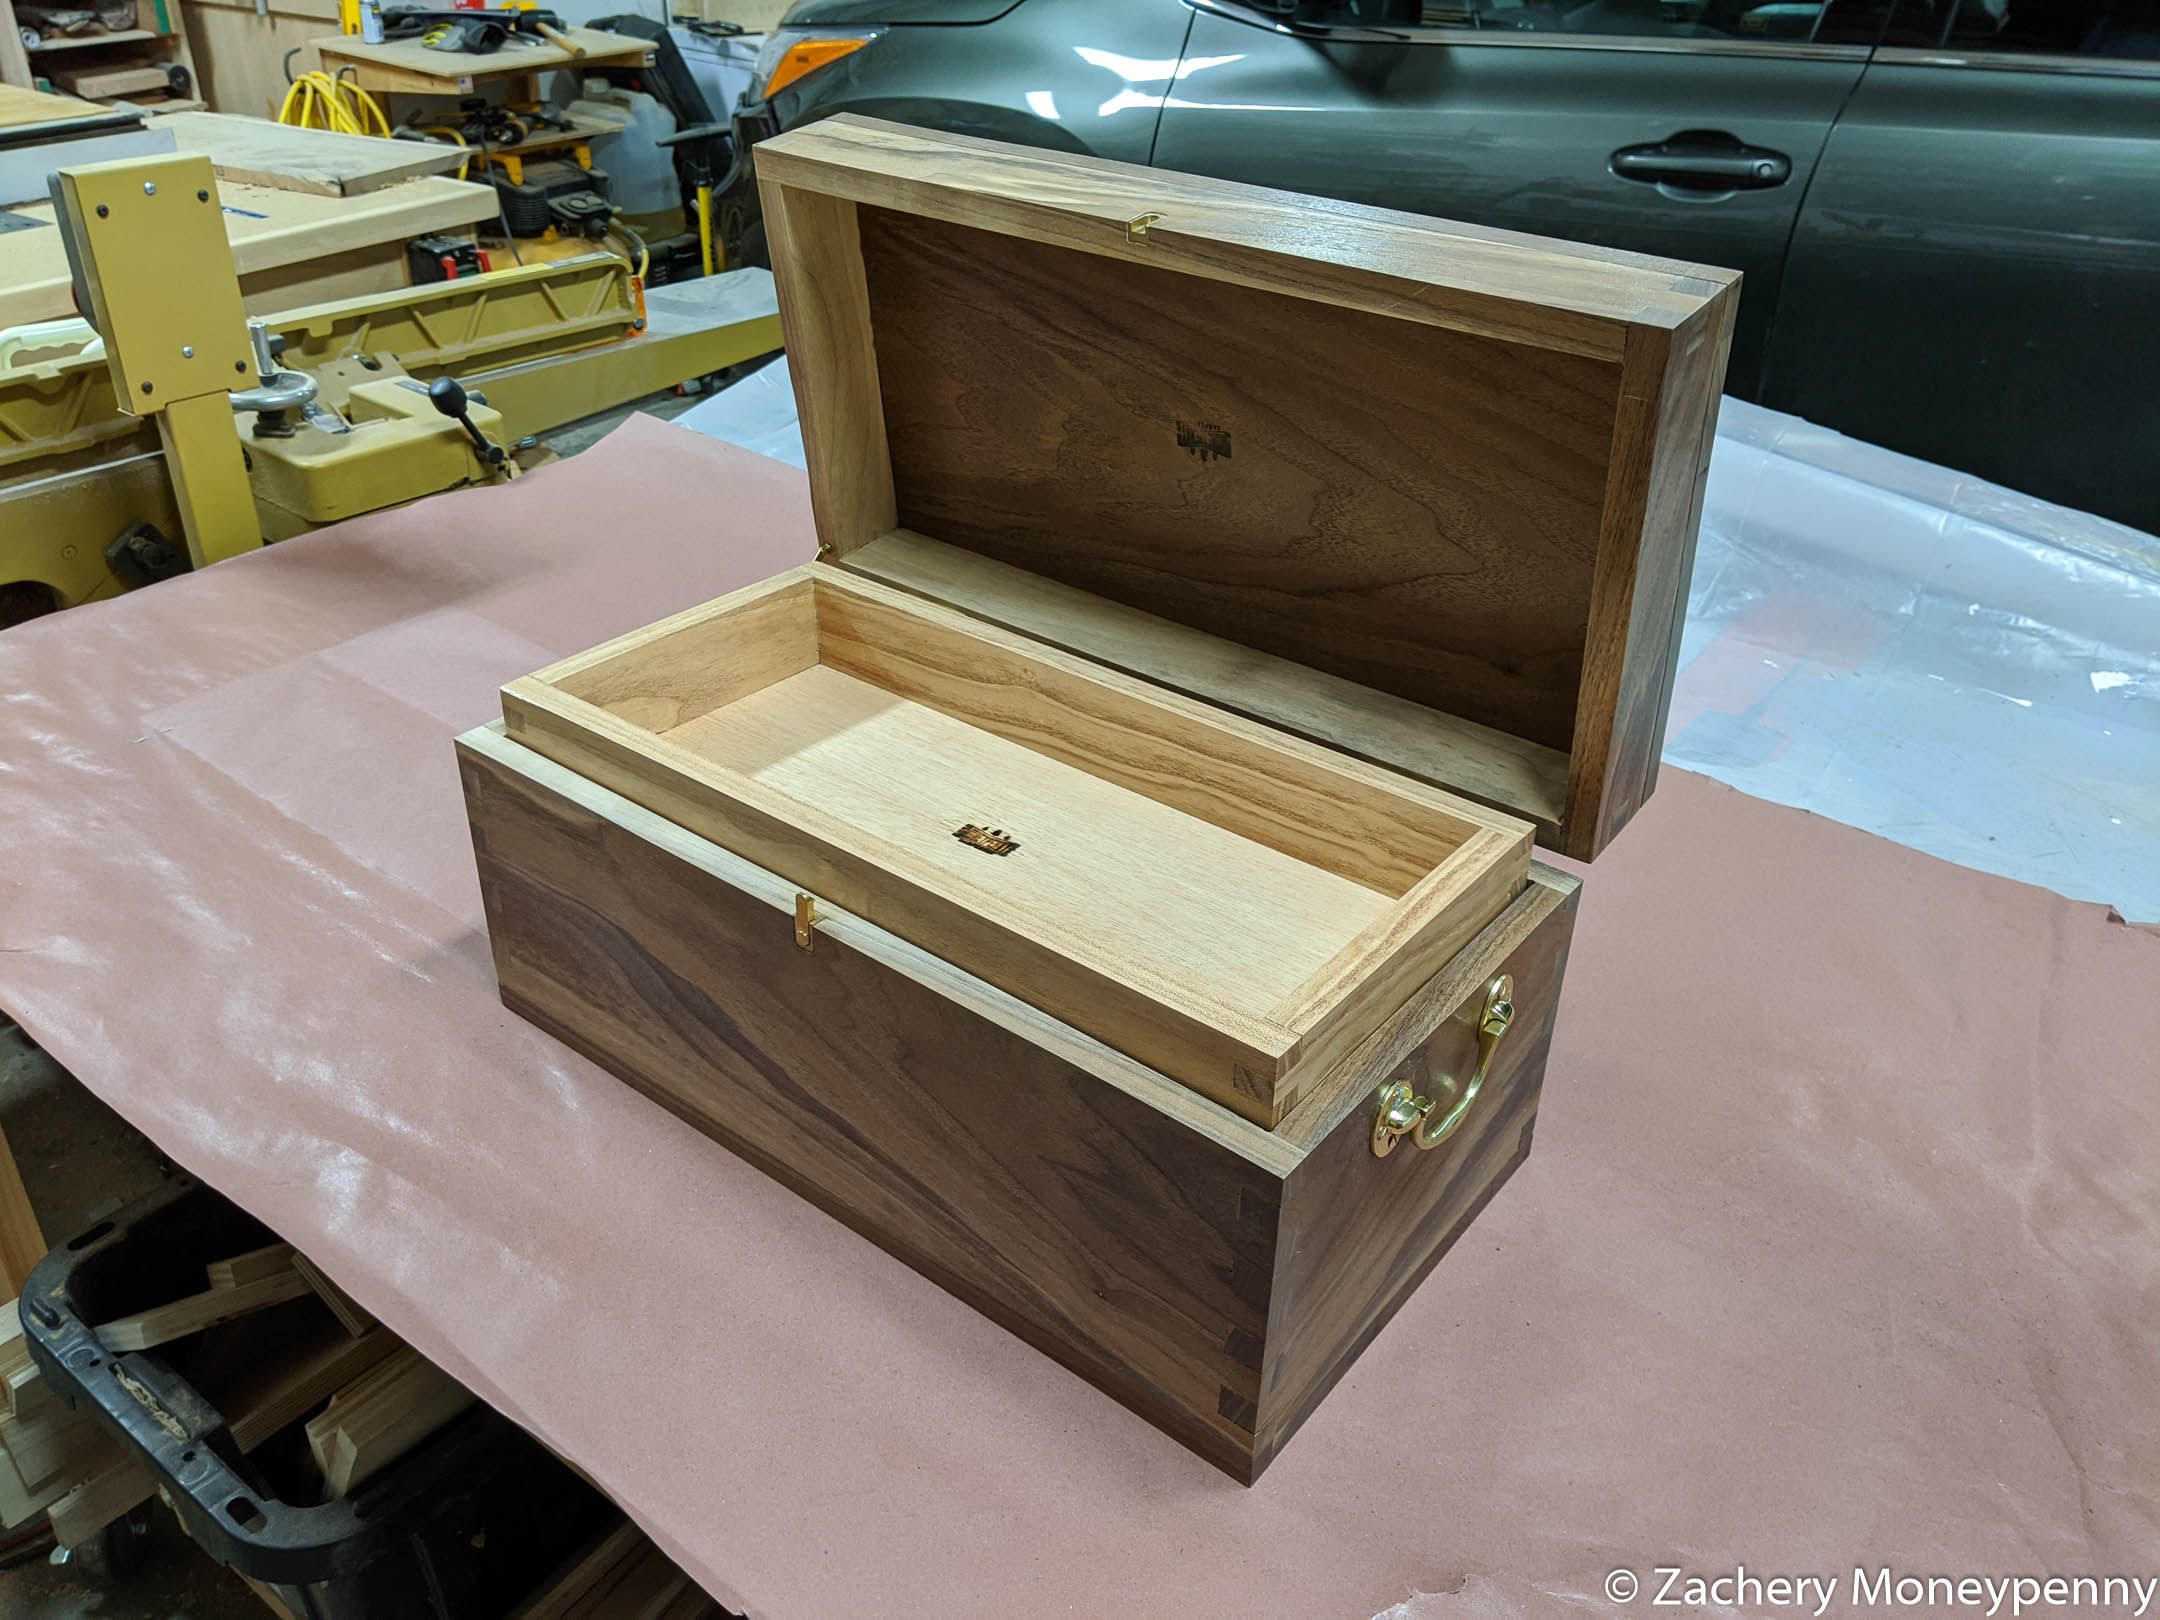
- Use a single brass latch in the middle of the box instead of two towards the outside.
- Use walnut for the box and locust wood for the removable tray.
Which brings me to the wood itself…
Wood
The piece of walnut I had was absolutely stunning, with tons of character and color that ran towards blues and purples. It was a full 10 inches wide, which would give me a lot of depth to work with for the box and long enough with no defects that could wrap the grain around the entire box.
The locust wood I also purchased at the Restore was something I’d never worked with before, but had what I thought was a complimentary warm tone to it that would look great as a tray inside the darker walnut box.
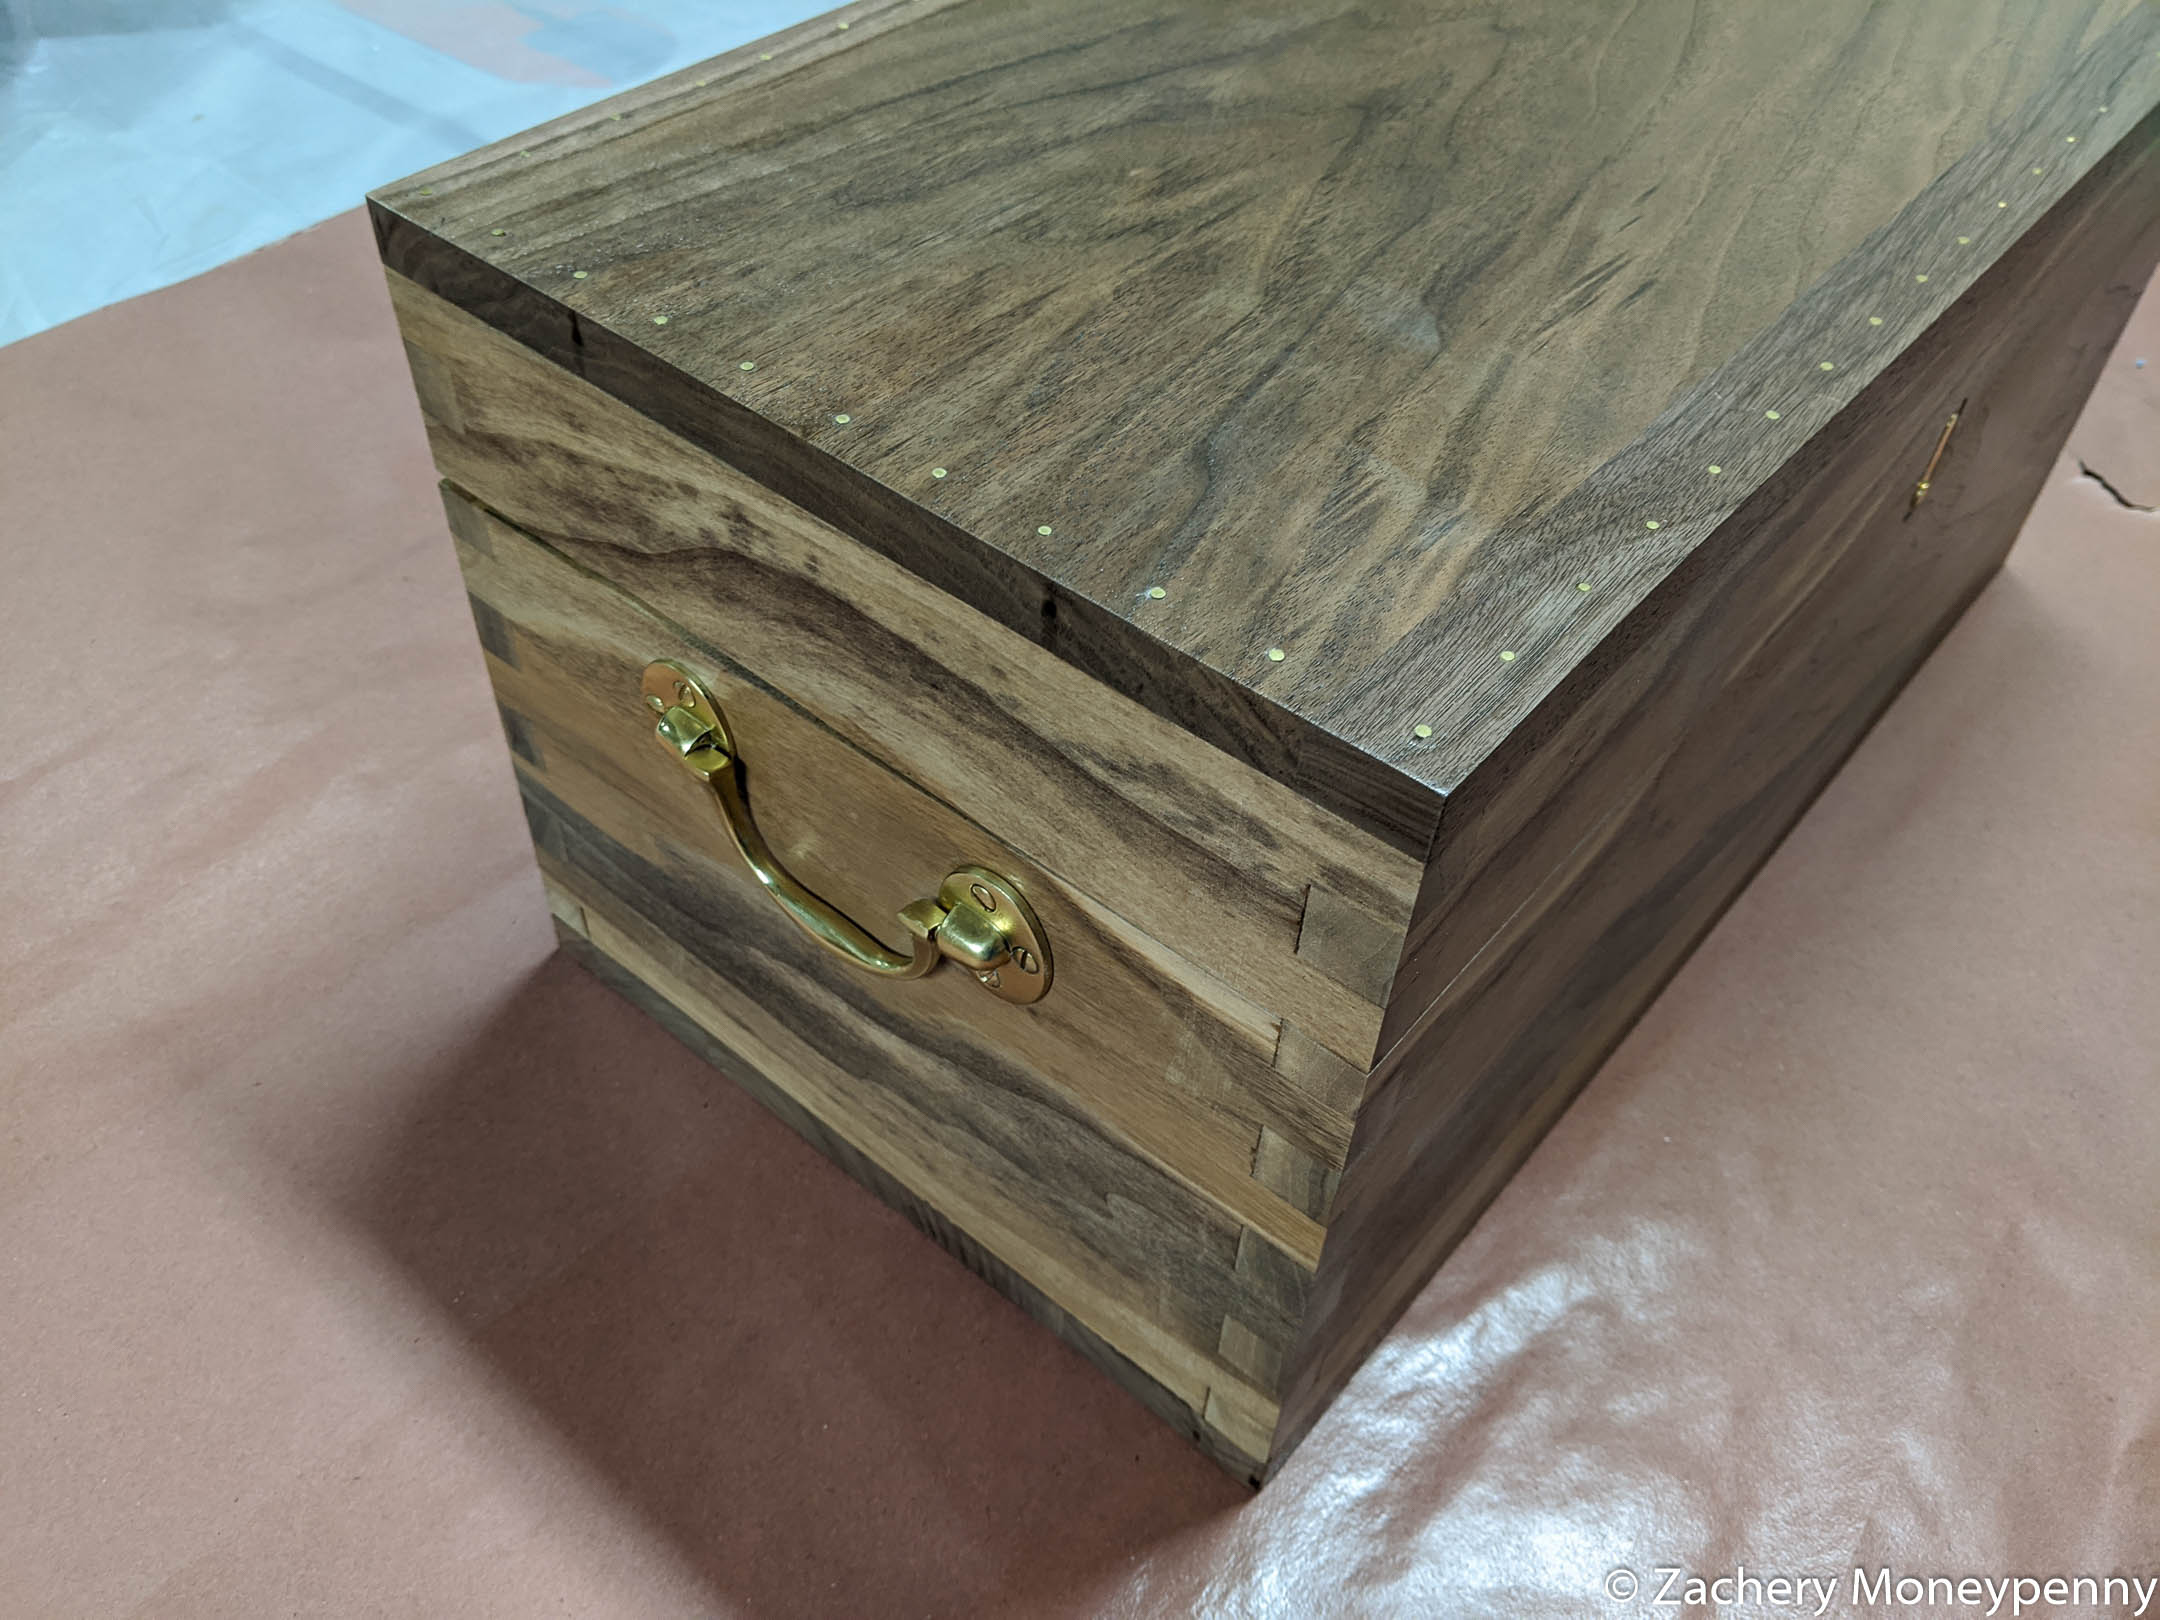
Box Joints
I’ve worked quite a bit with both router-cut and hand-cut dovetails for various projects, and it would normally be my go-to joint for a box like this. However, lately I’ve been intrigued to try making a box joint jig on the table saw and seeing what kind of result I could get there. I learned an important lesson.
I really, really, really need to go all the way with practice pieces when I make a jig like this. In this case I messed up because I didn’t run test pieces at the same thickness as my actual wood. I made a half inch box joint jig and went through the whole process of cutting and adjusting until I had test pieces I liked. Then I threw away the jig (because I felt I understood the design of it), made a new one for the 3/4” material I was using for the box, and did a cursory test on 3/4” plywood that was not the exact same thickness as the walnut. This meant that my actual cuts on the walnut were off in the wrong direction (joint too tight to fit together) and then I had to sloppily come back with chisels and mallet to widen each and every finger to get an approximately good fit! Infinite sigh.
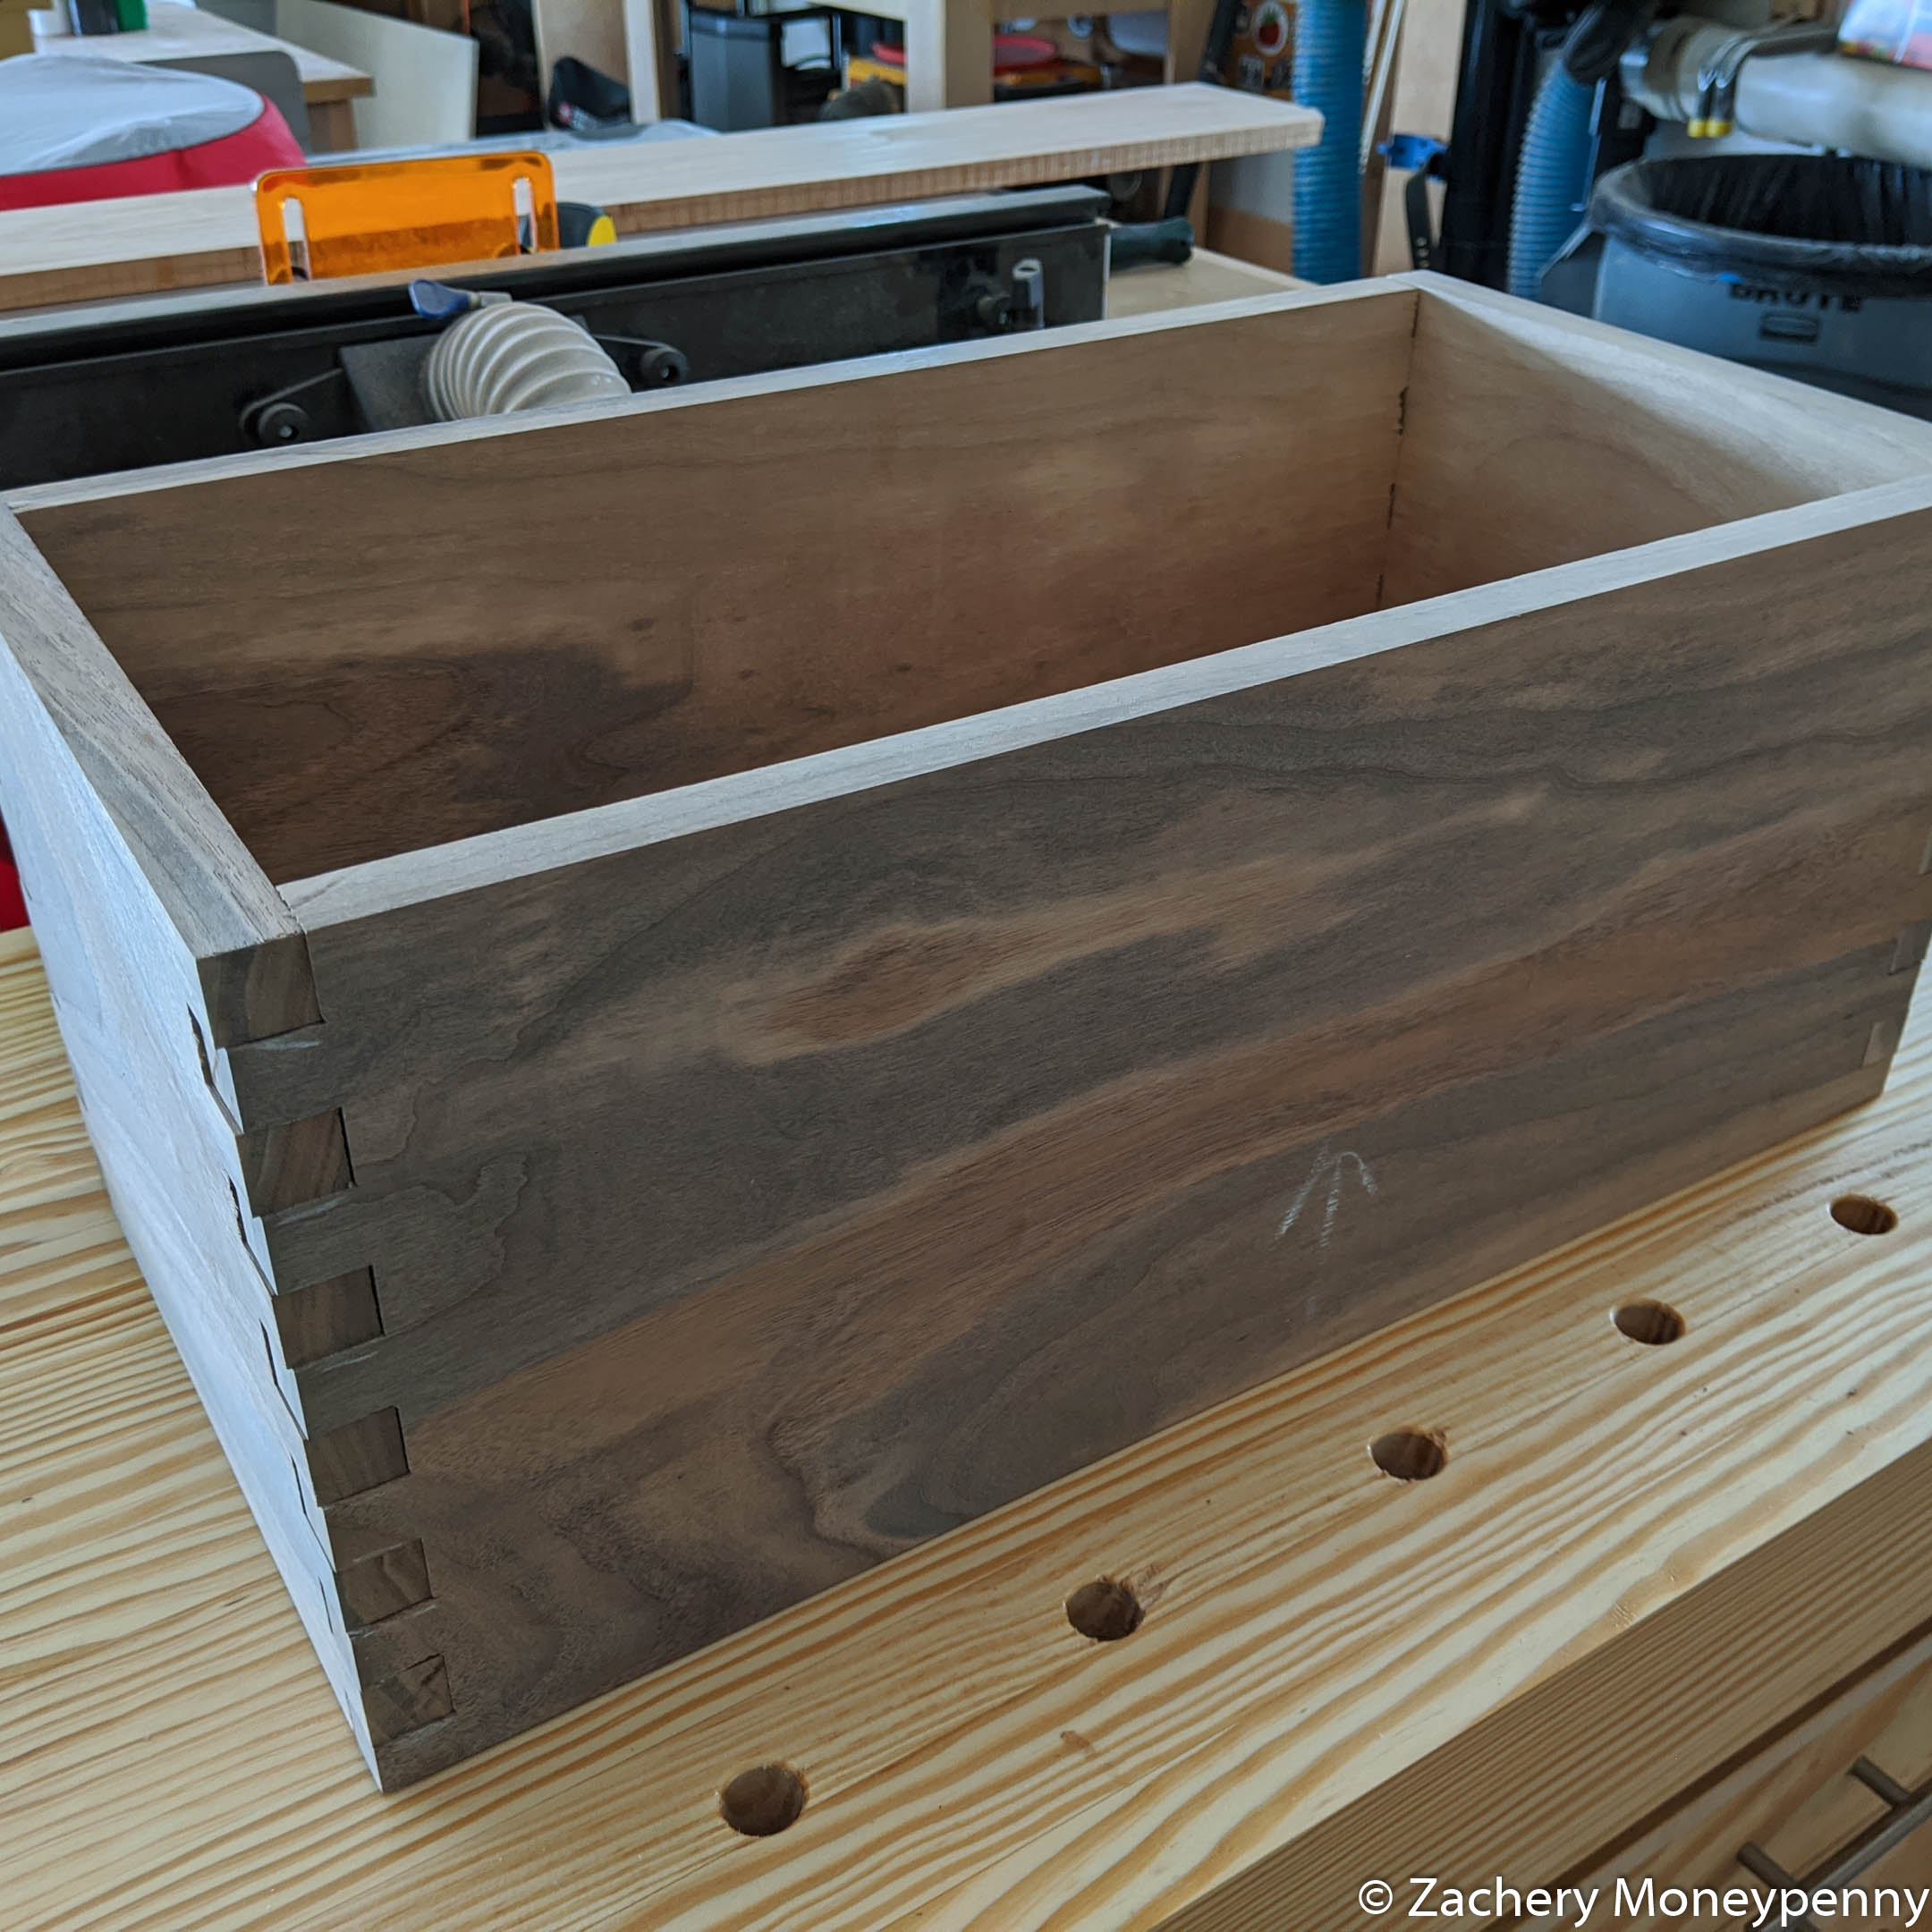
When I went back to make 1/2” joints on the tray sides I had learned my lesson and spent much more time tuning and testing the jig setup. In the end those joints turned out perfectly, only 1/16” to 1/8” proud at the joint, whereas the 3/4” joints on the walnut weren’t even flush.

Ultimately the walnut box took a hell of a lot of sanding, hide glue + sawdust and more sanding (and then more sanding) to get looking good.
Top and Bottom
I was not able to get a matching top and bottom out of the single piece I used for the sides of the box. I had to use other walnut I had lying around and glue them up into panels. Unfortunately, the walnut I had was far from a color match and so I simply leaned into the fact that the top and bottom are distinct from the sides.
I did take it as a challenge to get my Dewalt planer working again just so I could plane the panels to final thickness once I’d glued them together. It worked, and then I finished off with my smoothing plane. I tried using my card scraper but it needs to be burnished and doesn’t do much smoothing at the moment.
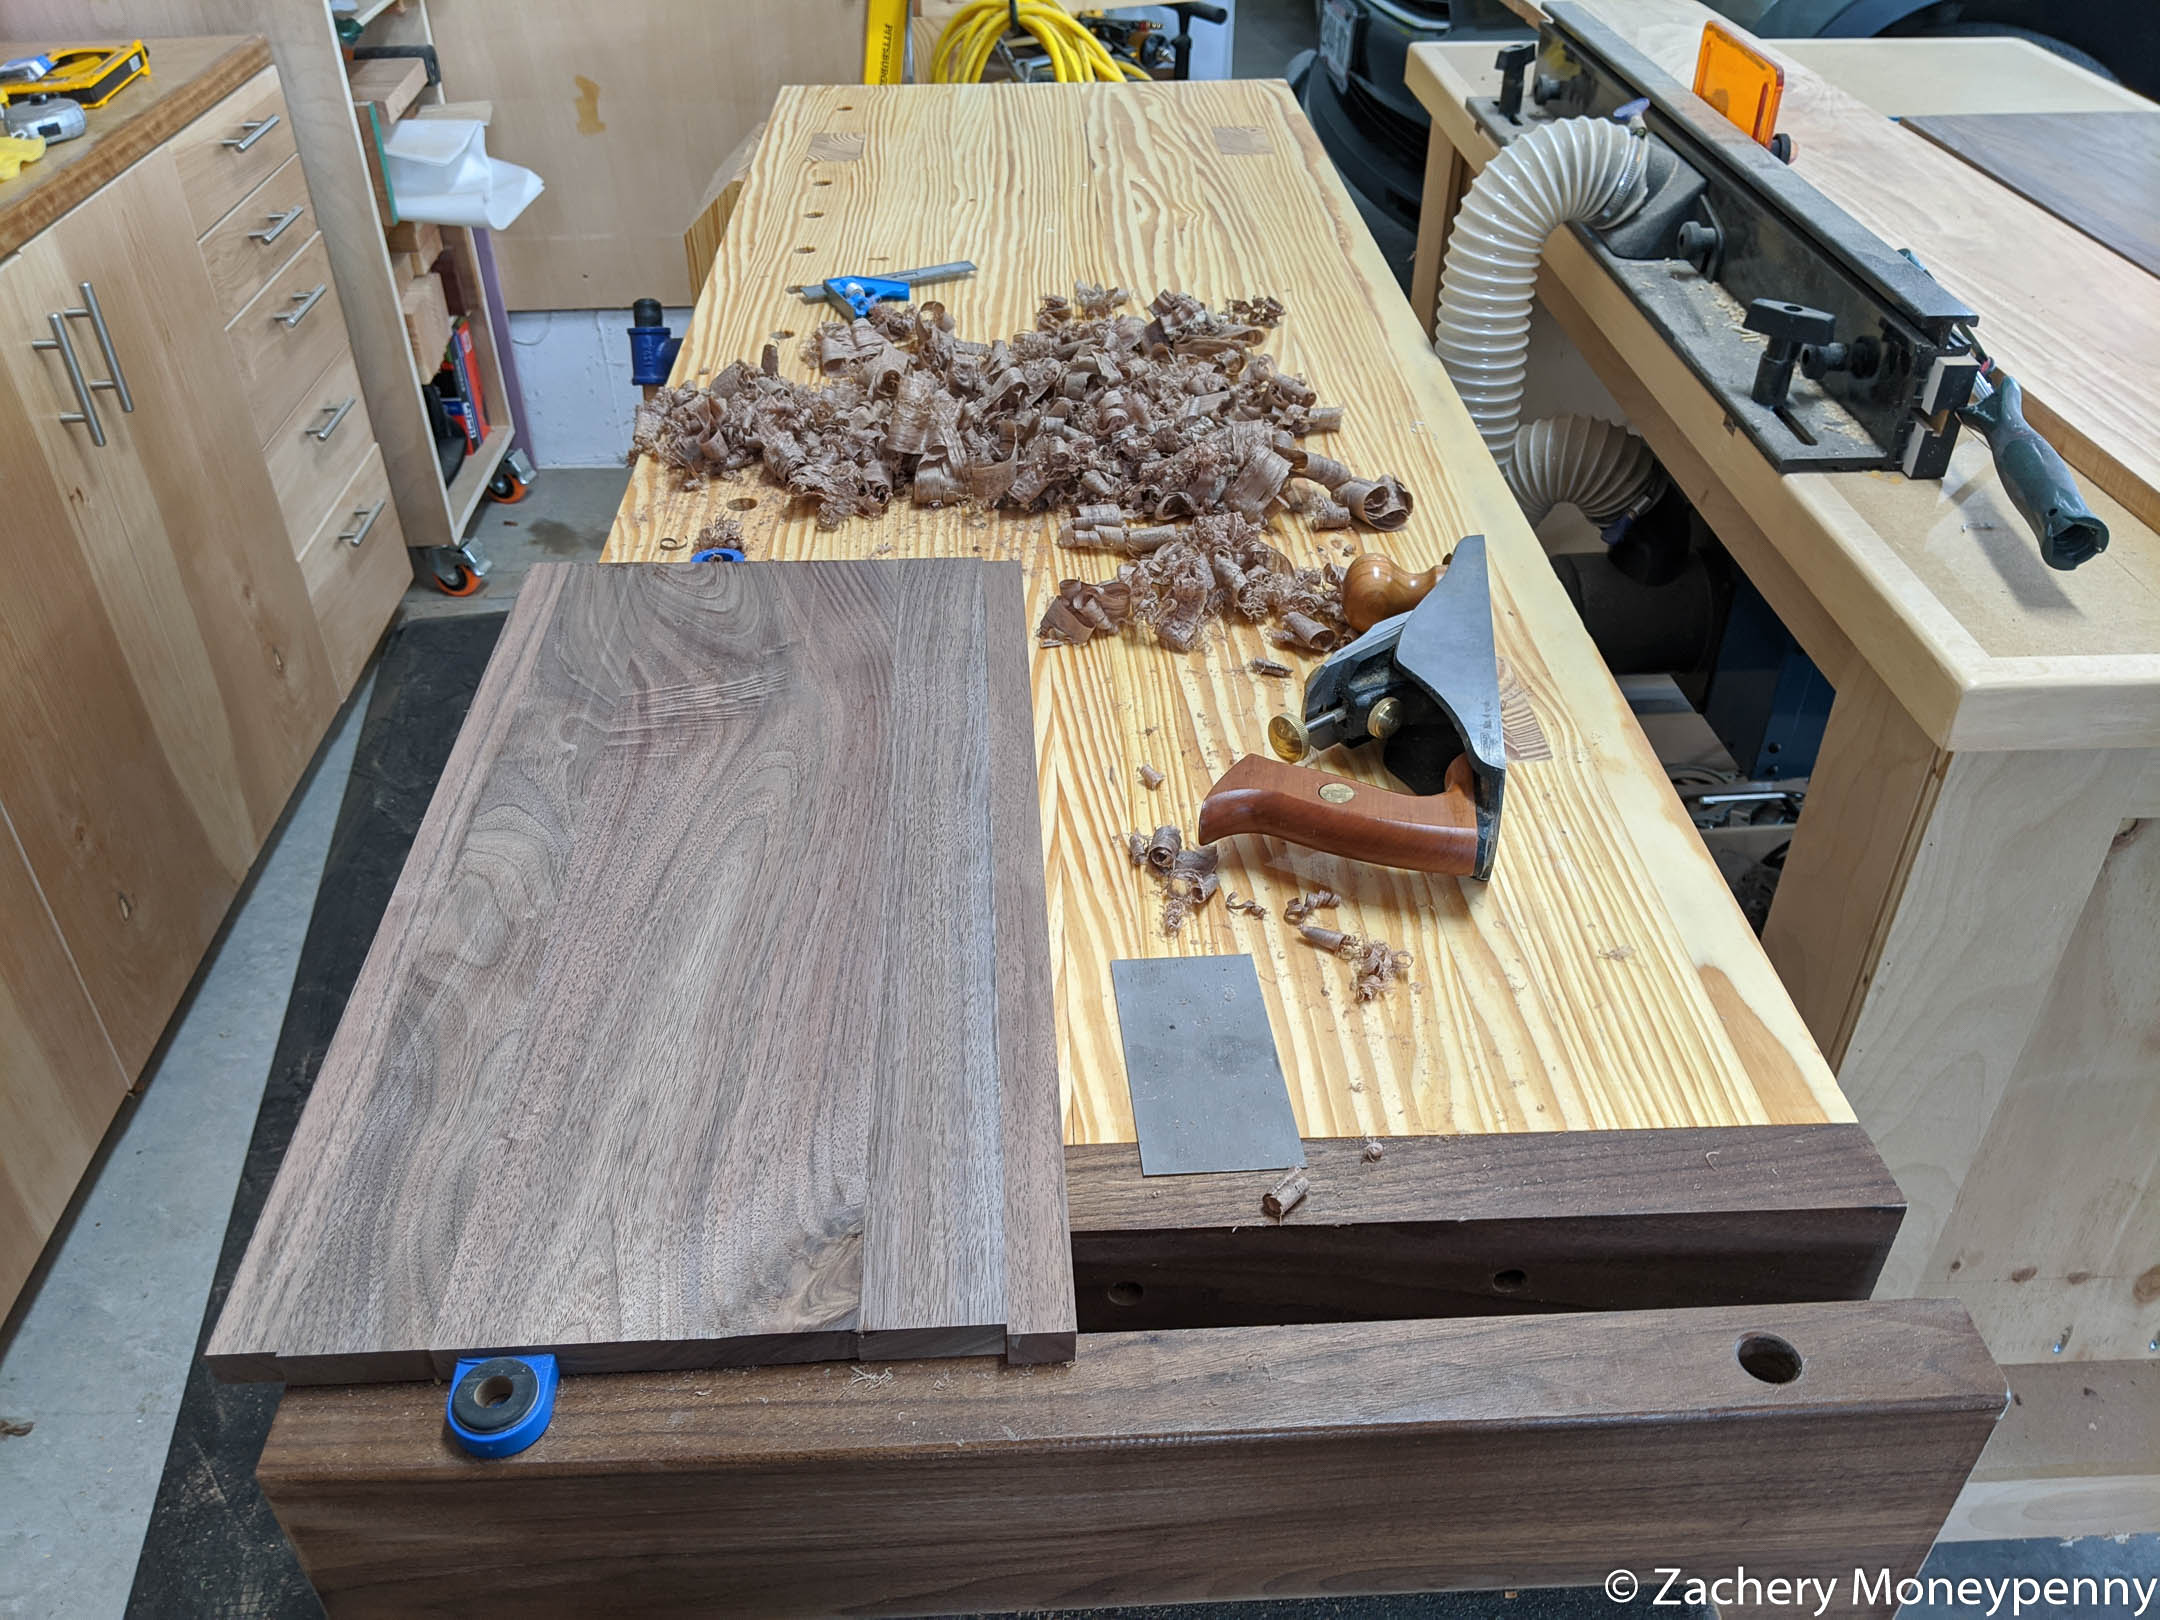
After sizing the top and bottom panels to about 1/8” larger than the box I glued them to the top and bottom, and then once dry I used the flush trim bit at the router table to make them flush with the walls of the box.
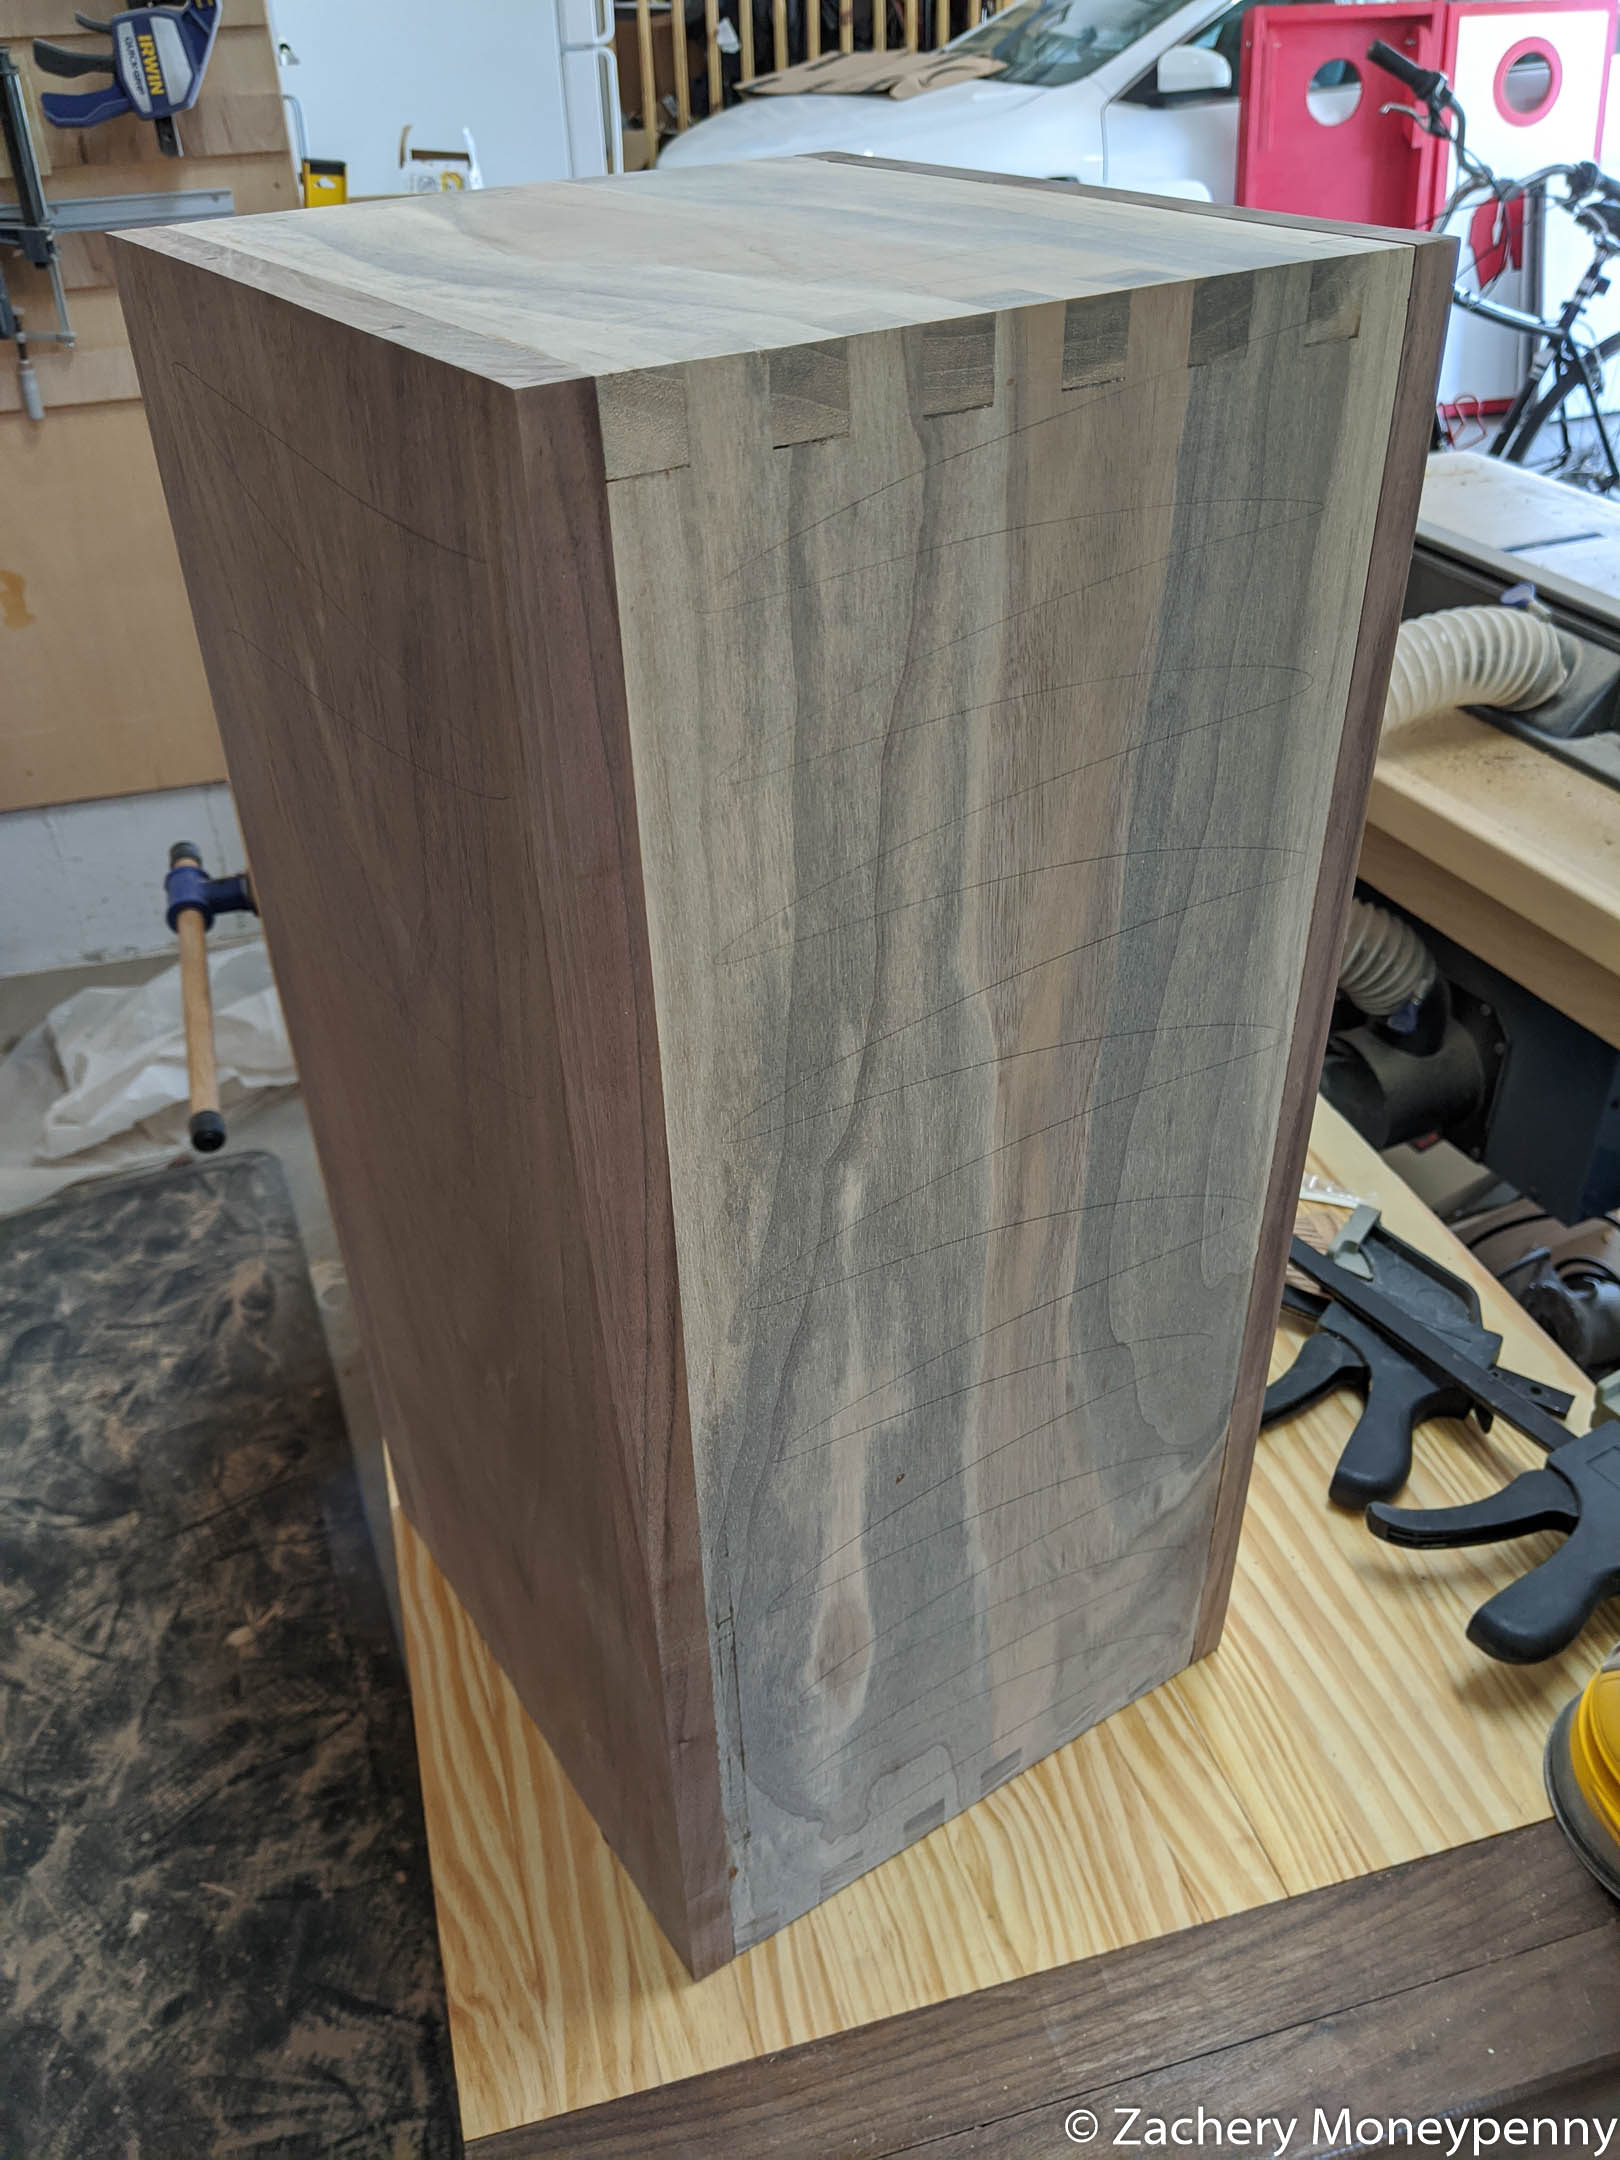
Sanding
I am embarrassed to admit this but I will: I was sanding my woodworking projects all wrong this whole time. I recently watched a Two Minute Tuesday video by Jonathon Katz-Moses that I wanted to try out on this project.
I was determined to use the pencil lines to know when I had evenly sanded the piece, and holy shit it took a long time but holy shit did I get a great result! I went up from 80 to 100 to 150 to 180, and then finished at 220. Alongside the hide glue + sawdust for the imperfections in the joint I ended up with fantastic corners. Well… fantastic for how they started, at least.

Tray Construction
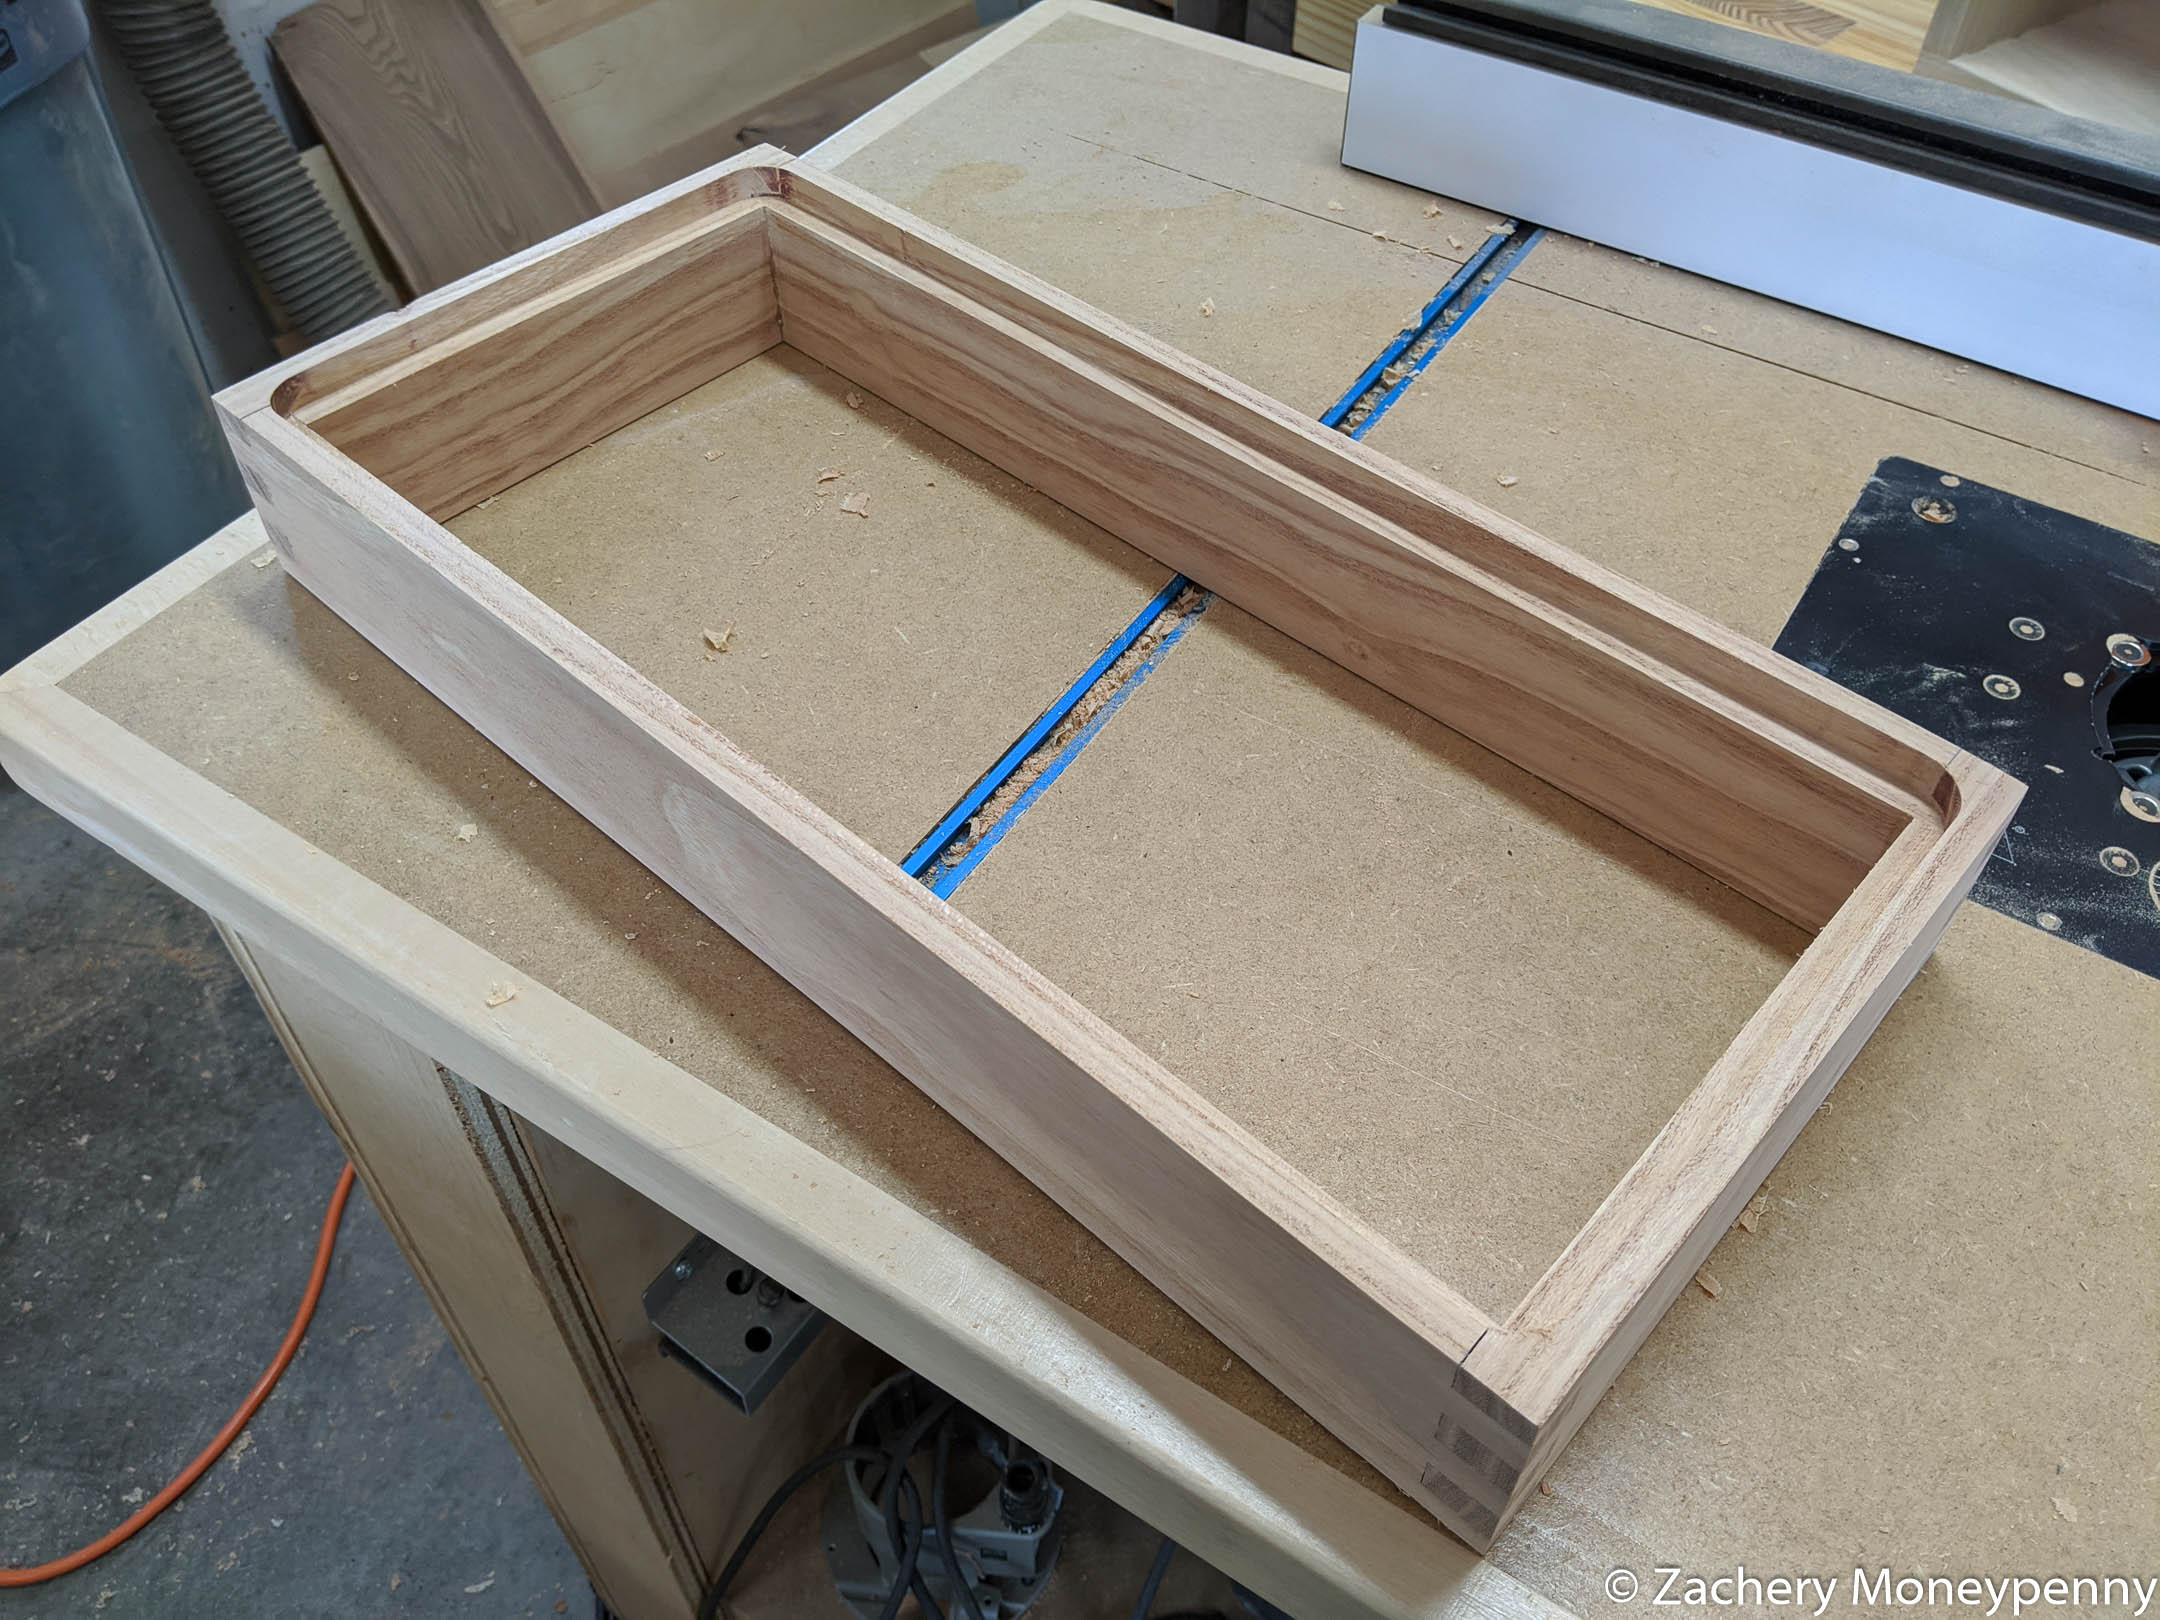
I ended up using the router table to cut a rabbet into the bottom so that I could set the bottom of the tray in flush with the bottom of the sides. I was using 1/2” plywood I had, and while this was the first time I’d made a tray bottom like this I think it worked out really well!
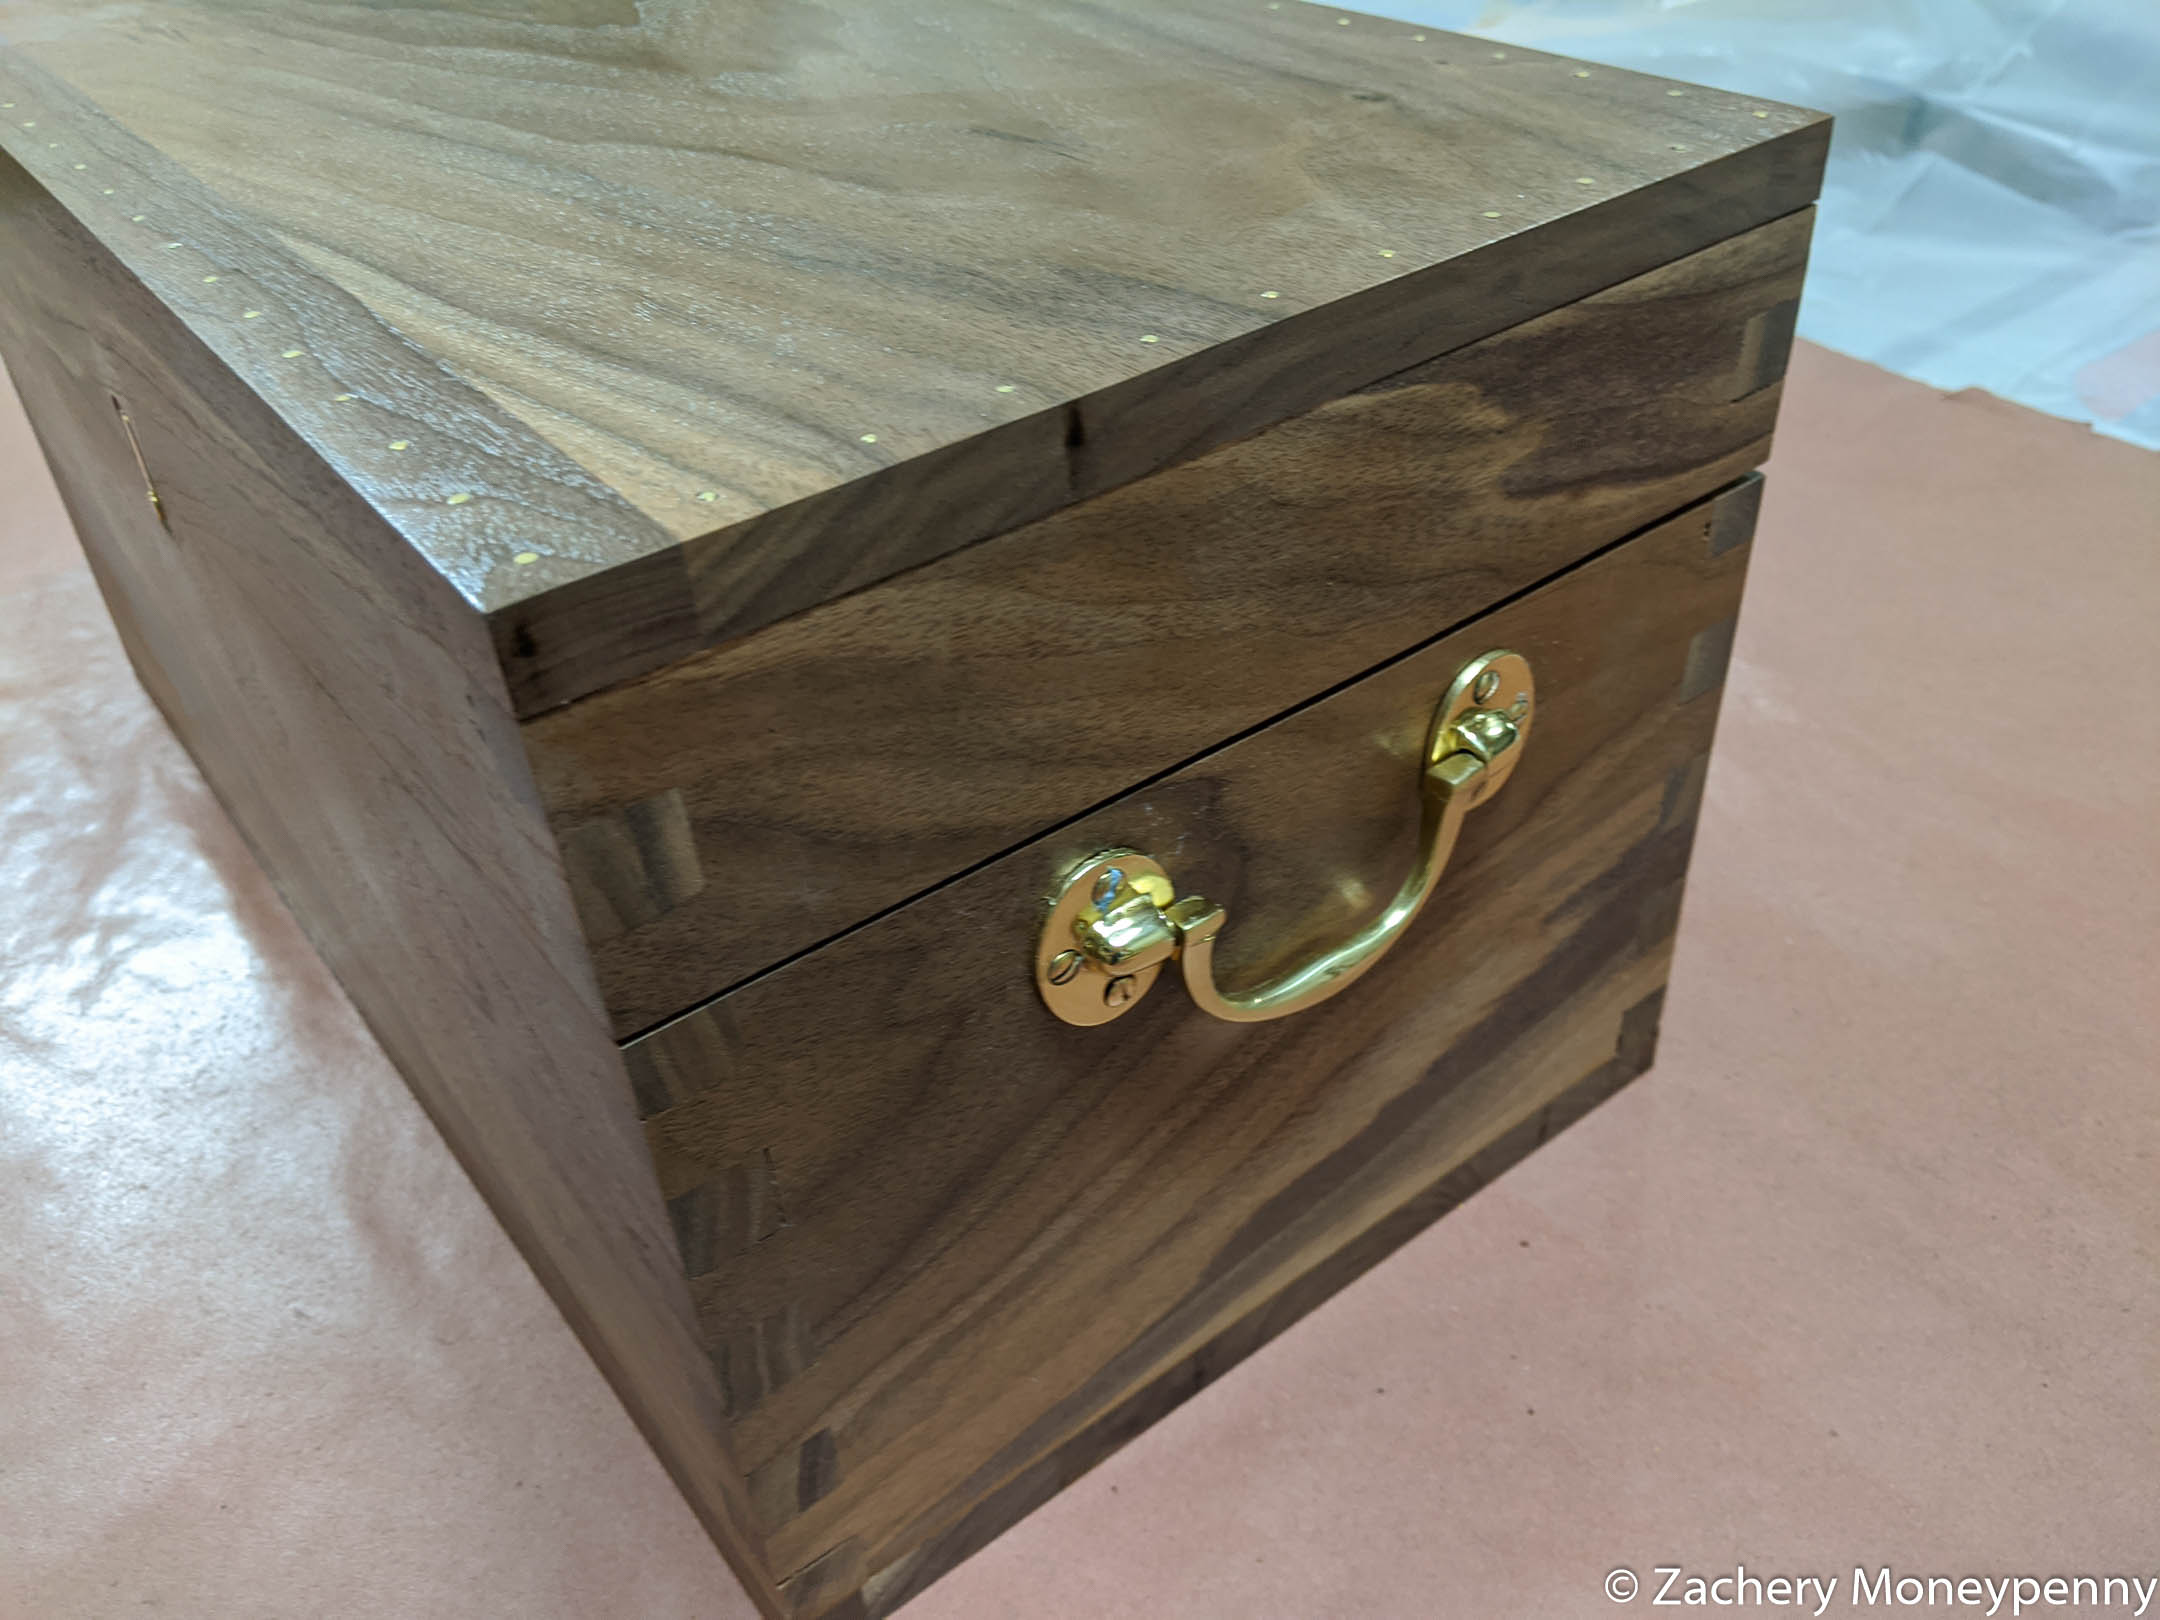
Cutting the Top
Once the whole box was glued together, the top and bottom flushed and the whole shebang sanded it was time to cut the box with the table saw to create the top.
It did not go to plan.
I’ve watched half a dozen videos of people doing this part, and it looks easy but I ended up getting a pinch on the blade doing one of the short sides and it gouged the wood. After completing the cut I had to level and sand the now-exposed edges of the sides of the box, which took an extra long time.
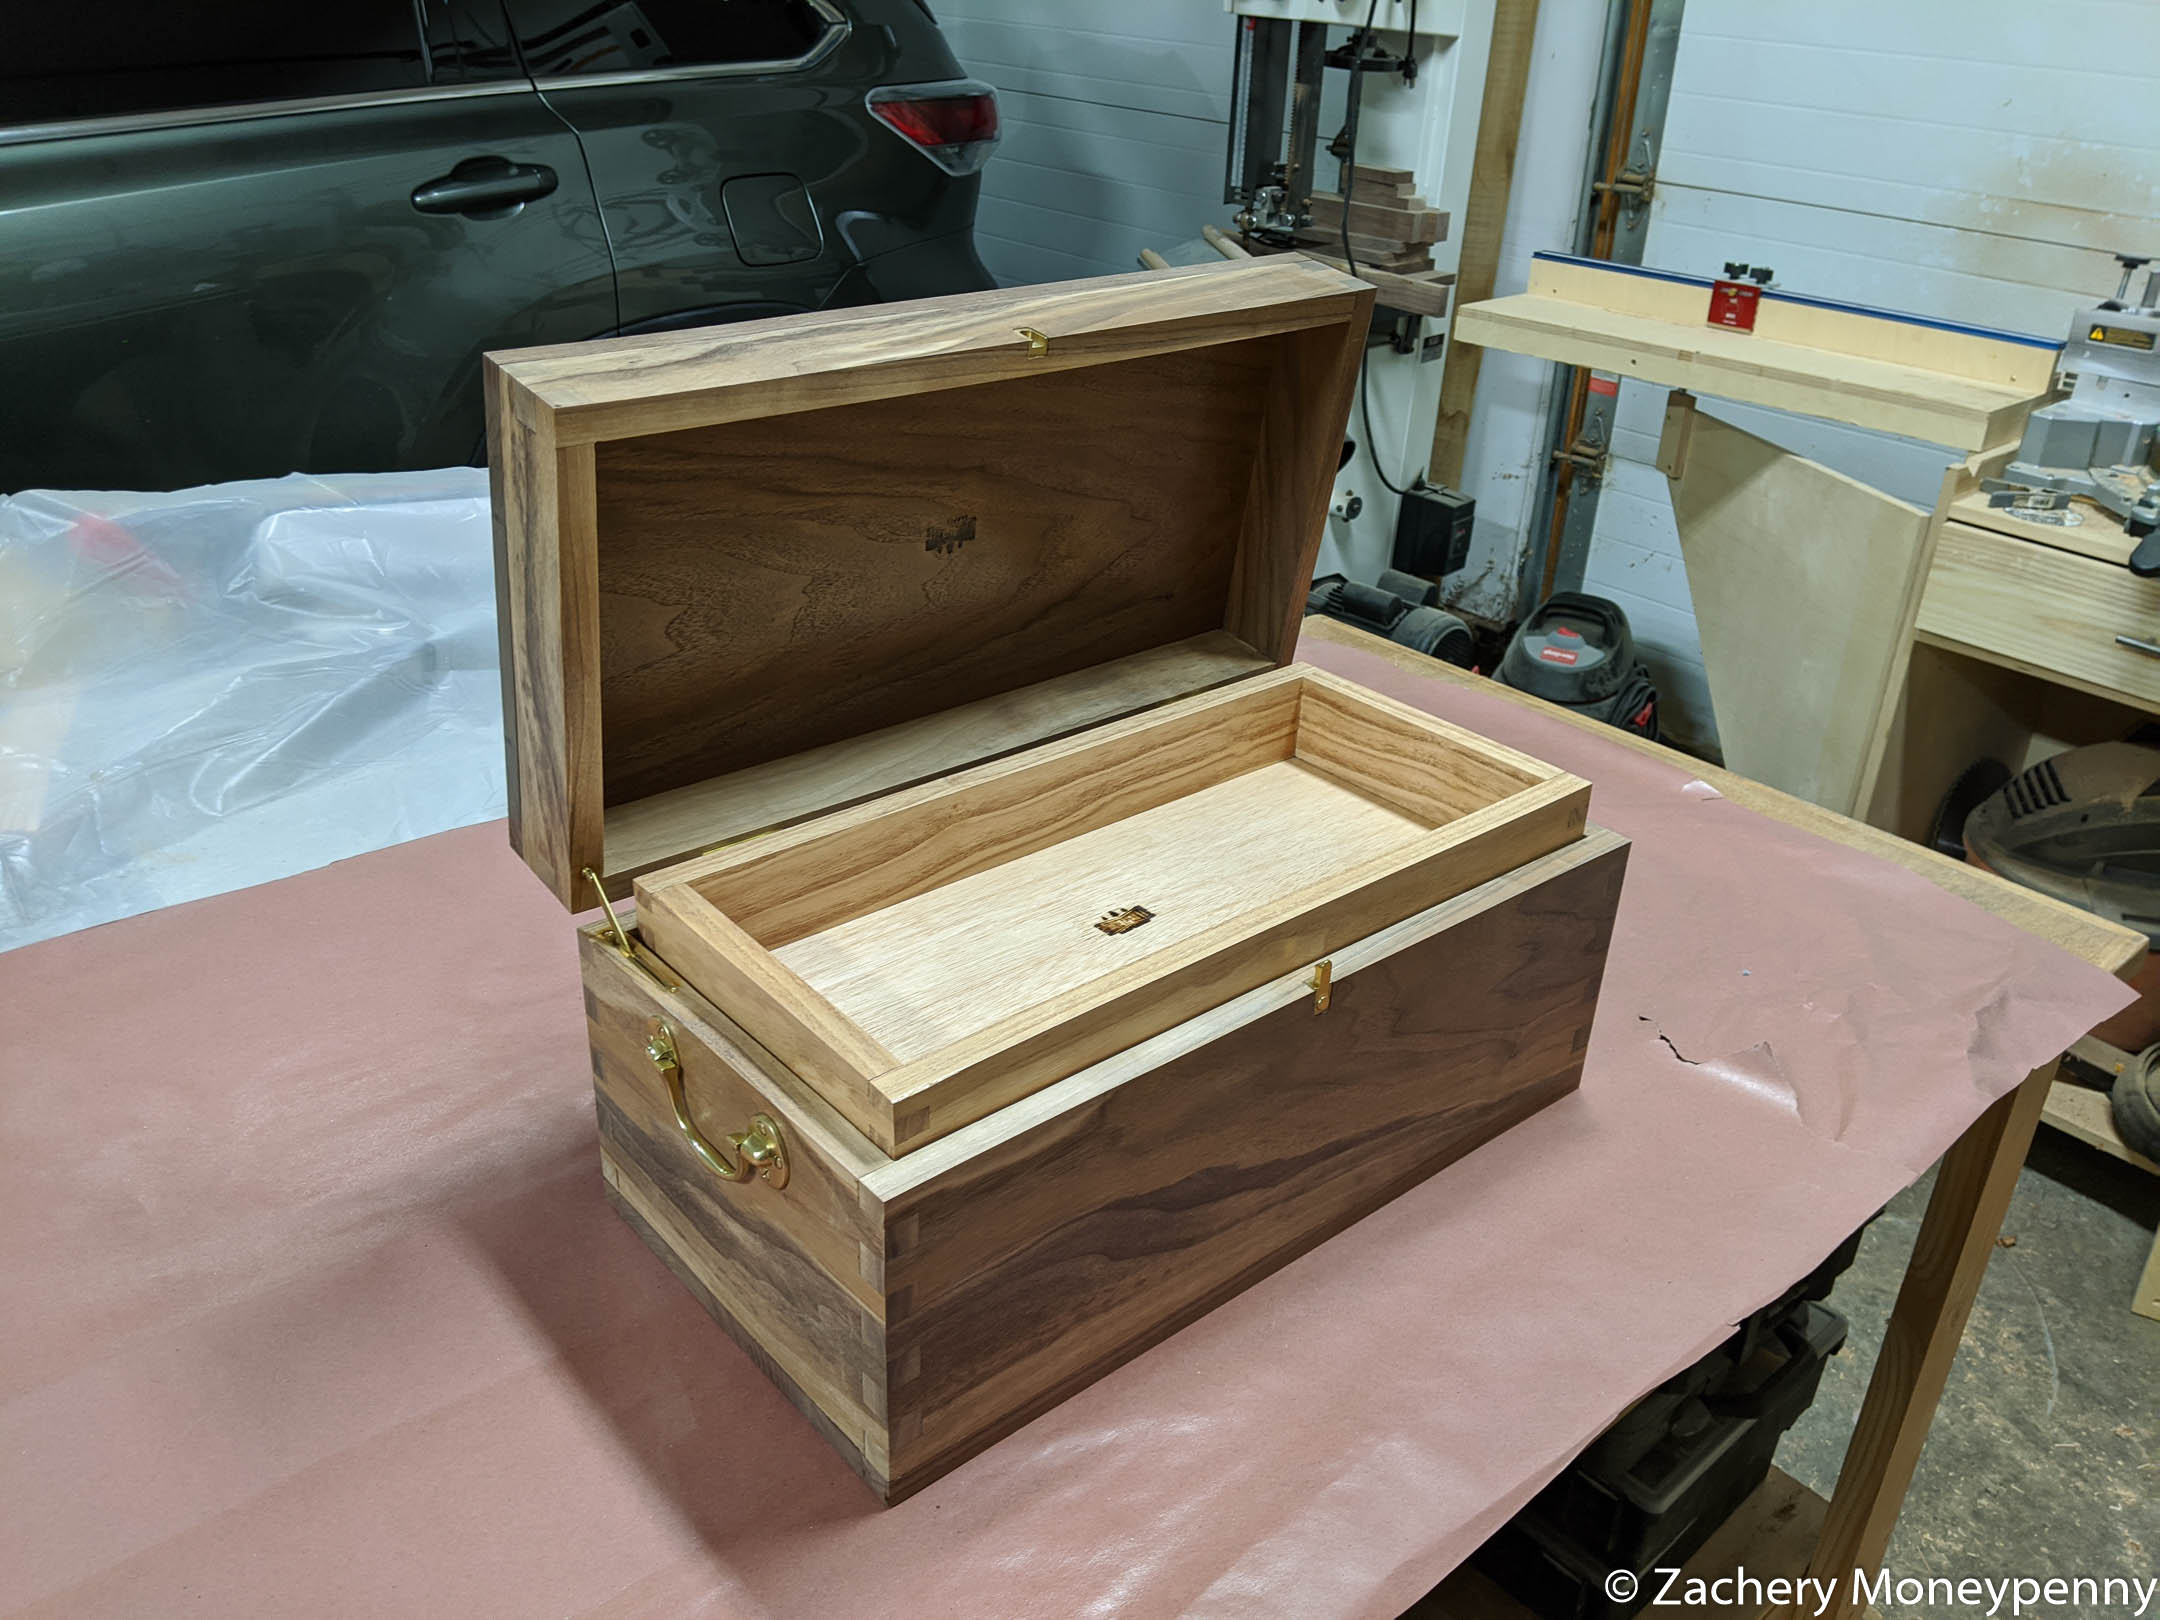
Brass Hardware
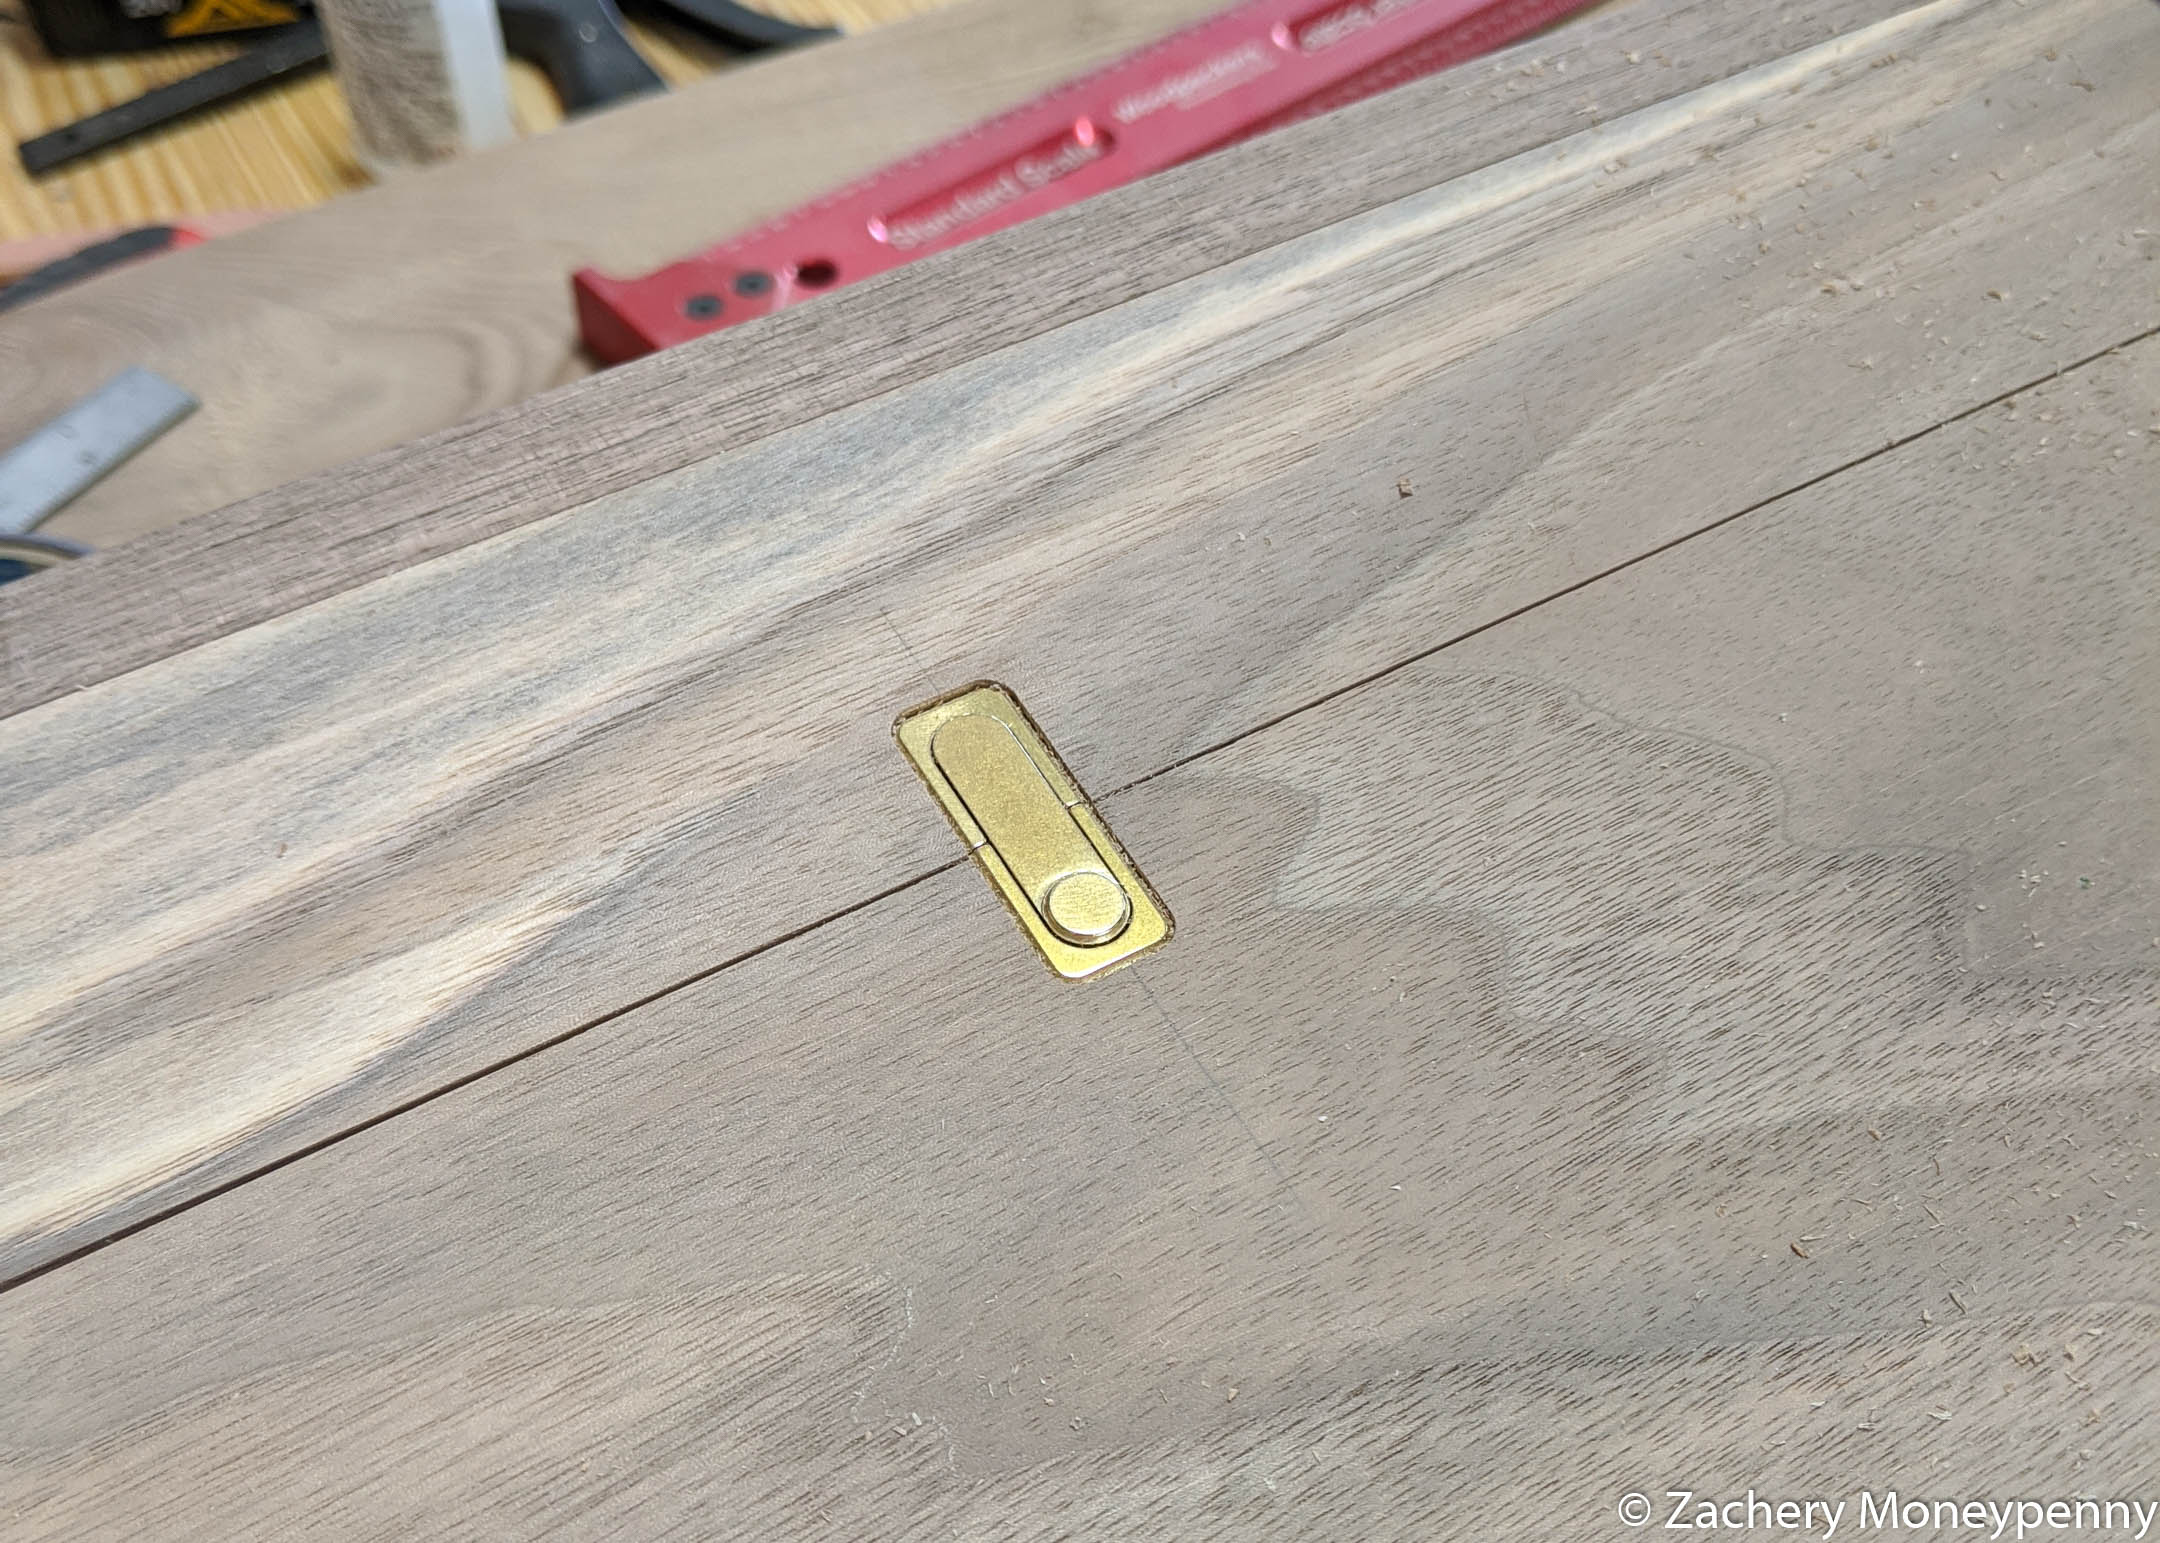
There were three different pieces of hardware that I needed to create mortises for: the hinges, the lid stay and the latch.
The hinges were pretty straightforward. I cleared out most of the waste with my palm router and a 1/4” spiral bit, and then cut to my lines with my chisels. I made sure to use some screw wax to try to keep the brass screws from snapping.
For the lid stay and latch I made some custom jigs using the time-honored Wood Whisperer technique:
The lid stay jig was designed to take a 1/2” bushing and allowed me to center the jig on the sidewall while I made a single line 1/4” mortise.

The latch jig didn’t allow for one dimensional movement, but it was simple nonetheless.
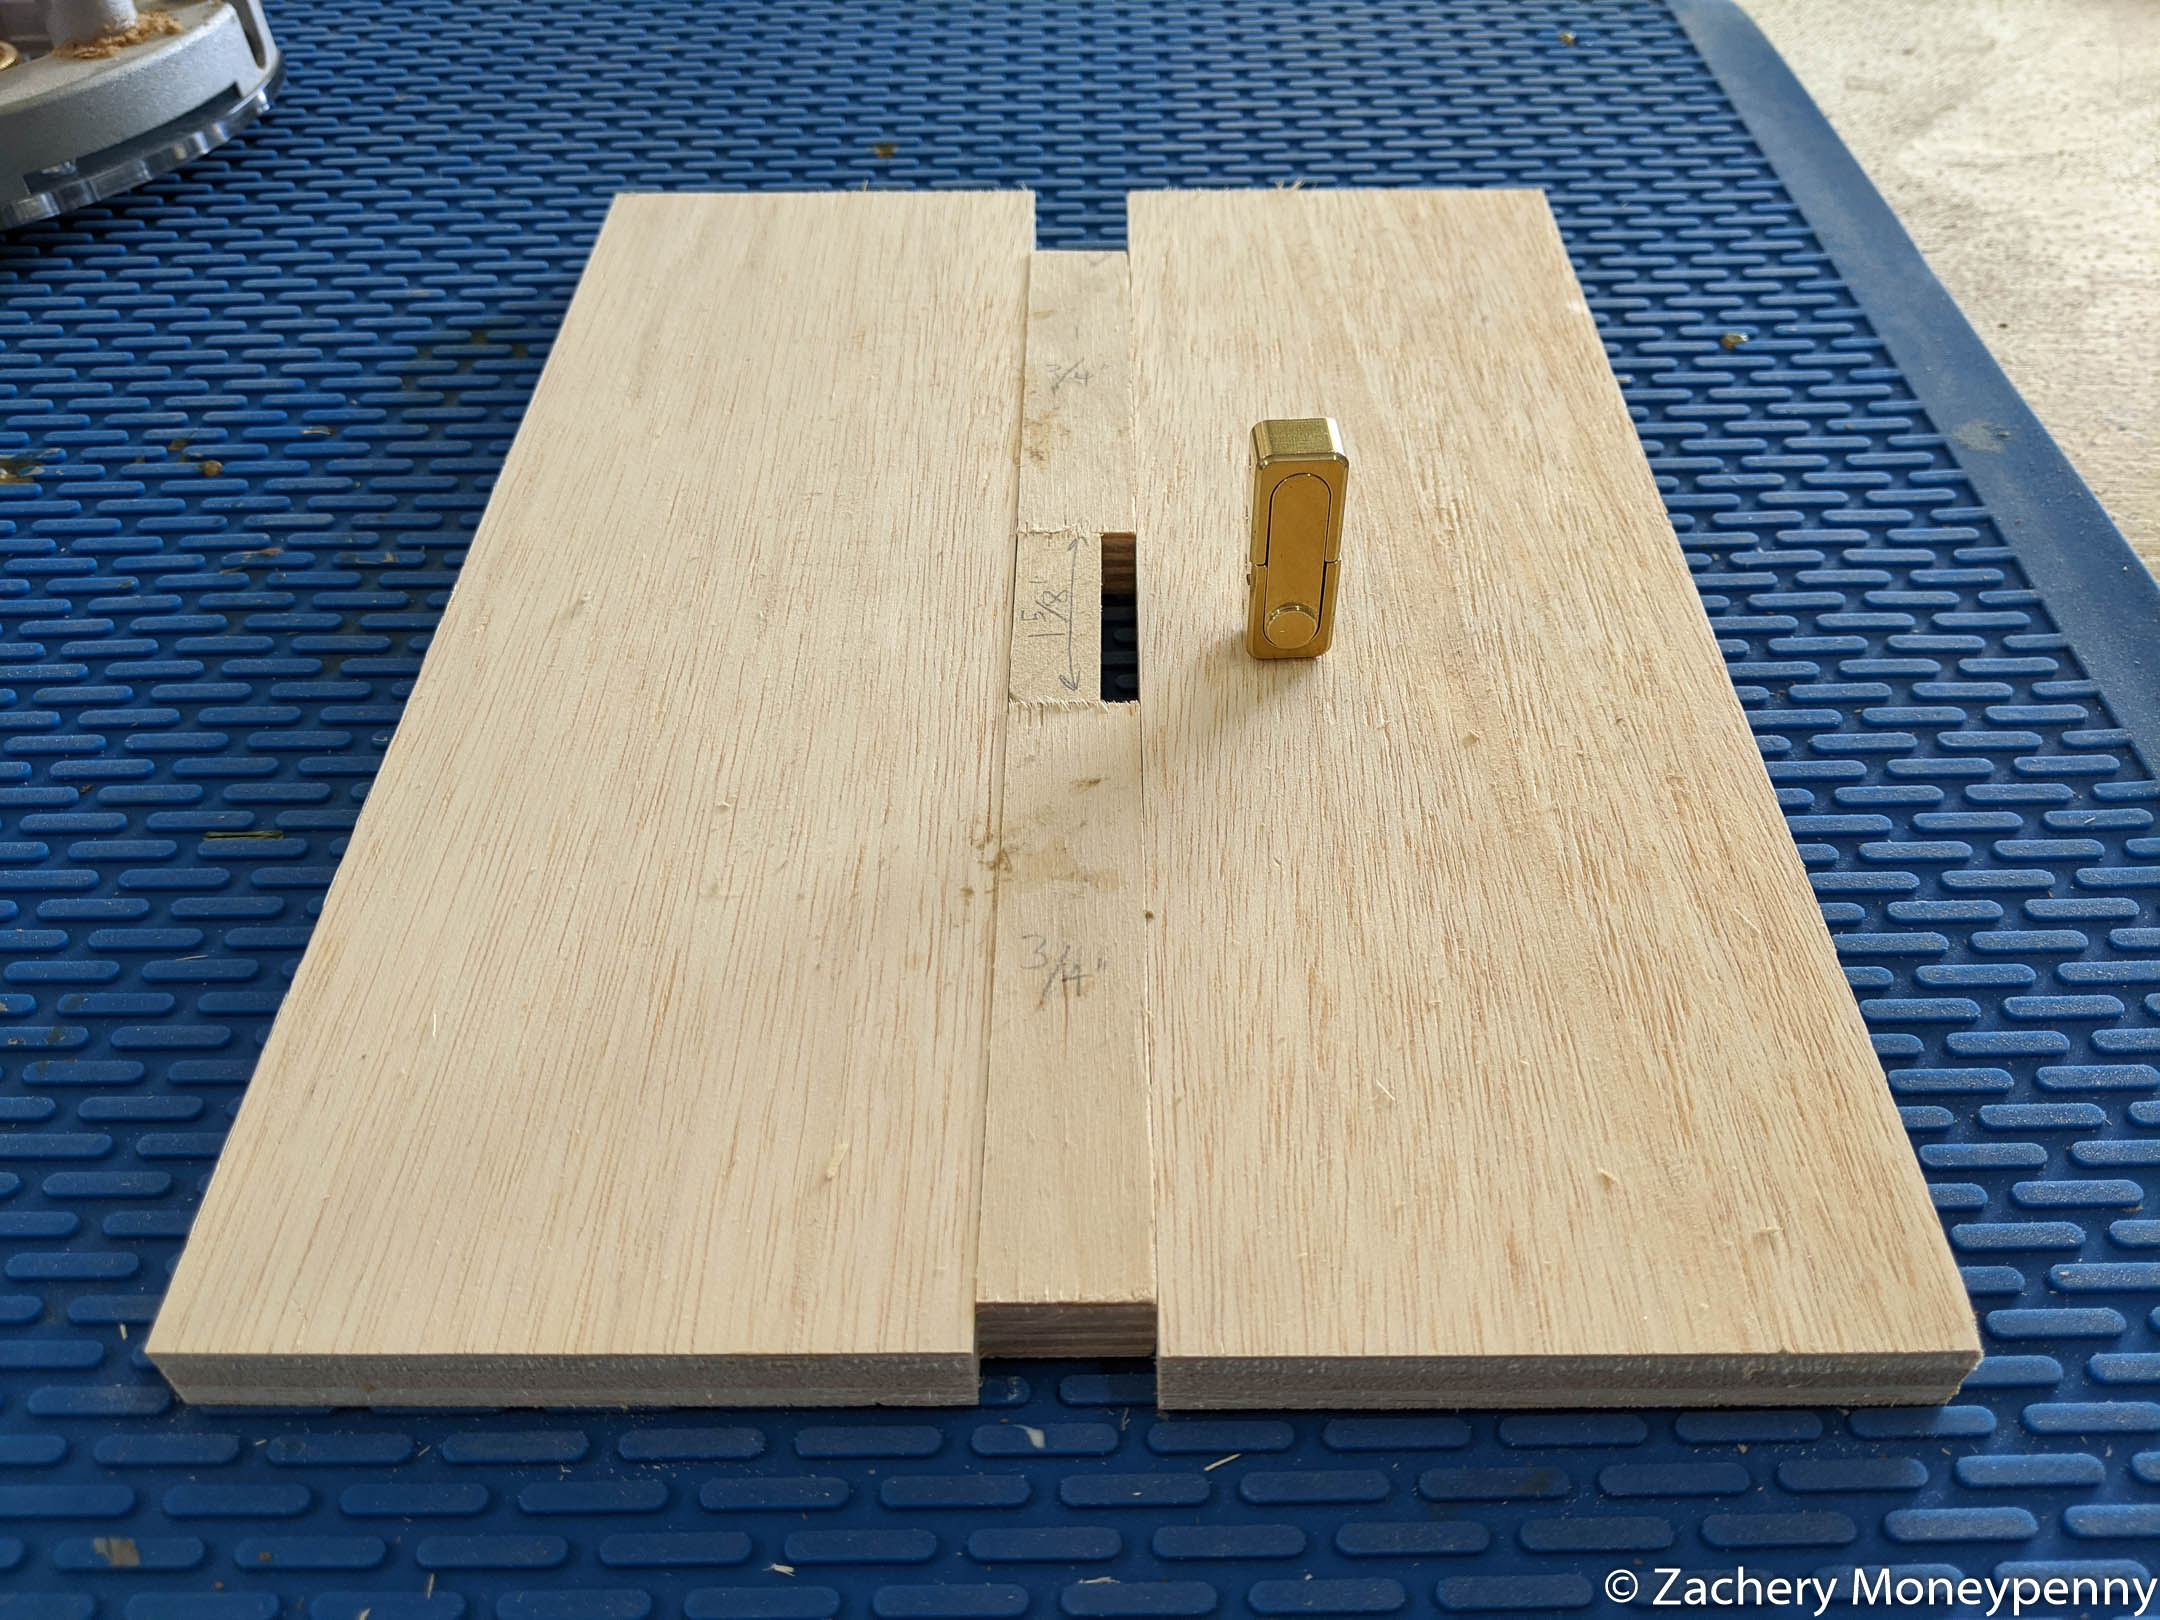
In both cases I attached the jig to the work piece using the blue tape trick.
This worked really well, both of the mortises came out perfectly!
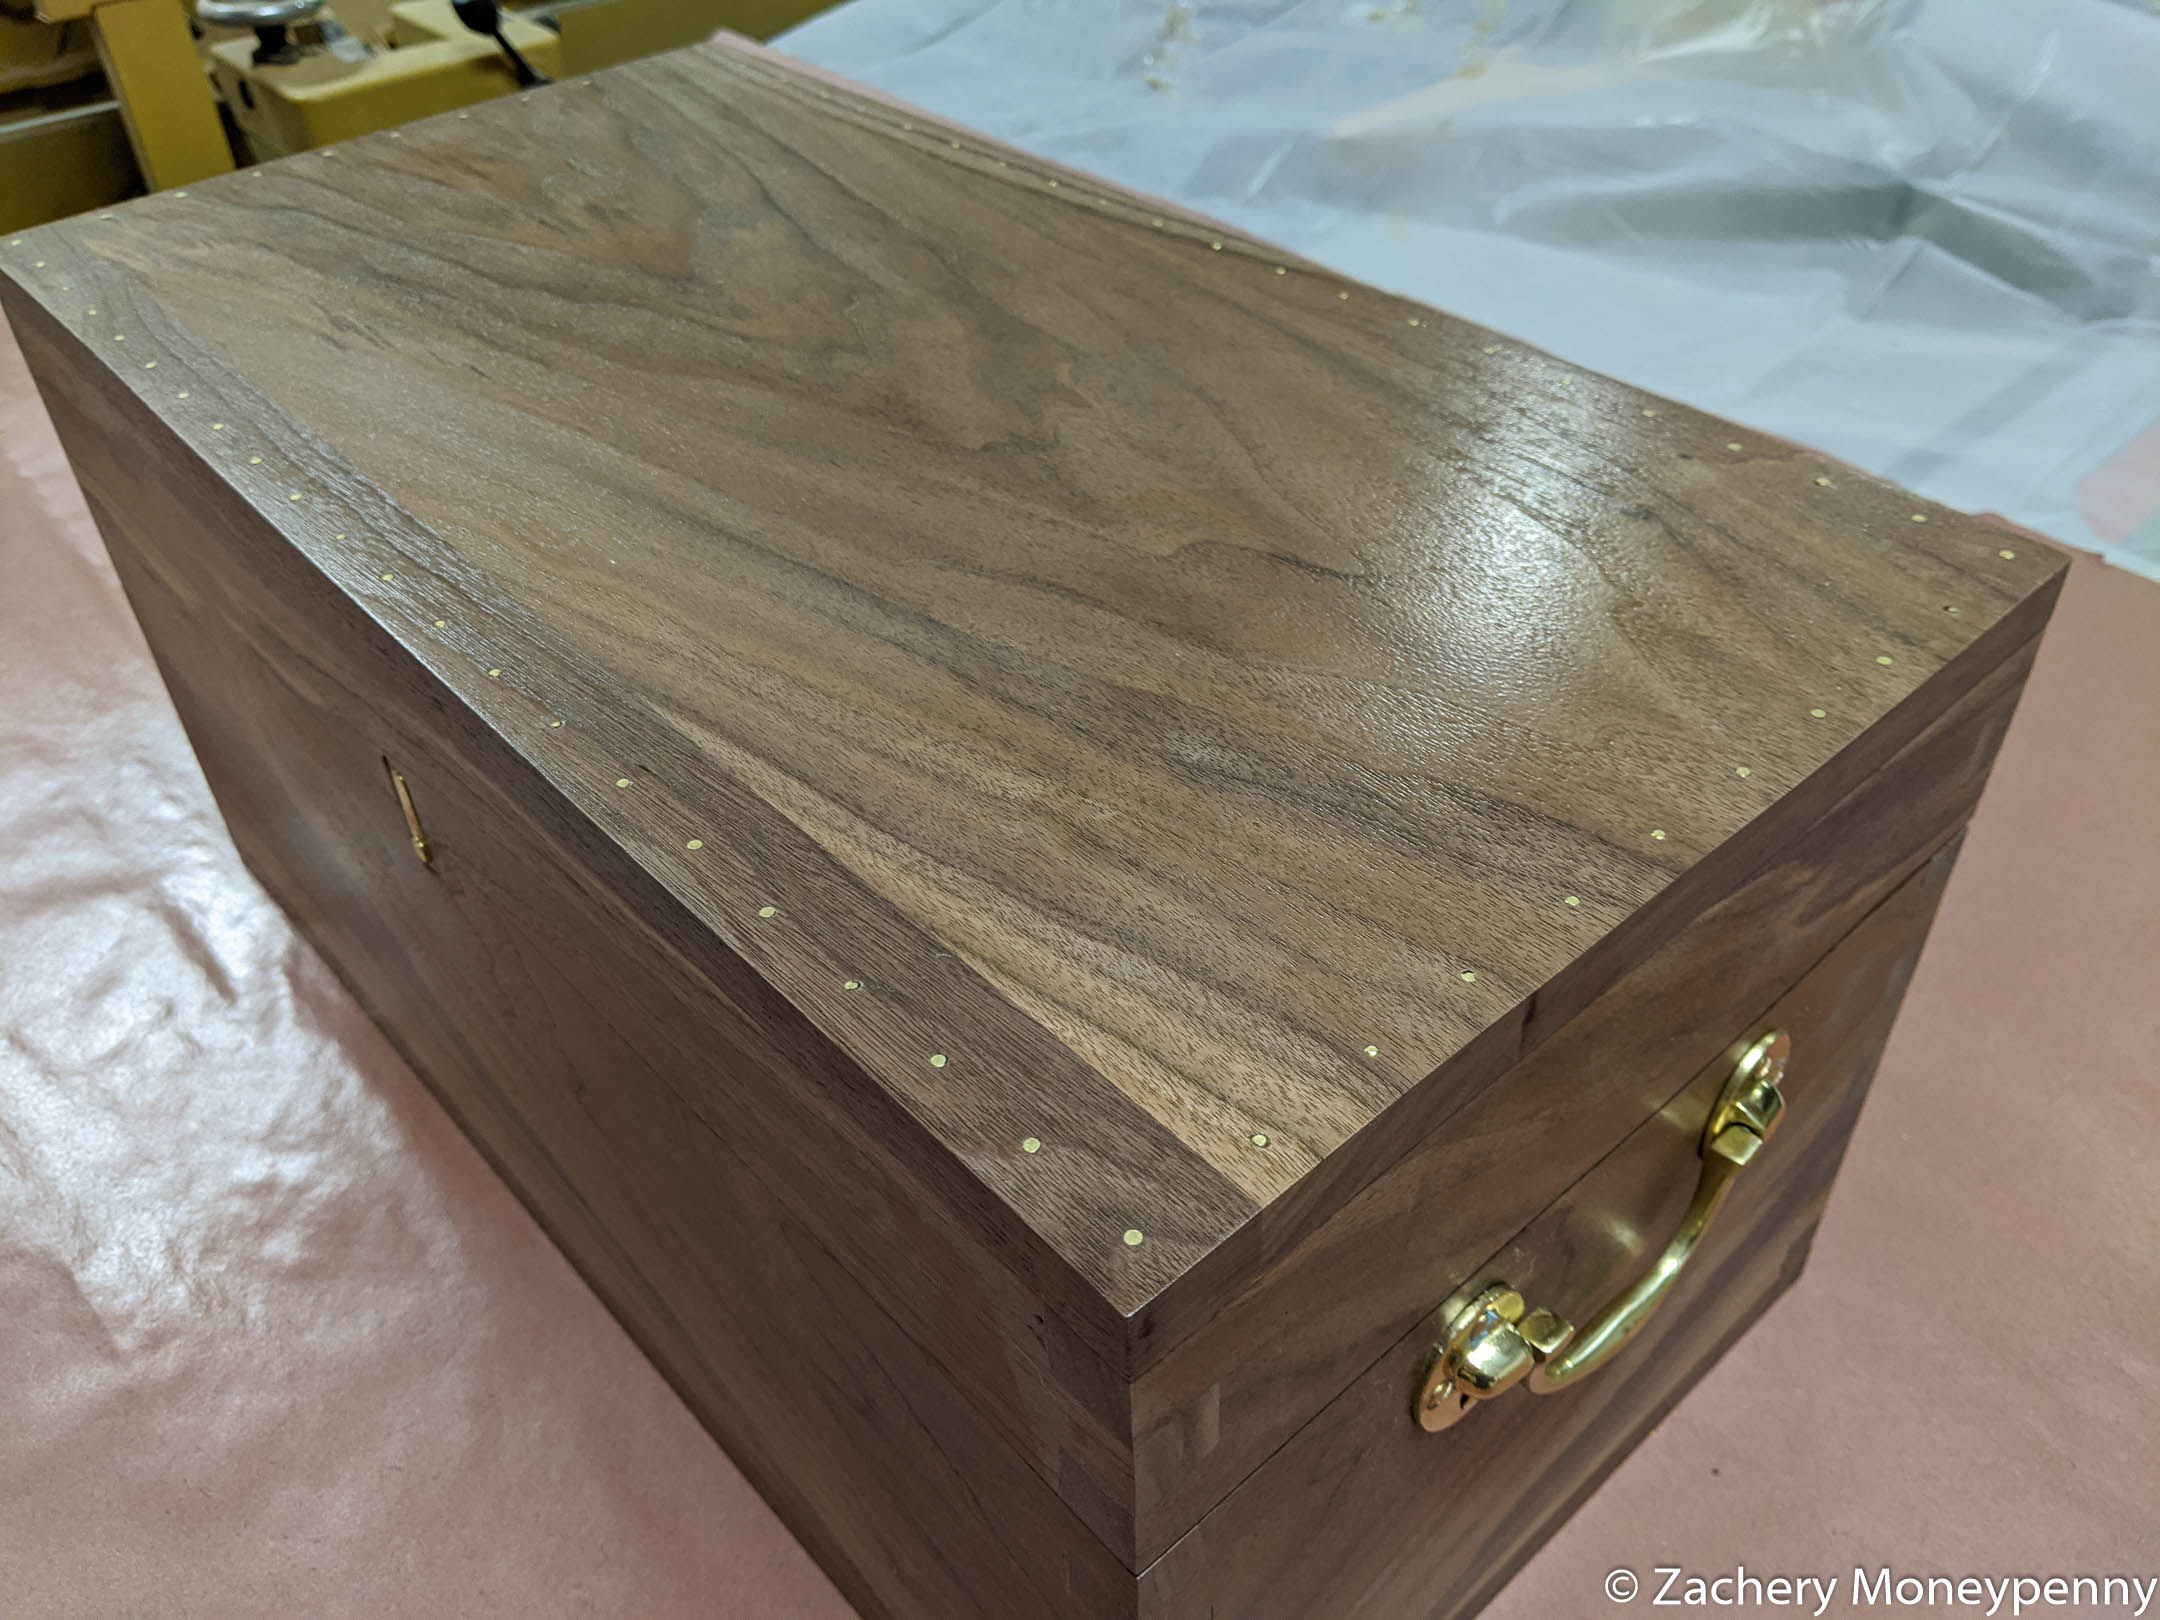
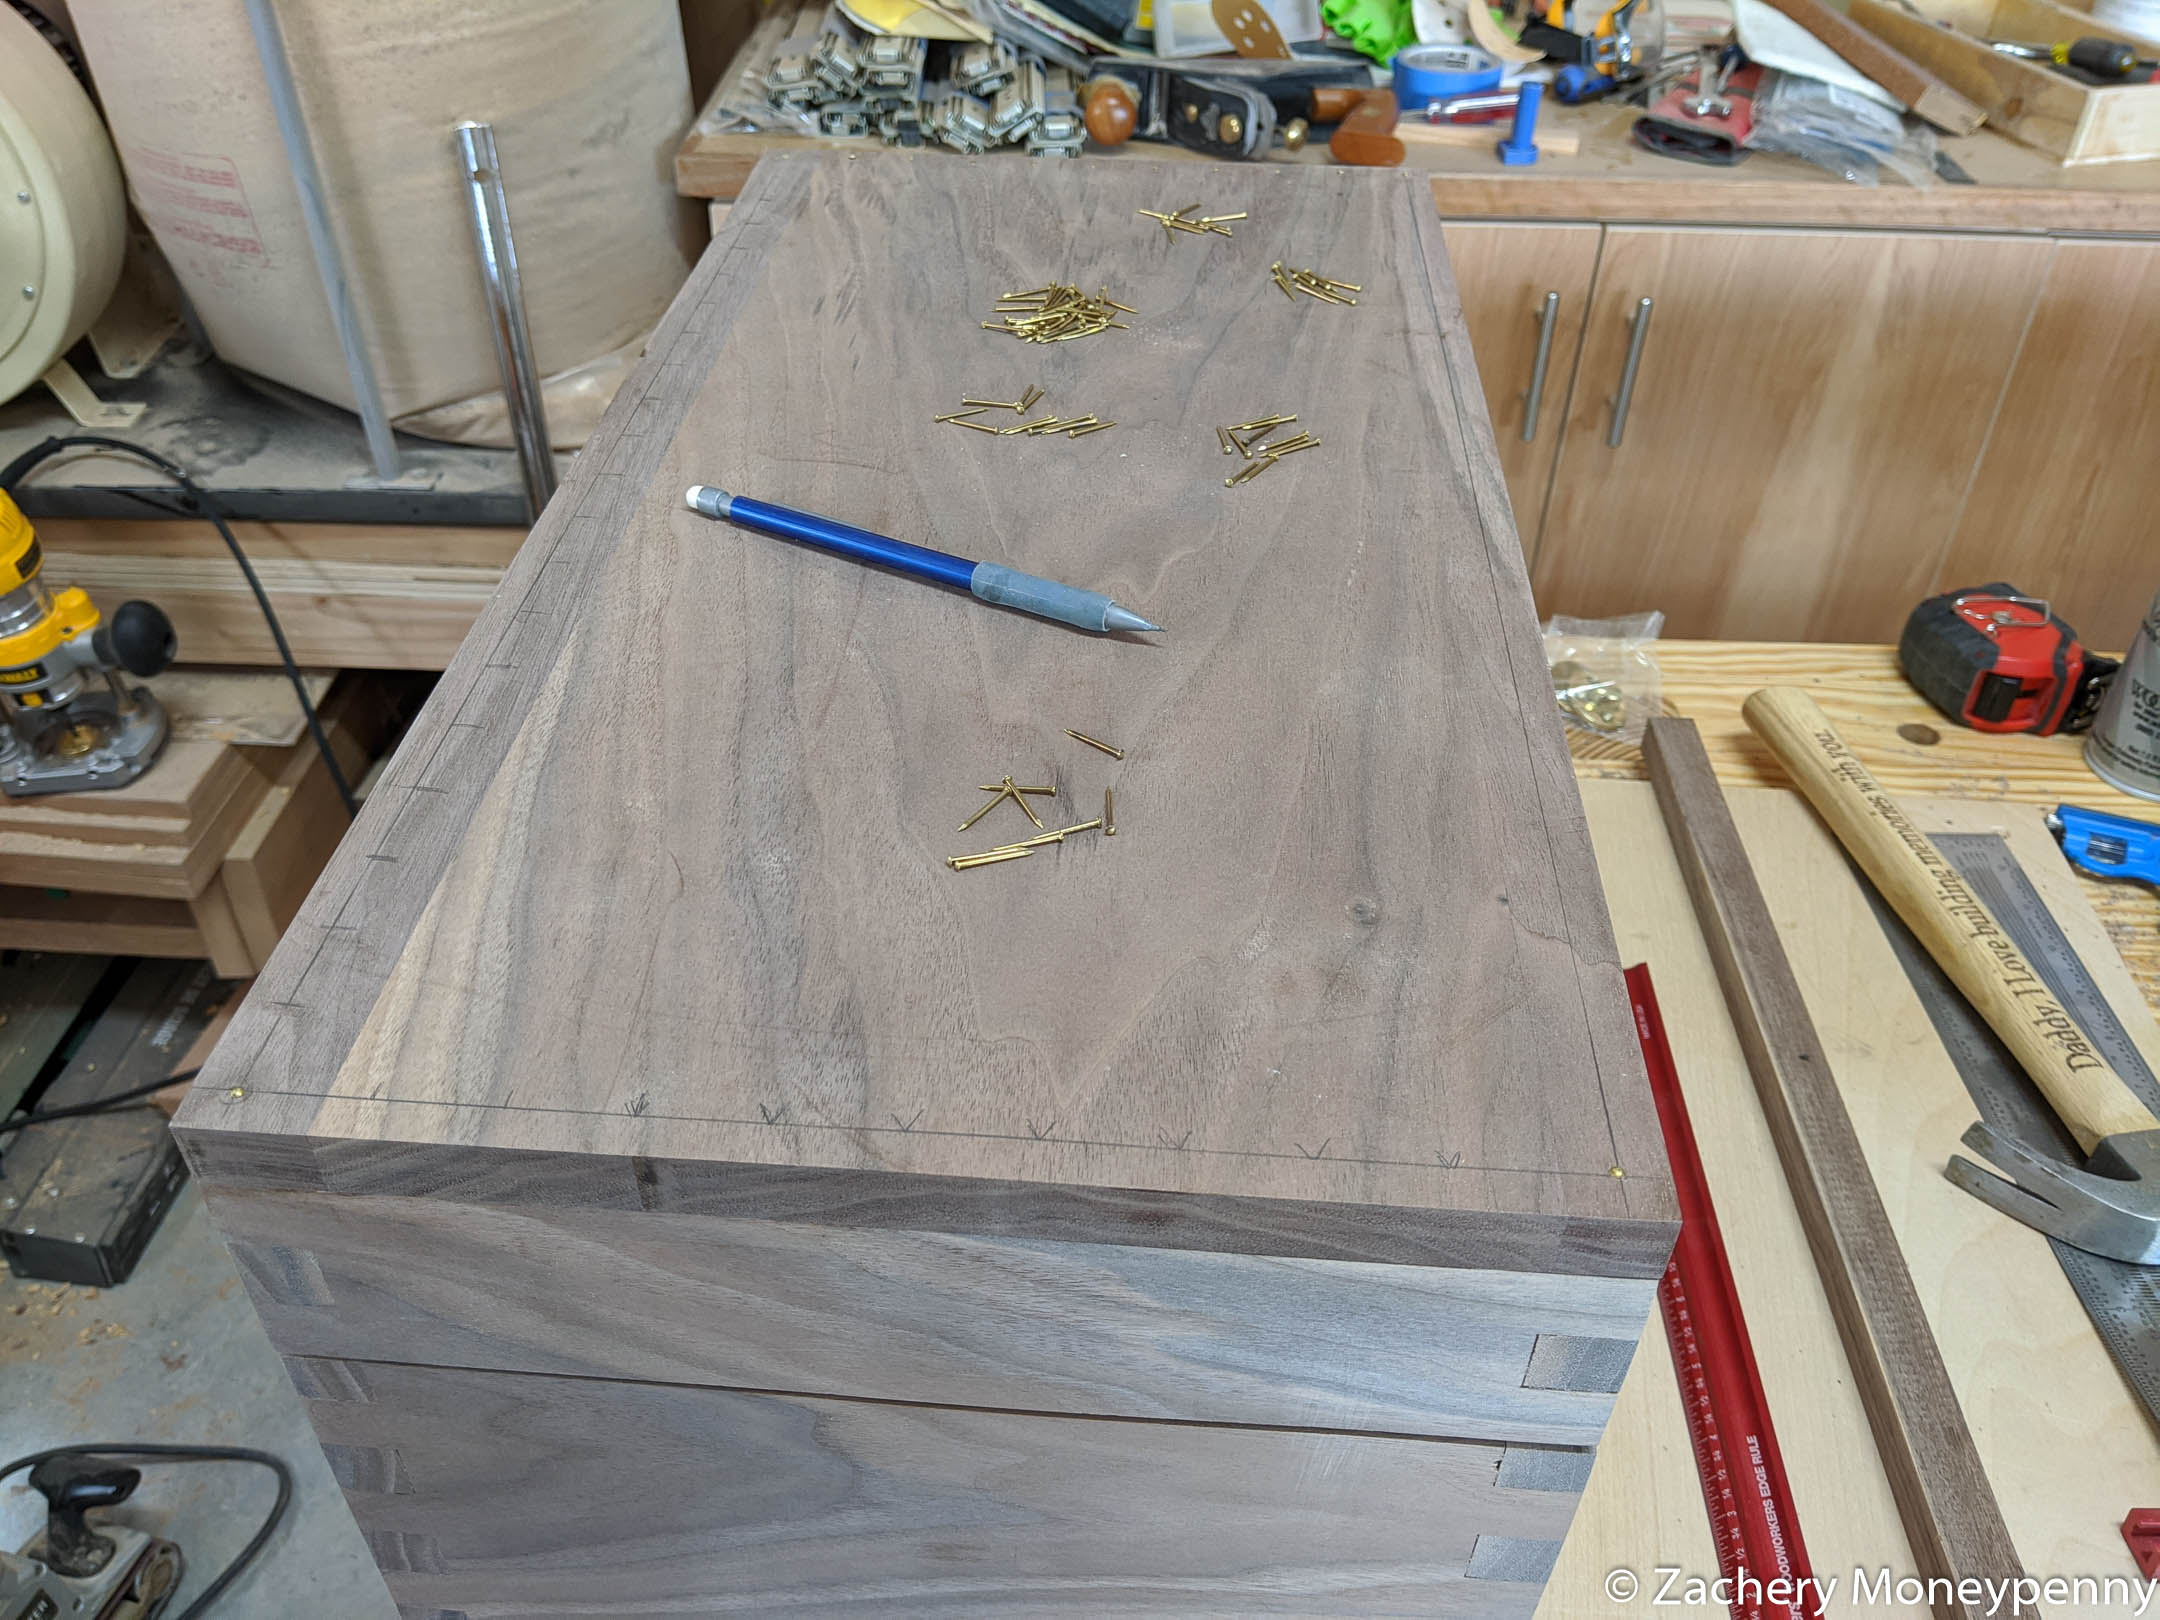
Brass Nails
I liked the nails Jimmy used in the top of the box. To make mine stand out a bit more I ordered a box of brass nails, and laid them out in a 1 inch spacing, 3/8” from the edge all the way around the top. It did take careful hammering because of how easily the brass would bend. After driving all of them in I actually sanded them down to make them flat and flush with the top of the box—it’s a great effect!
Finish
My HVLP kit is woefully underused, so I was determined to get a nice spray finish of polyurethane on the box. I taped off the hardware to minimize getting polyurethane on it, and then proceeded to layer on coats. I ended up doing five coats in all, but in retrospect another 2 or 3 probably would have done wonders. It was a semi-gloss but for something like this I wonder if gloss wouldn’t have been a better look.

Once the HVLP settings are tuned this method is so fast and dries so quickly! I just kept coming back every 2-3 hours to check on things and re-apply if ready.
Reflections & Learning
- When working with box joints, cut extra material the same thickness as your boards and test your jig on those pieces first. If you must test with nominal thickness plywood make sure you allow extra room for the slightly thicker material you’ll be working with.
- Wish I would have gone up a size on the latch—the one I got was too small, visually, for the size of the box.
- I wish I would have had a lazy susan and spray tent when I was doing this project. I went ahead and bought some so I’ll be ready for the next one.
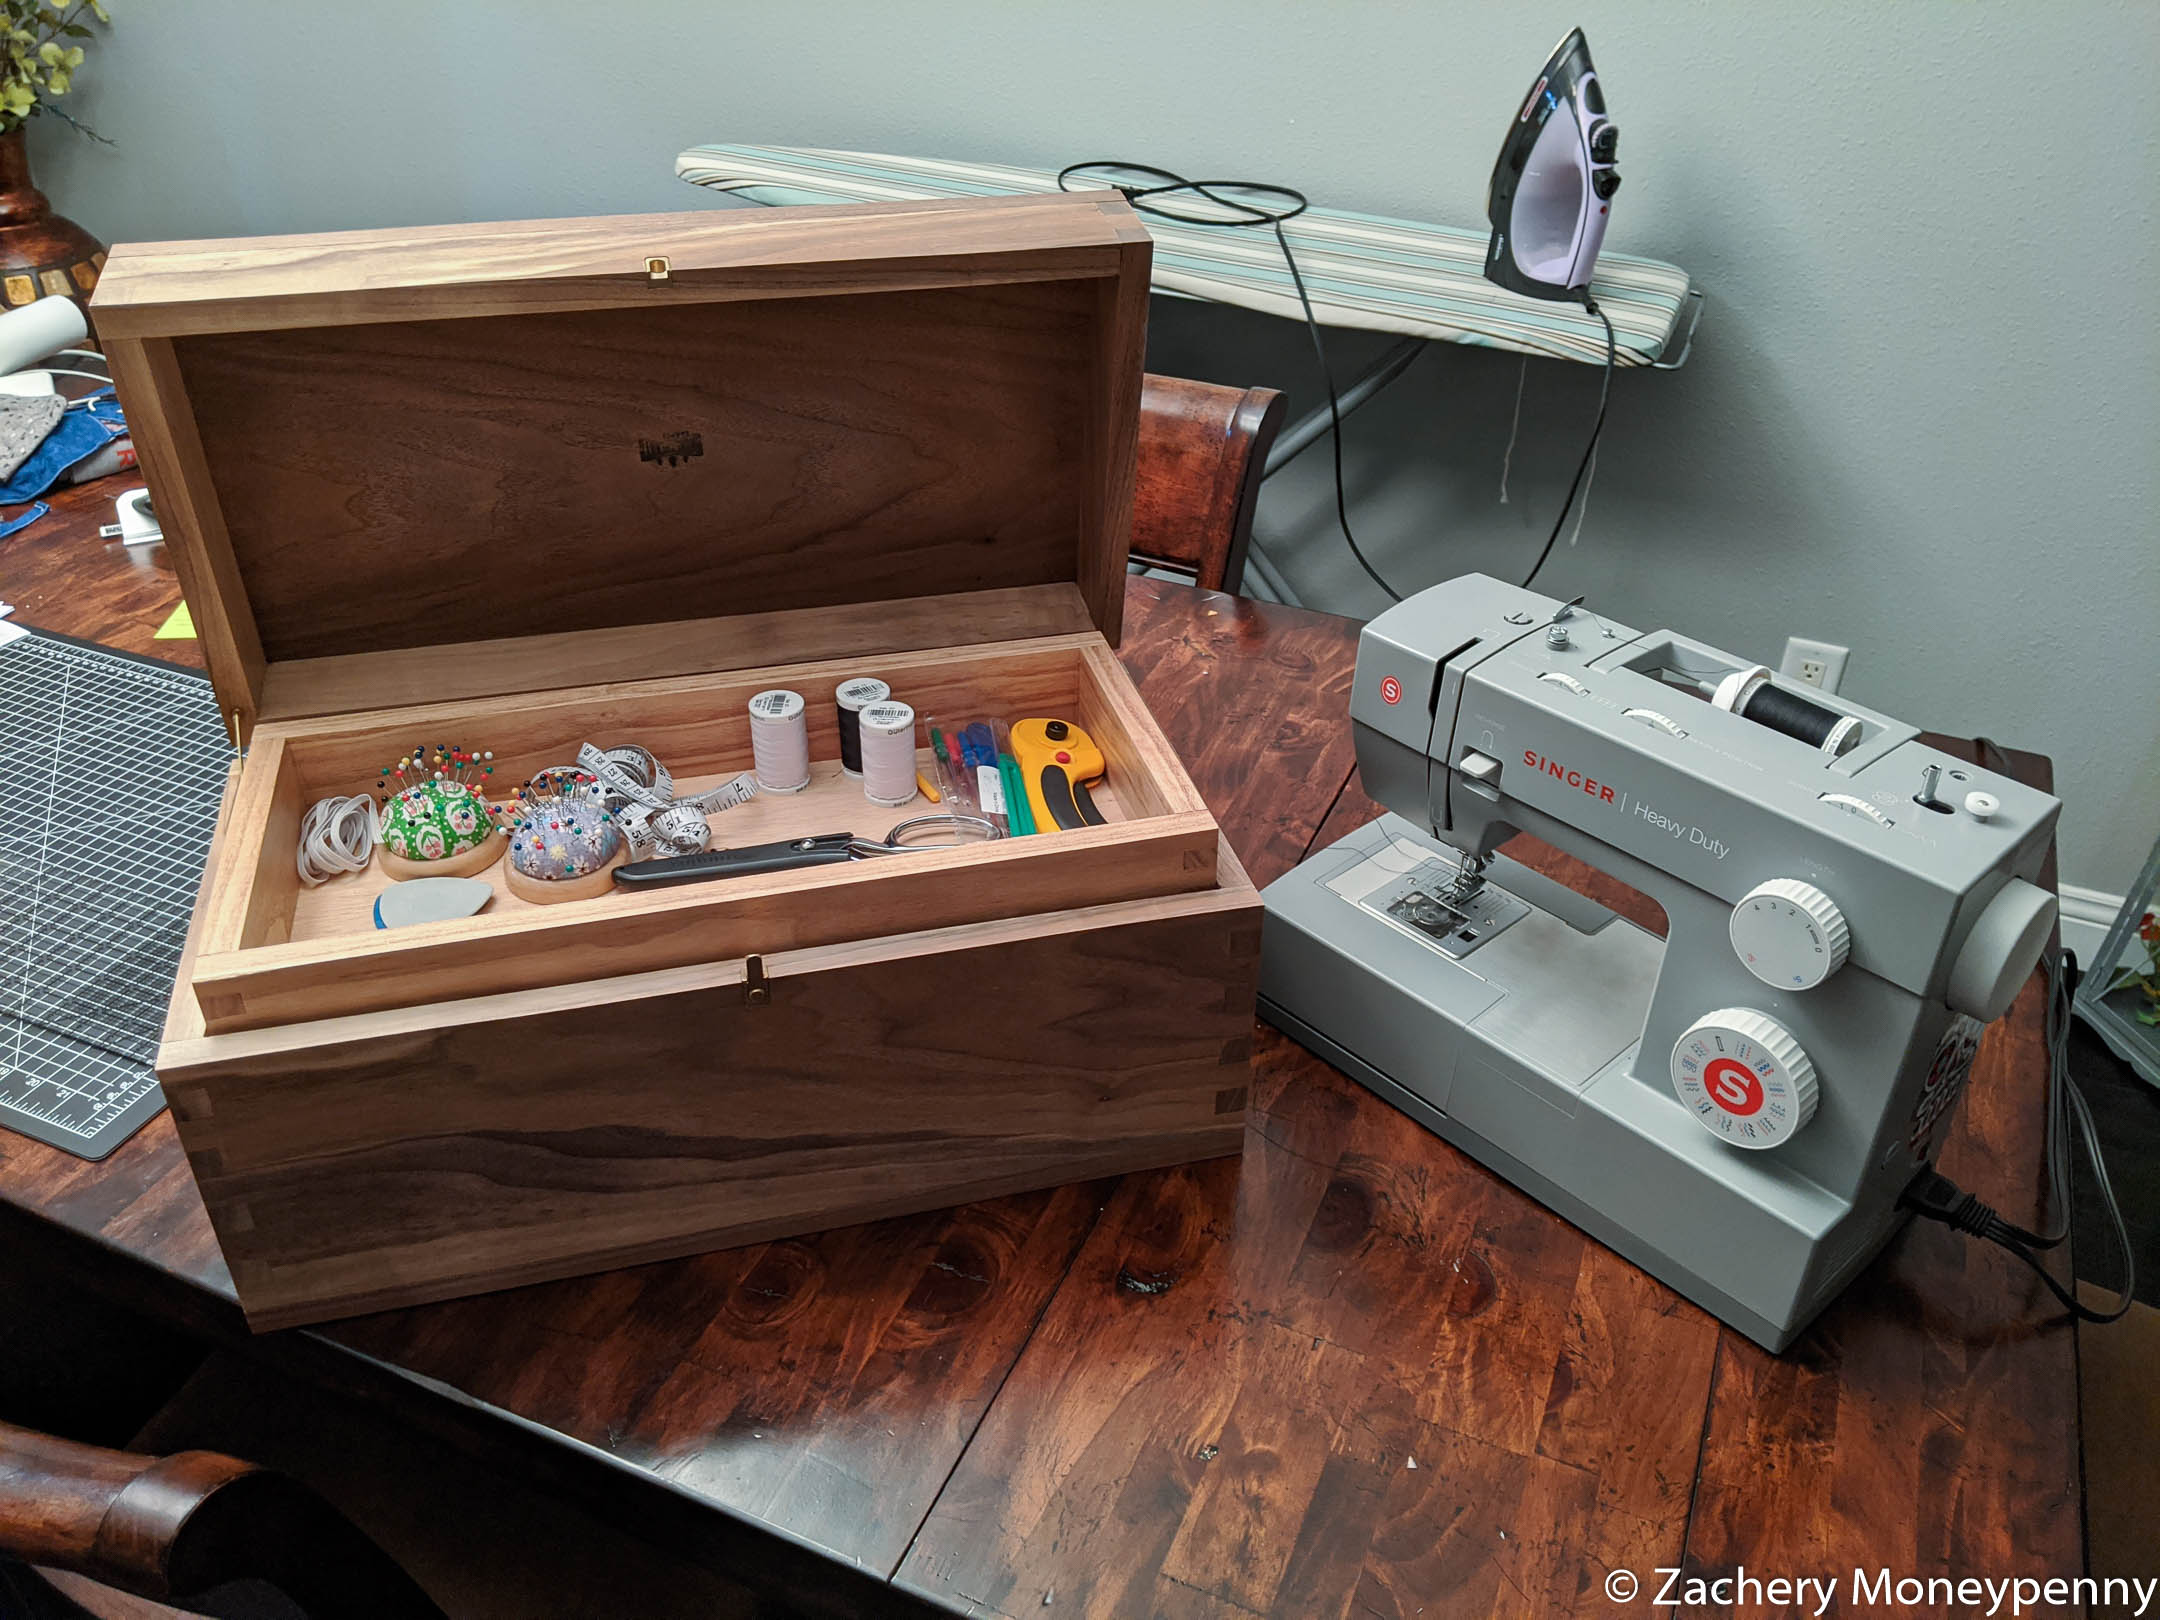
- The box is the perfect size for my sewing supplies; the deep bottom carries boxes of thread samples, patterns, etc. while the top tray easily organizes all my critical tools like scissors, rotary cutter, measuring tape and pincushions.
June 03, 2020