May Project Round-Up

Get caught up on all the new and completed projects in the shop for May 2020.

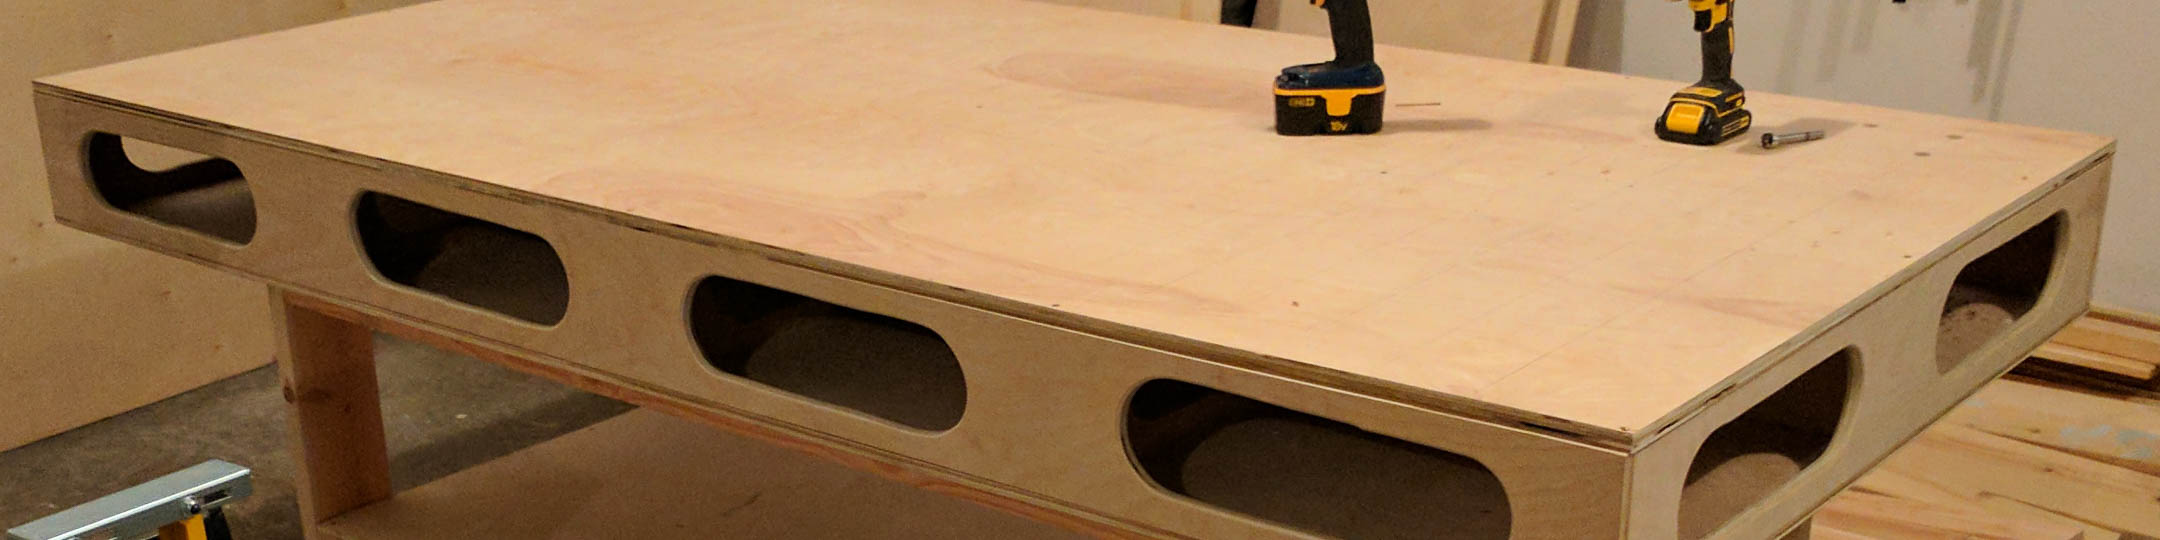
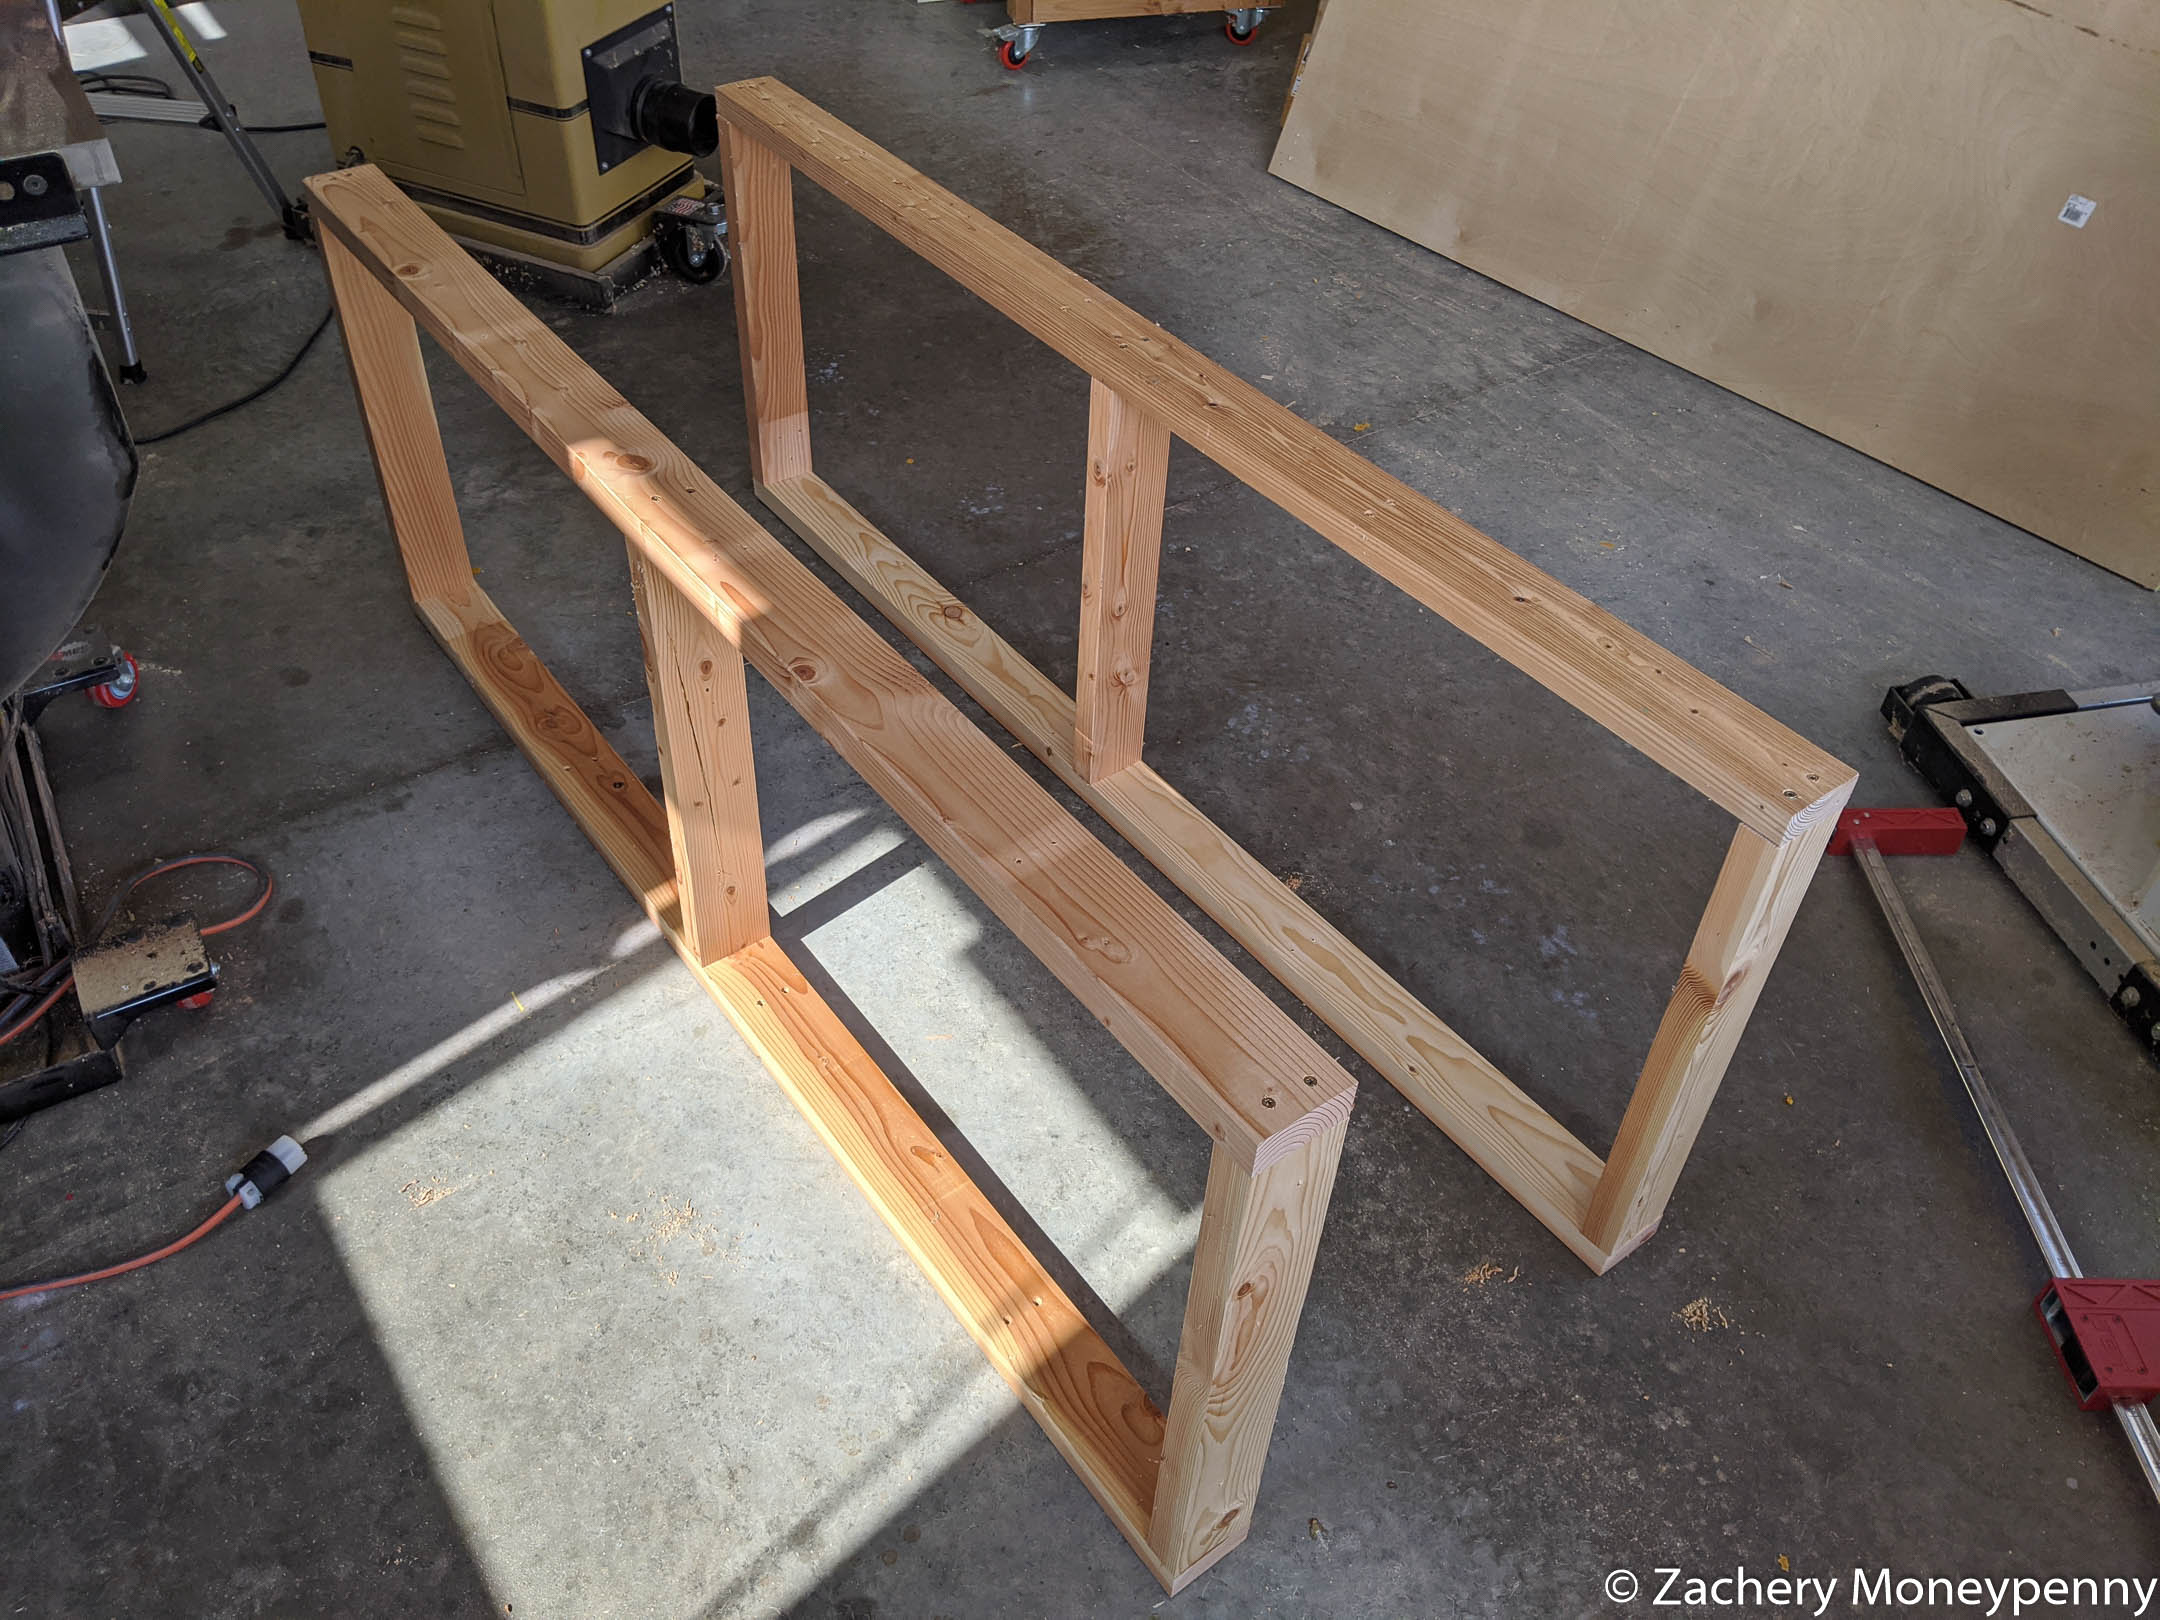
Completed: Workbench!

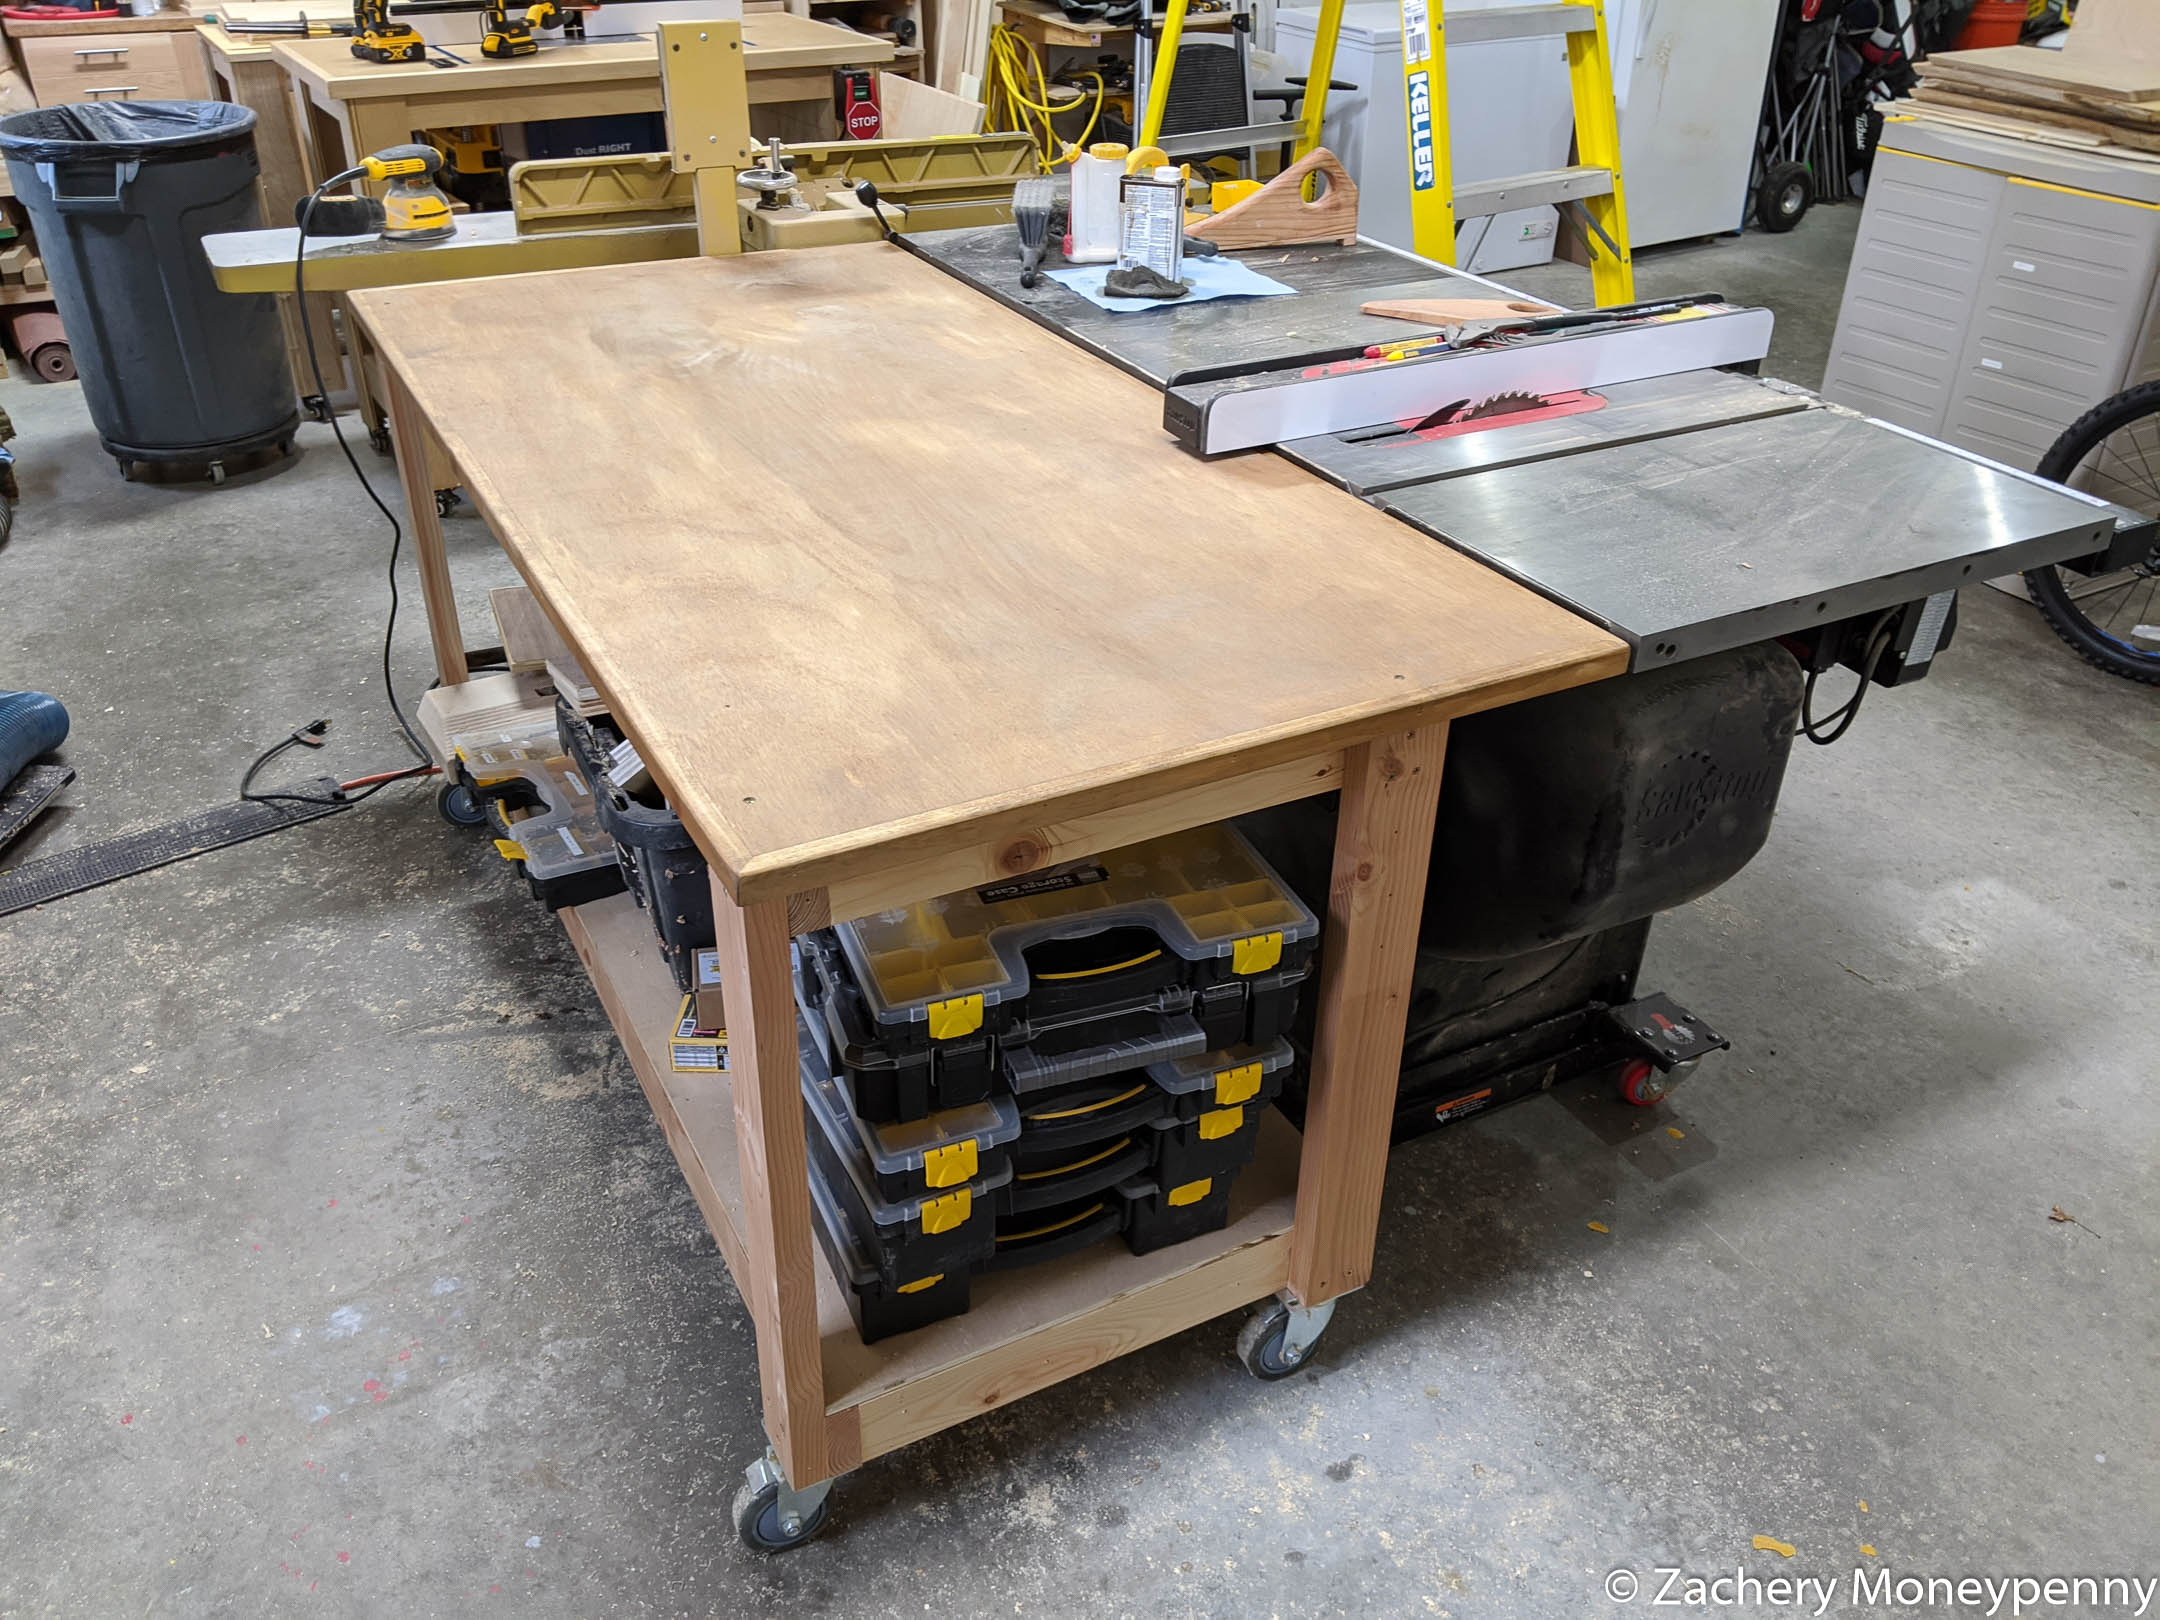
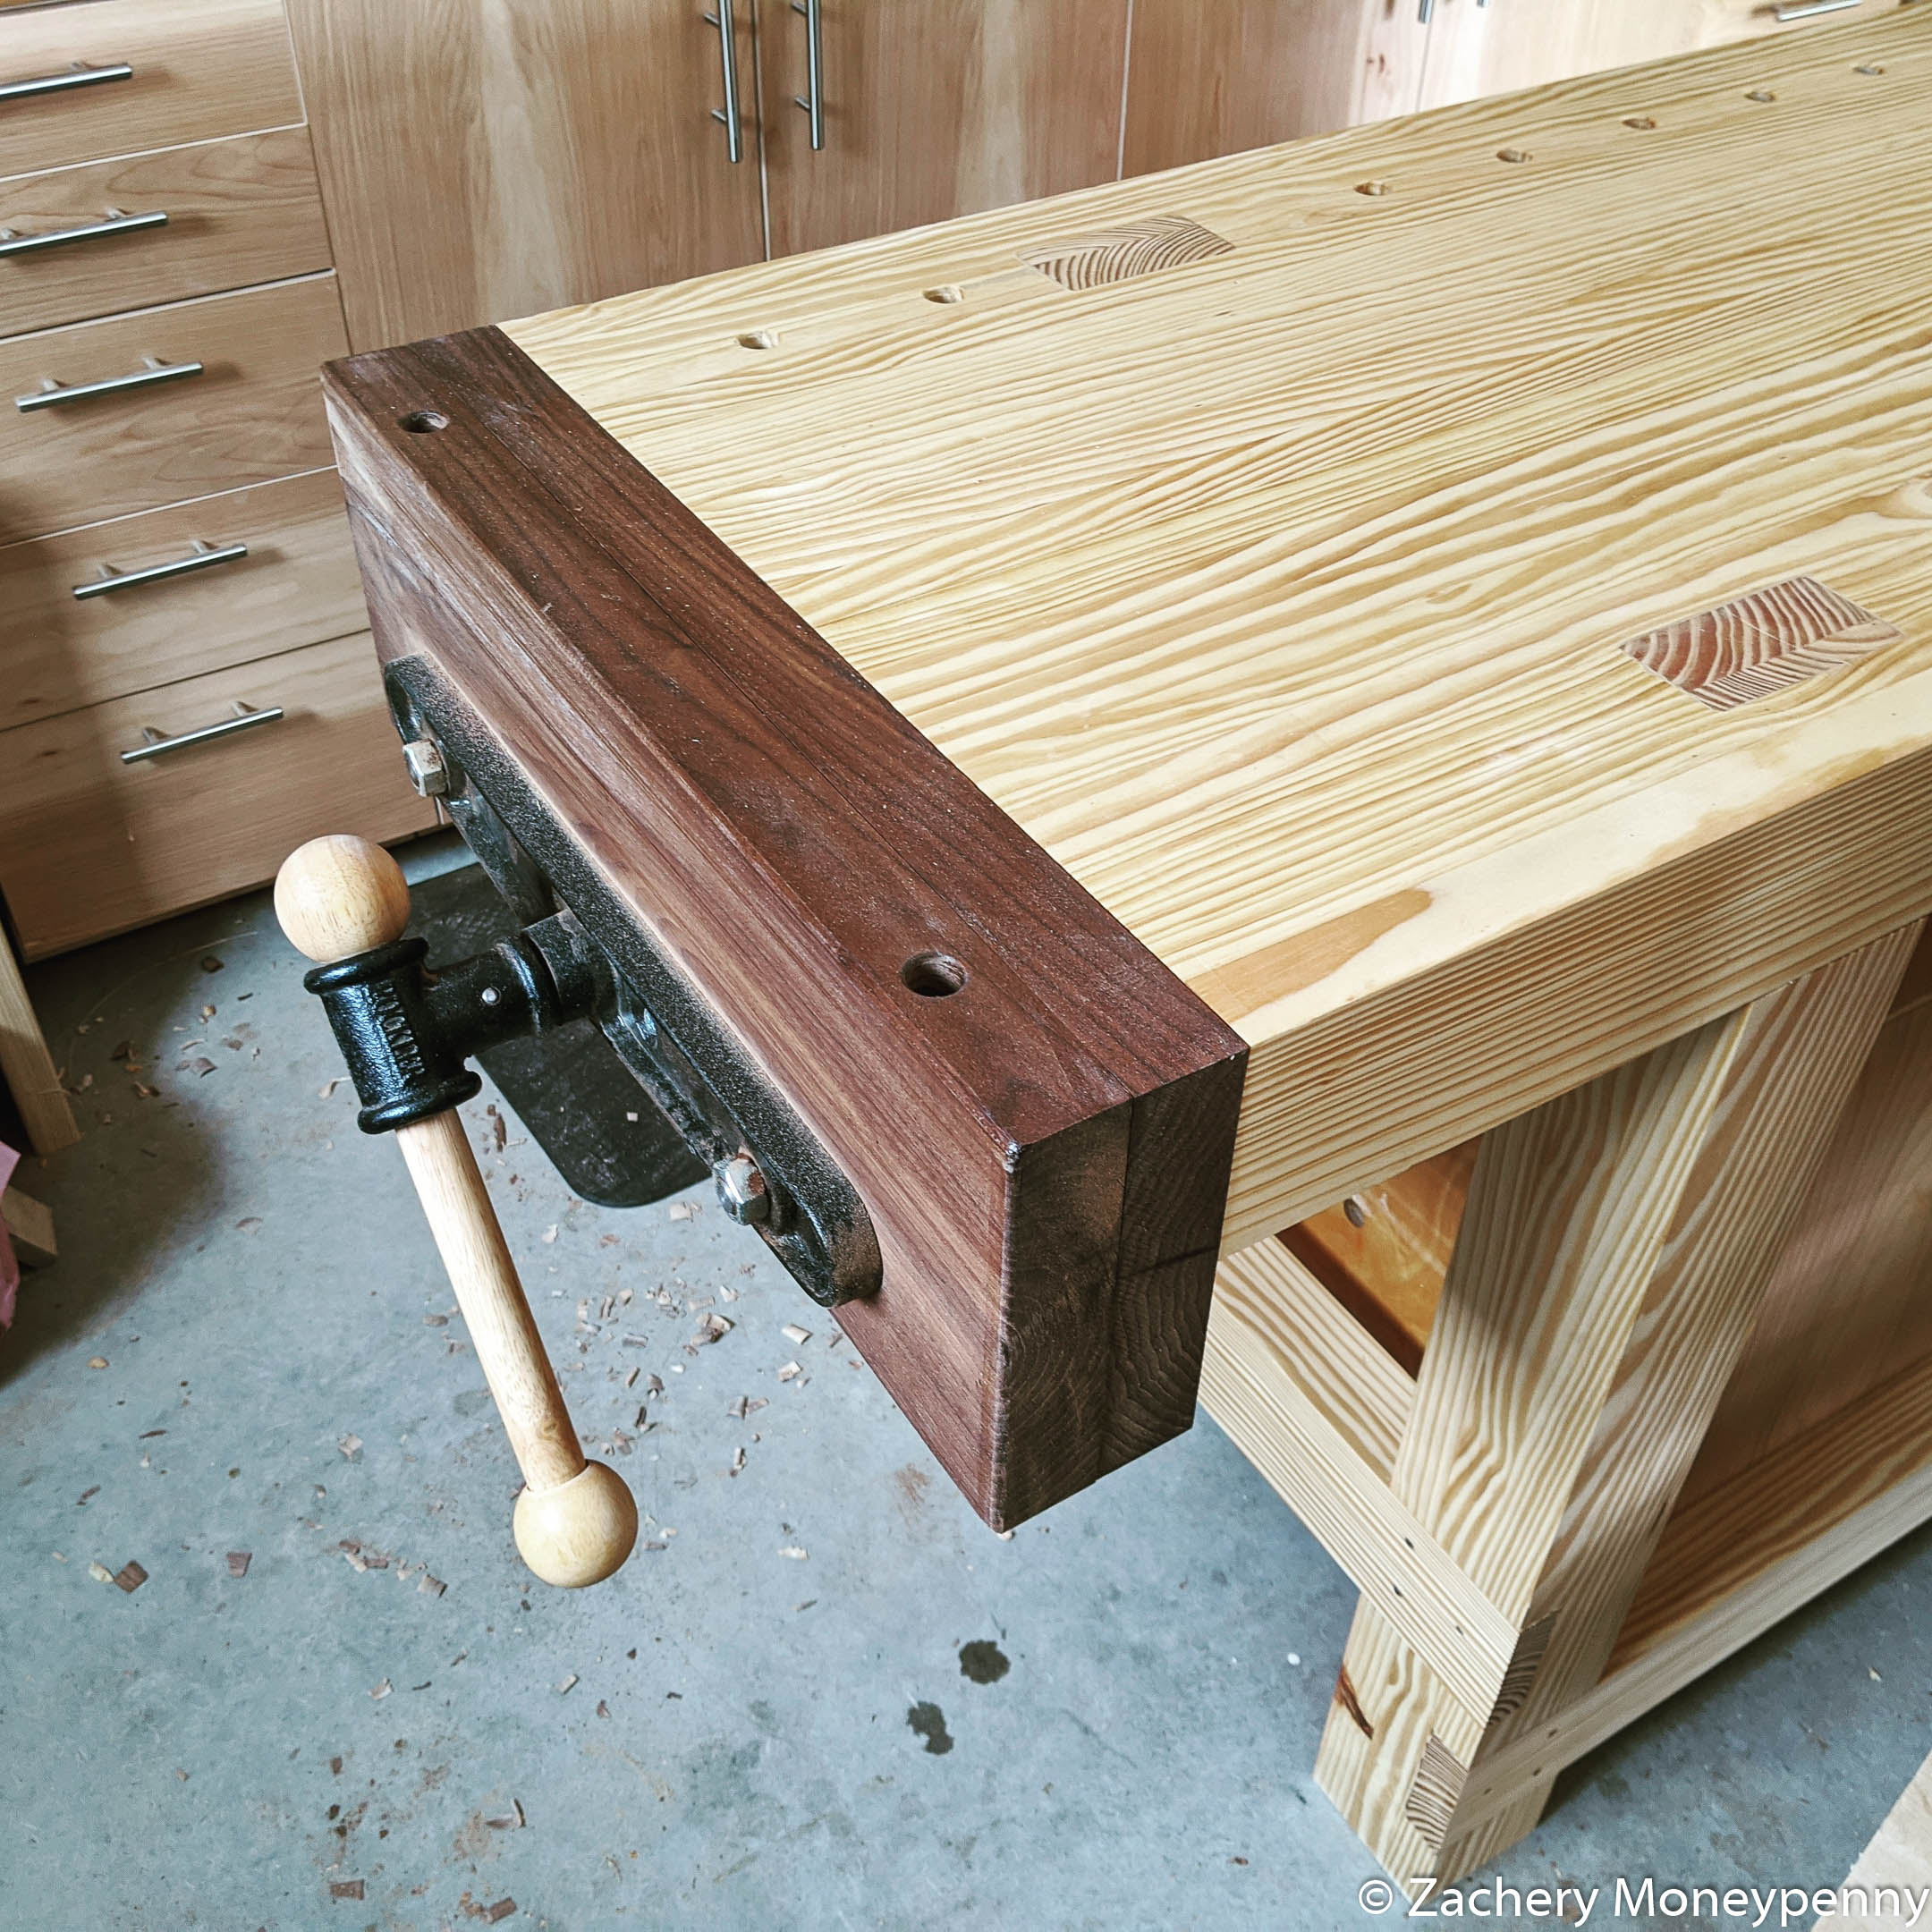
Three months of weekend warrior work are behind me and the new workbench is complete, including leg vise and end vise installation as well as dog holes, storage cabinets underneath and finish!

Ready for finish

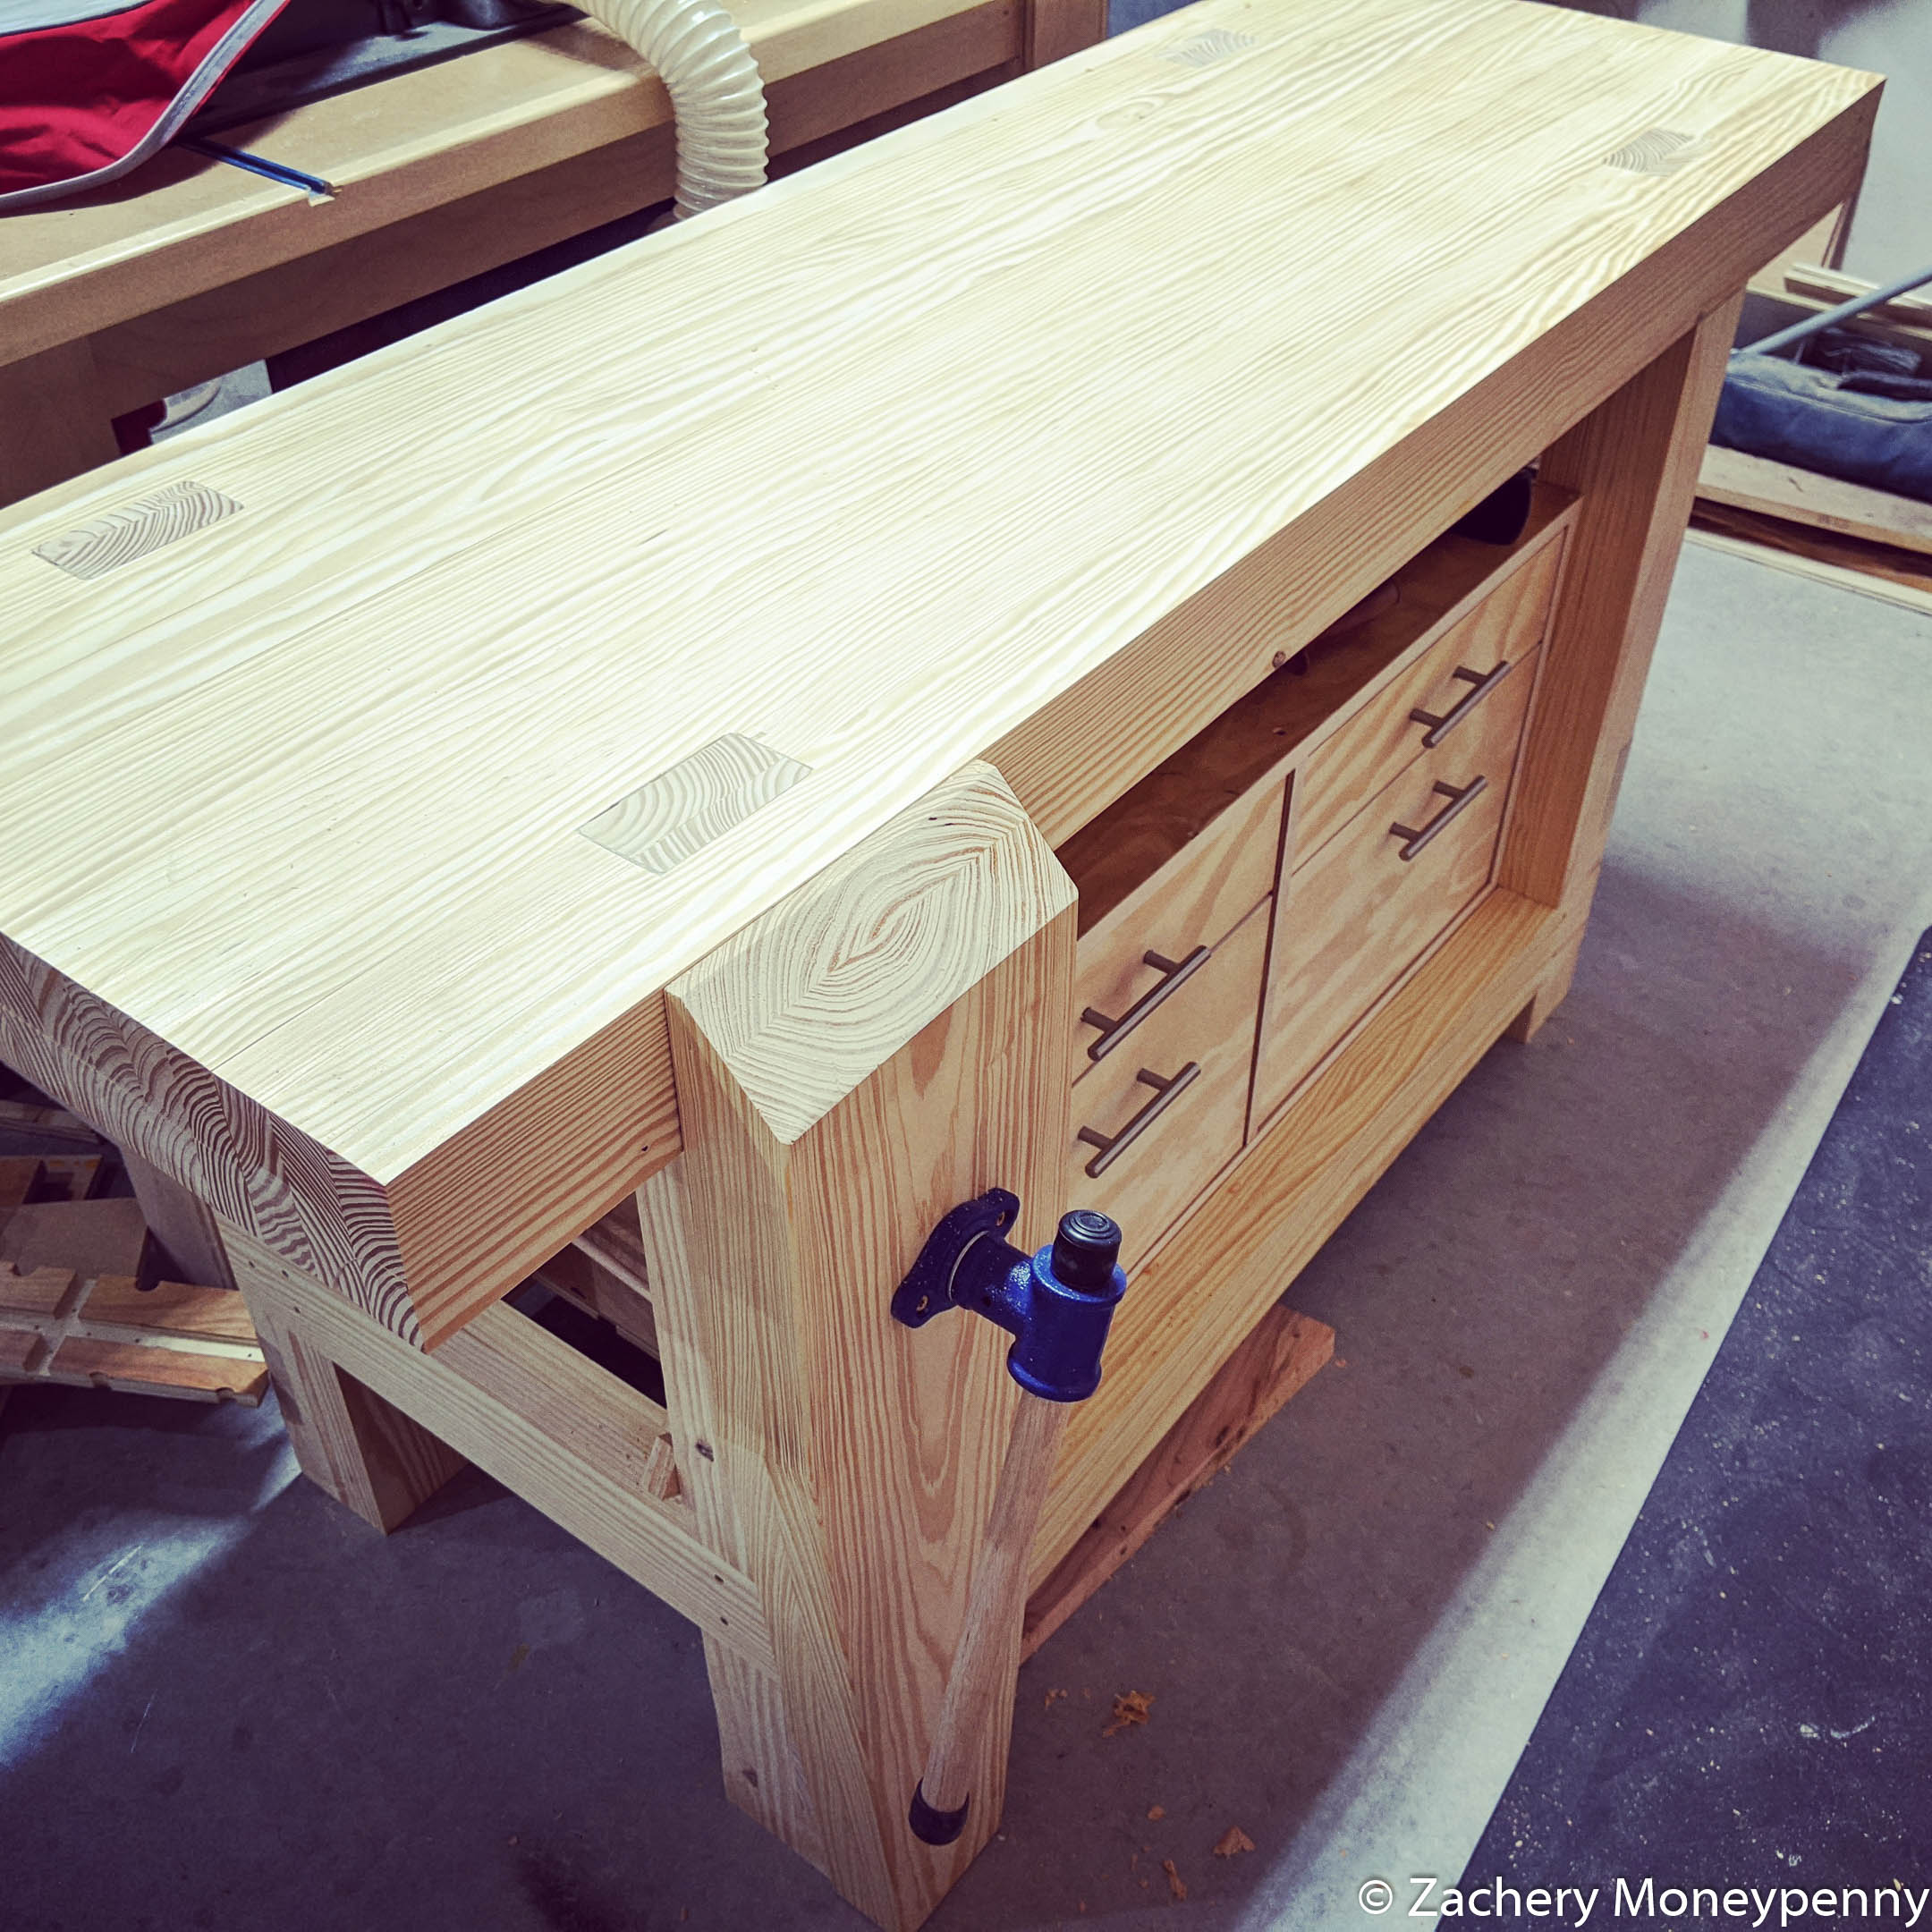
I’ll be writing up a considerably larger project page, including step-by-step photos and more detail, but for now I’ll just glory in being able to chisel, plane, and clamp work pieces in ways I’ve never been able to before. Just weeks after finishing I don’t know how I lived without it for so long.

End vise with walnut jaws installed

Yay!

Started: Sewing Box

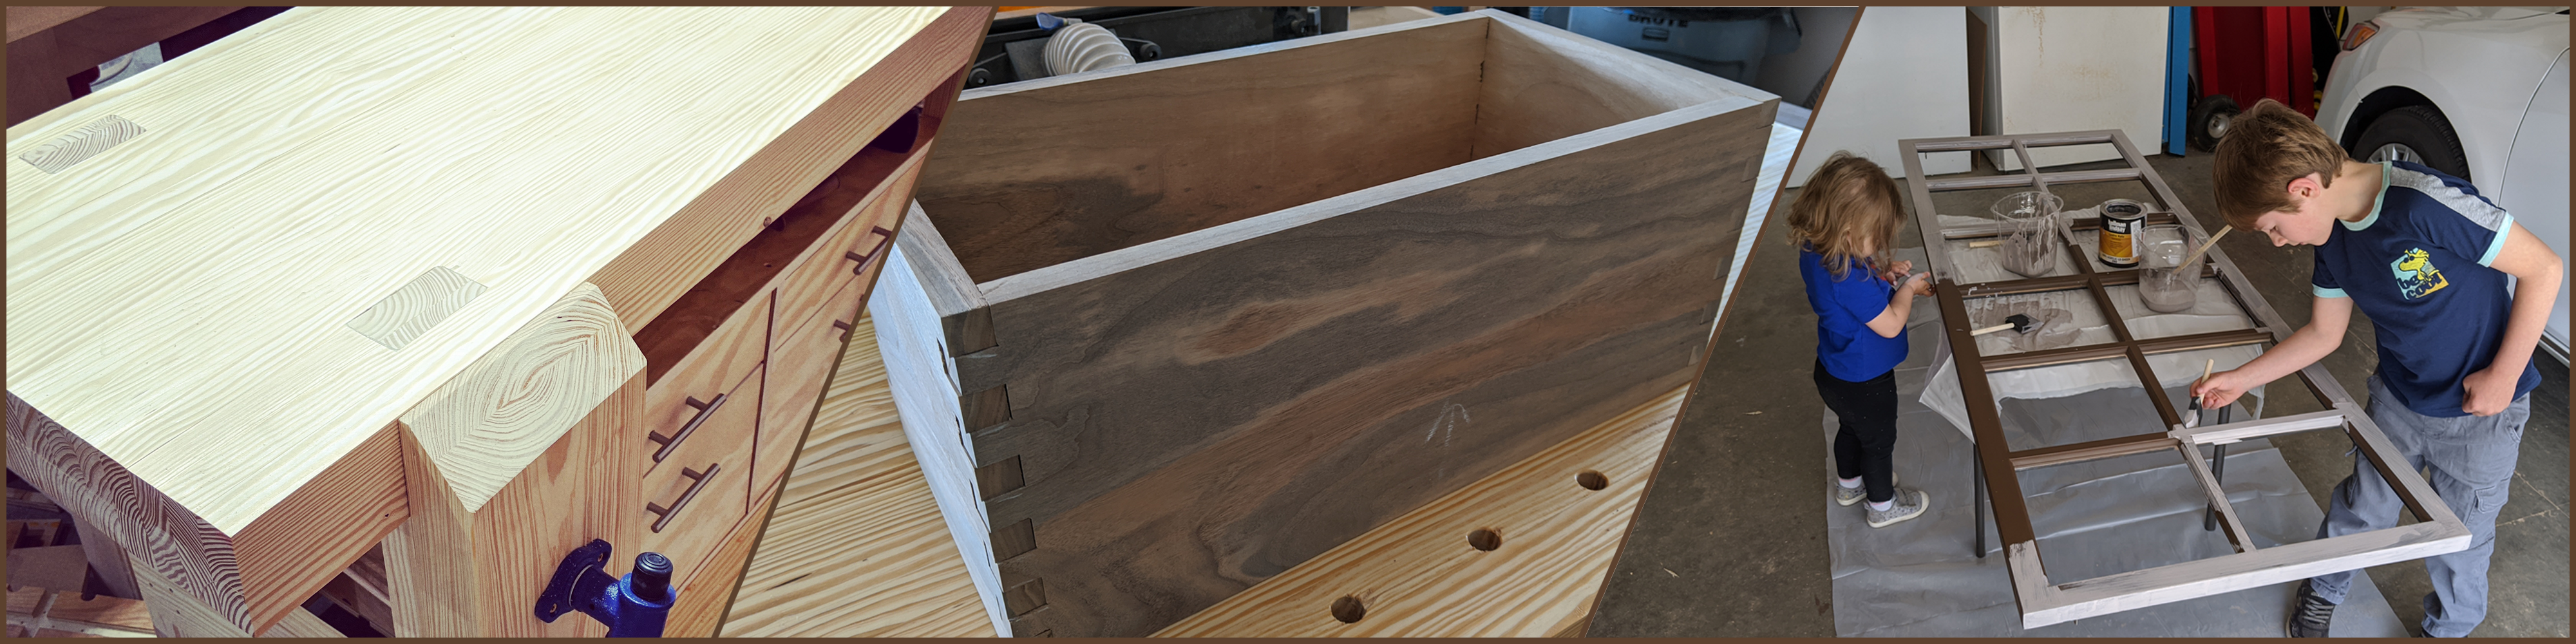
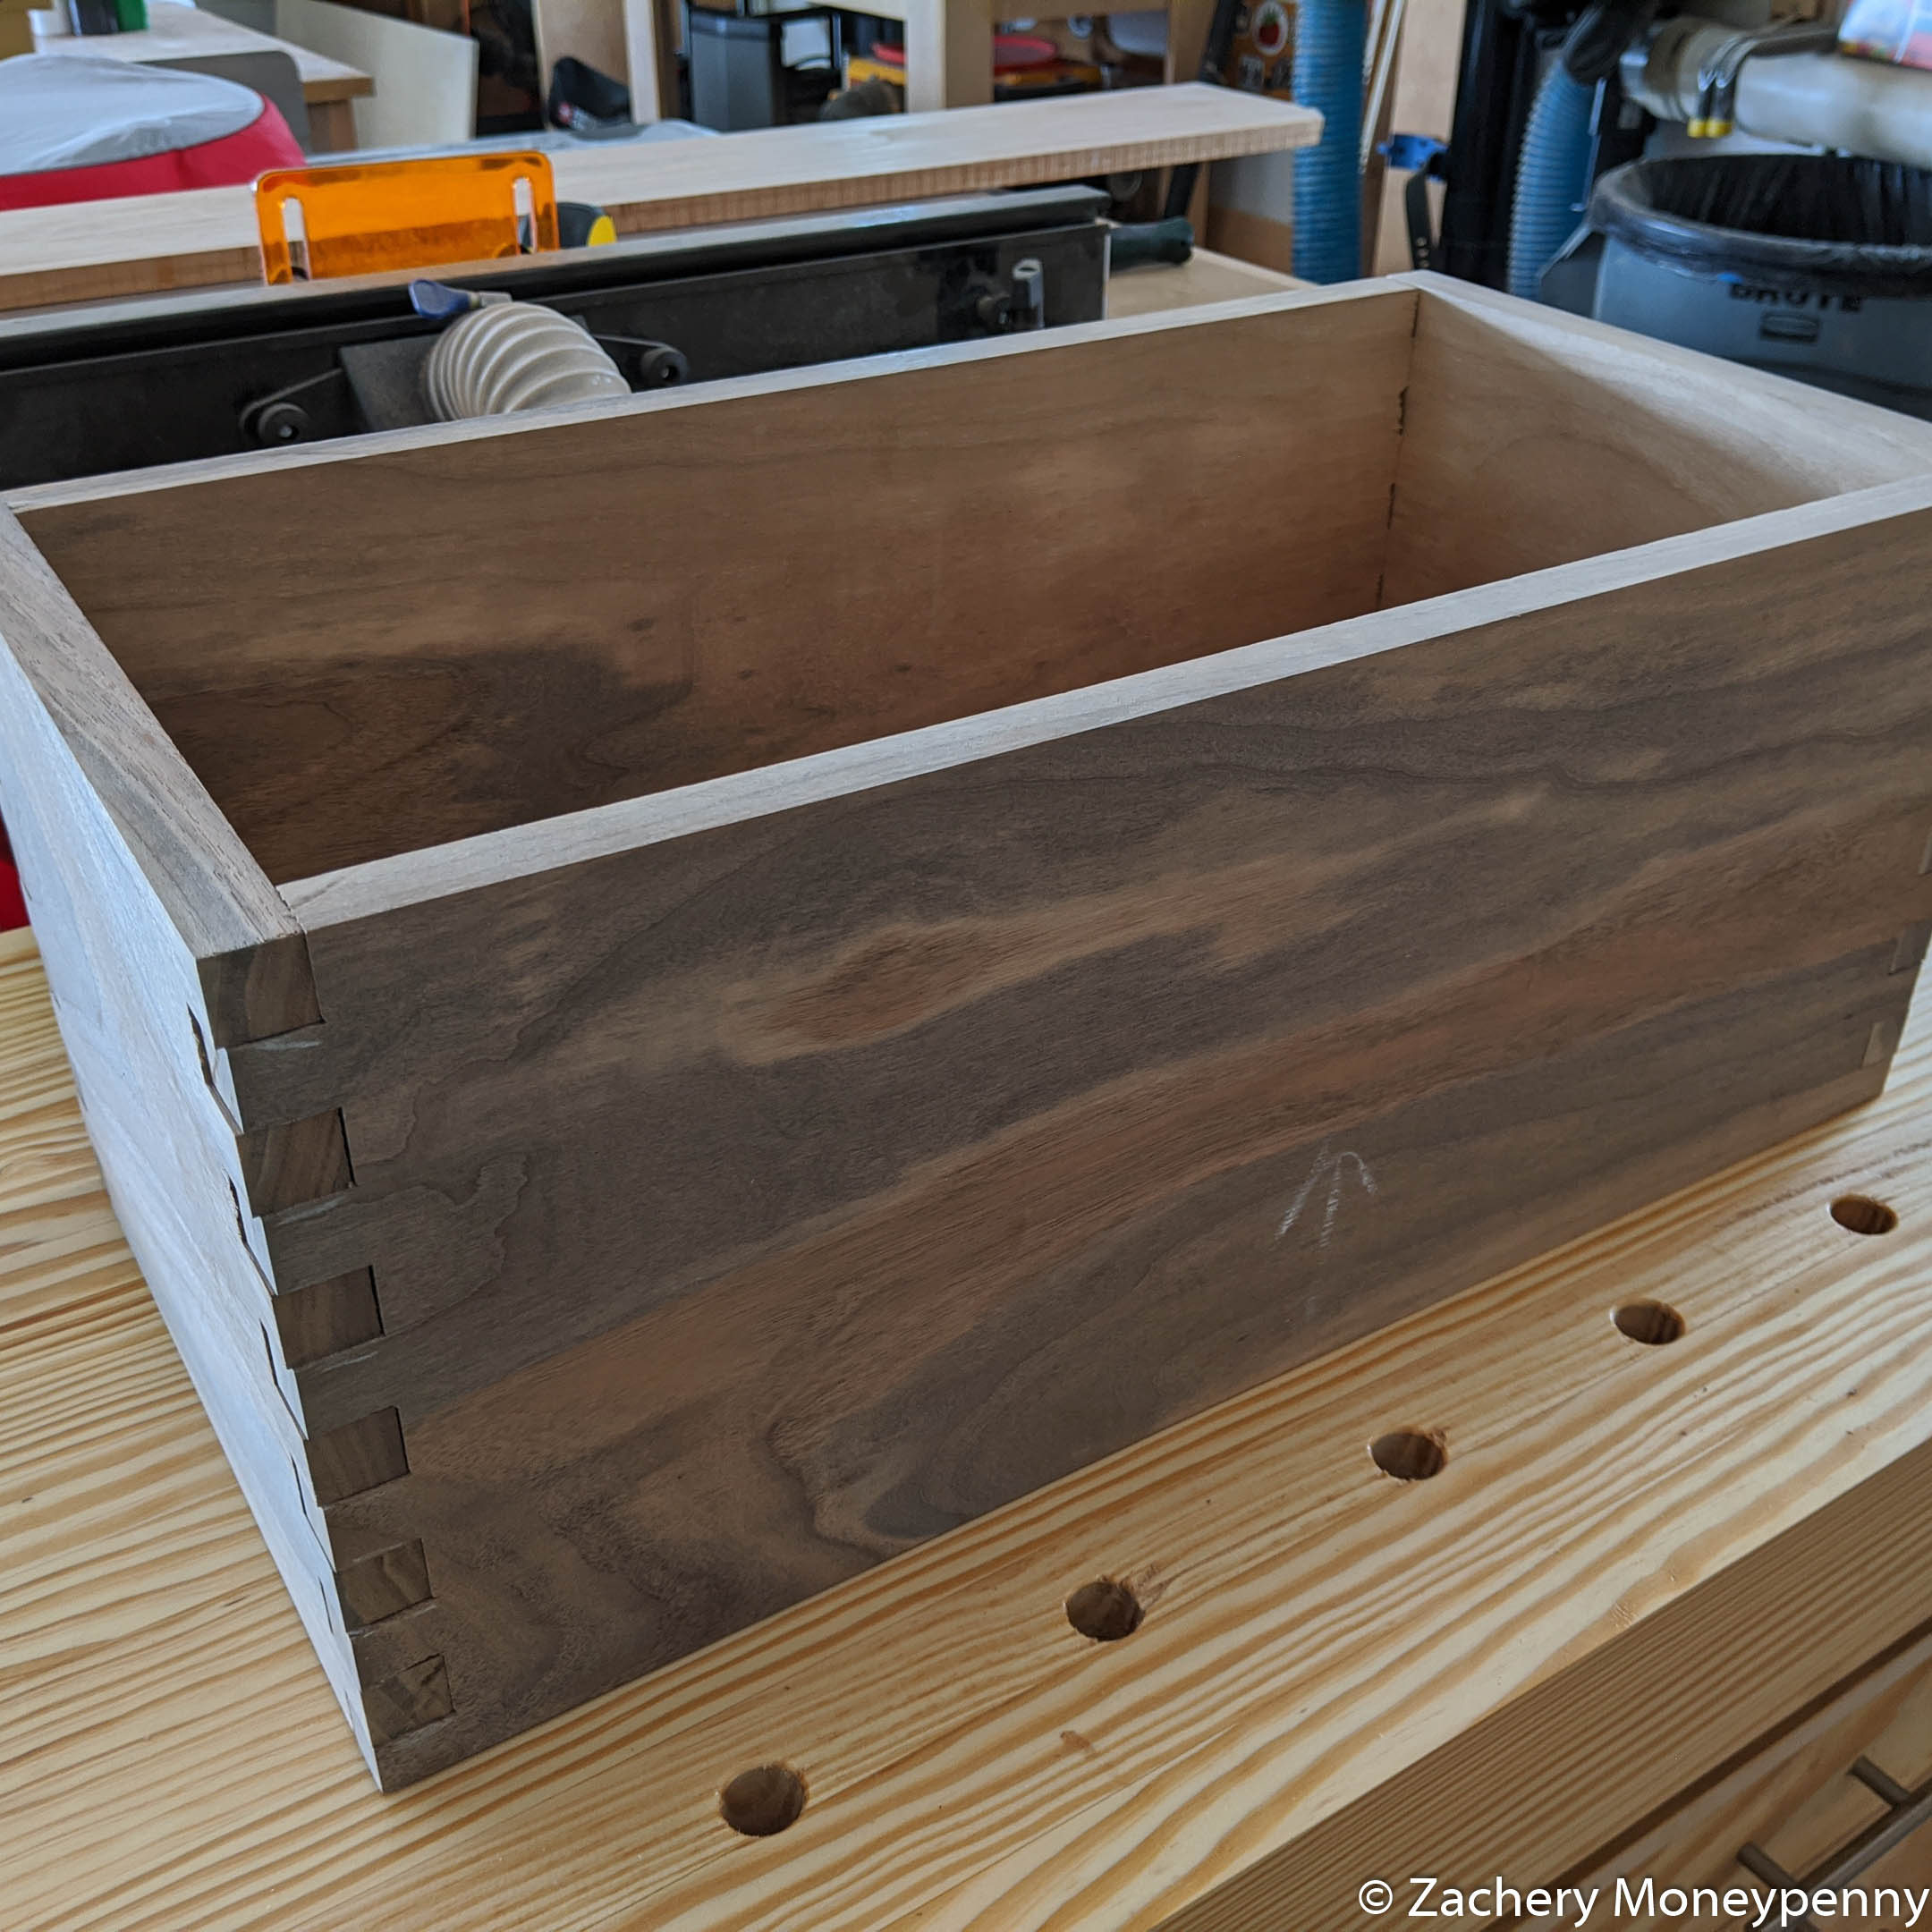
My first significant piece to build using the new workbench is a sewing box for all my supplies. In mid-March 2020 when covid-19 descended on us I purchased a sewing machine so I could start making masks for family, friends, and to donate to the hospital if it came to that.

I was inspired by Jimmy Diresta’s white oak box he made for his sewing supplies, and back in the winter I’d found an absolutely perfect piece of walnut at the Restore that had so much character and color.

My plan is to roughly build the same thing in walnut with brass hardware. I have some locust wood from the same Restore trip that I’m going to use to make the removable tray inside.

Box joint test

Stay tuned for more updates on this!

Side Note: I May Have Fixed My DeWalt Planer!

I’m hesitantly cautious that I may have figured out the problem with my DeWalt 735 planer. For the first time I completely disassembled it this weekend to deep clean the parts and try to reason why the pulleys were not coplanar and the belts kept rolling off into the gears.

Ultimately I found that I think there was a spacer missing from the lower pulley so that it wasn’t tightened to the correct distance from the bearing, and thus was not coplanar with the upper pulley.

I cleaned the all the internal parts and re-ordered a new set of v-belts which should be here this Friday. Fingers crossed that I’ll be back to using the Shelix heads before no time!

Quick Project: Mother’s Day Mega-Frame

Finally, me and the kids worked tirelessly this week to paint and prep a very large picture frame that we’ve had for 10+ years without ever getting around to putting pictures in it.

It’s a 6 x 2 grid of roughly 10” x 10” squares. My idea was to do a progression of pictures for each kid, with a couple of open spots where can insert more pictures as our younger one gets older. We needed to repaint to a neutral color because the frame was originally painted (not natural or stained) an ugly brown color and I wanted to use black mattes and black & white pictures.

All finished, in the nick of time

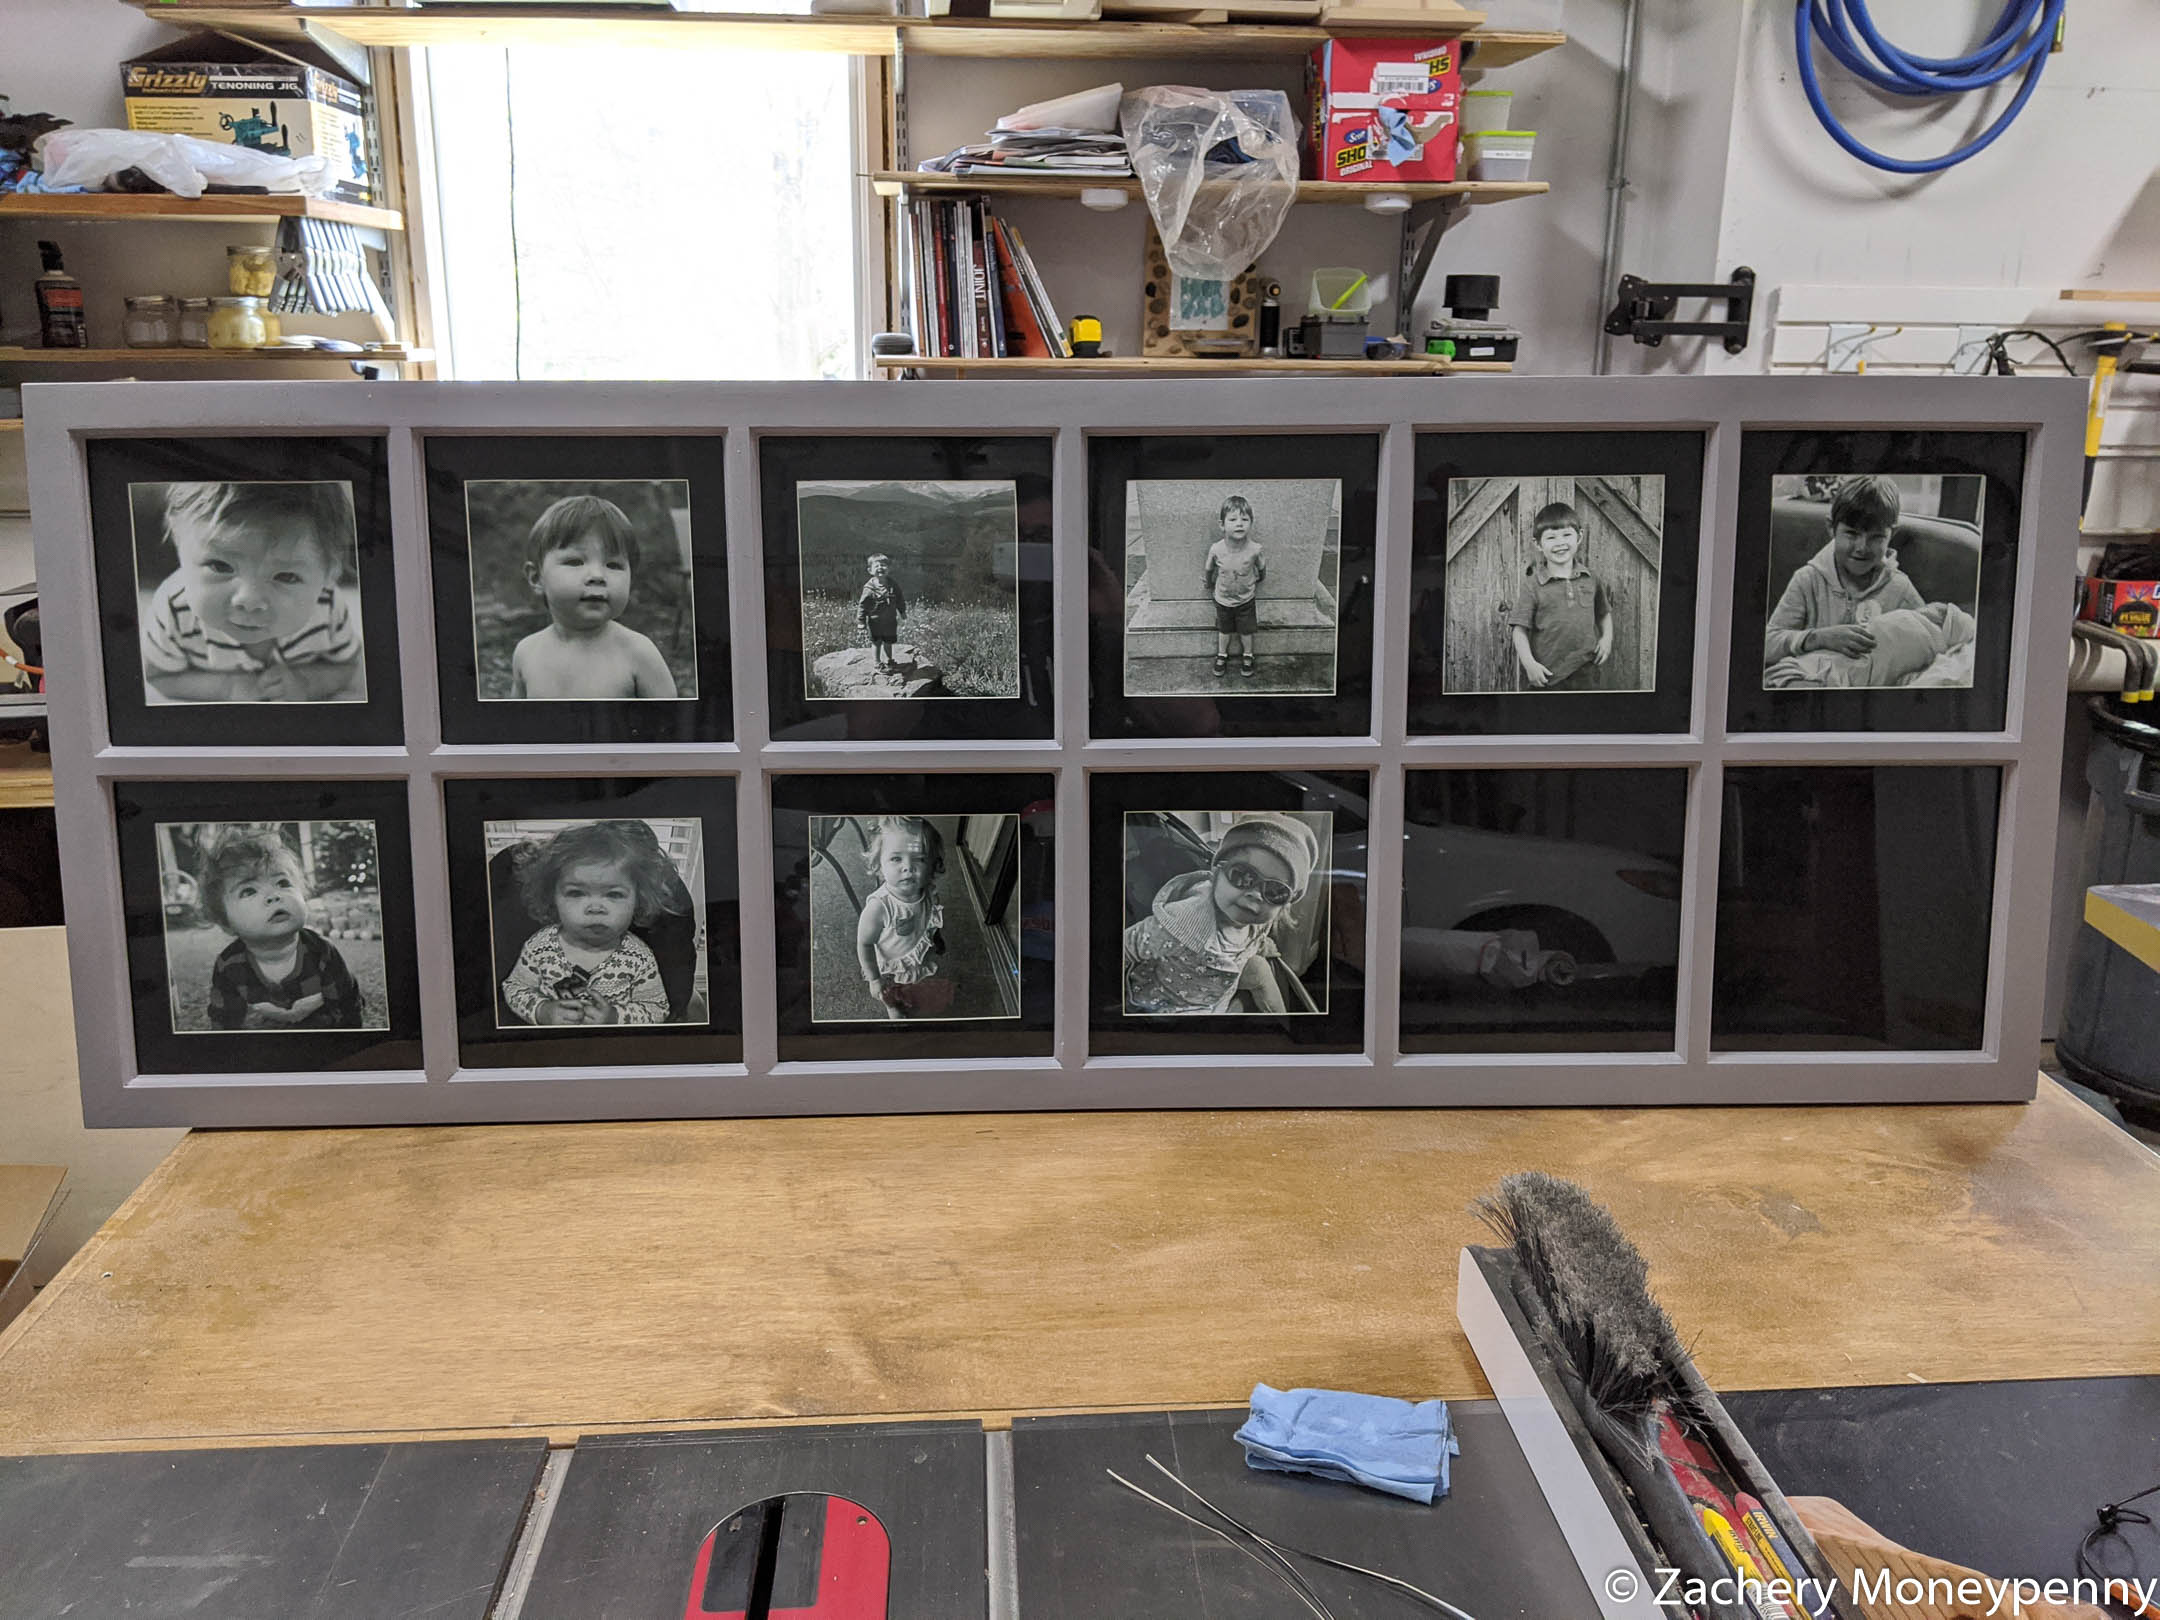
In retrospect because many of our walls are grey tones I wish I’d painted the frame white, as I think it’s going to clash with some of the greys on our first floor. But I can easily pop the mattes out and repaint the frame again with a white or off-white.

Result: she really loved it!

Tagged under: ,


Home Gym Cable System

I really, really, REALLY wanted to be able to do a lat pulldown.

I started working out in gyms after college when I moved out to California to start my career. I was never taught how to lift weights, and so had quite a terrible time lifting with poor form and without real goals aside from “look good naked.” By the time I was 30 I’d started working with a personal trainer to help with my poor form, and to focus on targeted goals, whether it was weight loss, strength, etc.

Eventually I felt very comfortable in a commerical gym environment. I knew exactly which free weight lifts and cable exercises I felt were most effective, and I played around with new ones from time to time to see if they fit into my routines.

Then I started building my home gym.

When my son was born it became very difficult to get to the gym five days a week, and our car wouldn’t fit in the one-car garage located in the basement of our house so I was determined to use the space effectively. I started by going to Dick’s Sporting Goods and buying a cheap barbell and weights. I gradually added more weights, and in particular got lucky when Capitol Fitness was getting rid of a bunch of older 5/10/25 plates and I bought them for real cheap. Then my personal trainer introduced me to Rogue Fitness. And that was the end for me.

Converted one-car garage at our first house

Fast-forward to the new house and with our larger basement I had the opportunity to expand the home gym setup even more. I built an 8’x8’ deadlift platform, and had a good place for my squat rack. I lifted on and off at home for years, usually getting more and more into it until I strained a muscle or just got too sore. Then 1 week off would turn 3 months and I’d go awhile without working out.

In November 2019, in conjunction with starting a new job, I went back onto the keto diet along with my wife, and I was determined to start working out again as well. Started doing some olympic lifting, then transitioned to a more traditional lifting program once the strain got too much on my right shoulder.

The home gym works really well just with the free weights I have, but I’ve always wanted to be able to lat pulldowns at home, and I don’t fancy dropping anywhere from $500 to $2,000 on a cable station for our basement. Then I saw this in my YouTube feed:

Here was the key to my desire, all for $25 (ed note: it was more than $25).

The primary challenge here was that we are currently in the middle of a pandemic (shout-out to future me if you get through this- it seems very far away from where I’m sitting typing this.) It’s not easy to go to your local big box home centers right now to buy cable and cabling accessories. Instead I sourced a lot of the pieces from Amazon, along with some additional items I had home-delivered from Menards here in town.

Yes, you can make the rope and pulley system for under $25, if you happen to have the attachments and loading pin sitting around. But I hunted for some inexpensive accessories, and I was off and running!

First step was to secure the D-rings in the ceiling joists.

Secured with 2" screws into the center of the ceiling joist

Next I needed to size and cut the coated wire rope to the desired length, and then since my pulley didn’t have a pin I needed to thread the rope through before looping it around the thimbles and securing it with clips. So I hung the pulleys and then threaded the rope.

Pulleys hung from the ceiling joists with care

Finally I attached the loading pin and pulldown bar with carabiner clips and loaded up some test weight.

Ready to rock

And just like that, I can now do lat pulldowns in my home gym, as well as any other vertically-oriented cable movedment such as rope or bar pushdowns. A potential next step would be to orient some pulleys along the wall so I can do the equivalent of a seated row.

Tagged under: , ,


Storage Bonanza

More storage in the garage as I install the ceiling-hanging platform.

In our search for more storage in our house I’ve long looked to the 12+ foot ceilings in our three-car garage. There seems to be so much air there, just begging to be replaced with plastic totes! My plan was to eventually install several 4’x8’ hanging units and then load them up with least-used items hanging around the storage part of our basement—things like ski equipment (we haven’t skied since our kids were born) and camping equipment (we haven’t gone camping since our kids were born).

While I have a lot of options for where to place the initial unit, I decided to try it in the middle of the garage, against the “front” wall which would give us maximum ability to access it from 3 (or even 4) sides.

Starting to mount the hangers to the ceiling joists

The FIRST first step was to lock the garage door controls so that I wasn’t killed by a family member opening the garage while I was on a ladder right next to it.

The next first step was to figure out just where the hell my ceiling joists were. Based on nail and drywall seam placement, along with a magnetic stud finder and a consultation of “ceiling joist spacing” on The Google I determined my joists were 24” apart. As an aside, my greatest fear about this sort of storage is that it falls from the ceiling and destroys our car and/or a child, so this was the aspect I spent the most time on getting right.

I drilled test holes 1/4” apart near the seams to determine joist width, and even then I missed sometimes and had to re-drill the self-tapping screws once I started installing the hangers. Each hanger “base” spans two joists, but being ~27” long they just barely did. I kept checking and re-checking spacing between seams, the front garage wall and marks I was making on the ceiling to ensure that I ended up with a rectangle and not a rhombus of some kind.

I used a 24" square to ensure my lines were 2' from the front wall and spanning two joists each

Once the first row went up things became a bit trickier—I was now using a 4’ aluminum ruler to guesstimate the spacing of the secon row from the first. It was difficult to ensure squareness at this point, especially when I was teetering near the top of an 8’ ladder. So once again I was checking, re-checking and drilling pilot holes to make sure I was aligned with the joists.

I totally planned the clearance for the light. Yup.

Next step was to start attaching the hanging posts from the bases.

This went pretty quickly, they were very easy to size and put together.

The final step was by far the most frustrating and elicited the most swears-per-minute by me. The platform held by the hanging arms used threaded bolts to attach each of the four 2’x4’ pieces to each other and the quality of the threaded holes was awful. When we went to lift it up into place the middle section buckled and it was extremely difficult to attach each side and corner arm to the platform.

“Fuck,” he said, depressingly. “Shit.”

Once it was kind of leveraged into place and I sorta got the bolts through the hangers and the platform I was able to go to each in turn, back out the bolts and then re-align and re-tighten until flush. It was at that point that I stopped swearing.

All screws and bolts tightened. Boom, done.

And thus we had ceiling storage in the garage! Before loading it up I let it hang there over the weekend. If my shoddy installation was that bad I wanted it to fall empty onto our truck. But, to my infinite delight, it was still standing and so we started loading it up!

I ended up with about 35+ inches of usable space above the platform with another 6 inches of clearance for the garage door in the up position, so those 12 foot ceiling did do a good job of absorbing random stuff in my house we don’t use very much! And now that we’re putting our camping stuff into inconvenient storage, that means we’ll soon get the hunkering to, uh, go camping. Win—win.

Tagged under: ,


The Start of Something Wonderful

The Great Cleanout begins, and the End of an Era.

Assembly Table Boogaloo

The king is dead, long live the king!

Then-brand new assembly table

In July 2017 I built the entire modified paulk workbench in a single day. It almost killed me, and I had considerable help from a friend, but I did it. I was so excited to have all that yummy work space to start building things on so I just kept pressing forward.

Now, two and a half years later, I have disassembled it to parts again.

Paulk workbench. Disassembled.

This is all part of the plan, but it’s a significant step. Luckily I was able to strip it for a considerable number of re-usable parts. I reclaimed everything from drawer slides and casters to the screws and usable sheets of ½” and ¾” plywood. Once the new new hand tool workbench is finished I’ll be using the spare plywood to build a set of low drawers underneath it for chisel, measuring tools and much more!

The initial need, however, was a smaller outfeed table to take the place of the paulk workbench. I wanted something close to the exact width of my SawStop, and just 2’ deep.

Using the reclaimed 2’x4’s from the larger bench, I cut them them down on the miter saw and then started with a similar frame design.

Smaller top and bottom frames.

There was some deflection in the 2’x4’s from carrying such a heavy weight for so long, but not so much to make it difficult to cut down and reassemble on a smaller scale. I was also able to re-use the extra 2’x4’s and re-purpose them for the legs. They’re in the same orientation as on the Paulk workbench so as to make it easier to slide a half inch plywood sheet underneath as a bottom shelf.

I had two spare ½” sheets of plywood leftover from the shop cabinet build, so I cut it to size and laminate two pieces for a nominal 1” thick top.

Top laminated and cut to size.

Some nice boards hidden in all my crap were unearthed during the shop cleanout (see below) and so I had a nice piece of select pine to use as trim for the outfeed table. Once glued and brad nailed on, I used a flush trim bit to get nice seams and then a roundover bit to soften the edges. Sanded up to 150 grit and then found a good use for some older Dark Walnut Danish Oil I had lying around.

Final Draft Form

Eventually I may get around to adding drawers underneath this table, but for now the shelf has a good place to pile Harbor Freight cases of fasteners.

Shop Cleanout

I’m attacking The Plan a little out-of-order. The final step of the plan was to get a dumpster to junk all the excess crap. Due to timing, however, we went ahead with that sooner, even though the new workbench is not yet finished. I ordered the 12 yard roll-off, thinking it’d likely be too much space but better to be safe than sorry. Hoo boy.

Between all of the stuff we managed to clean out of our basement and garage, plus neighbors asking if they could add “just one thing” to the dumpster it’s getting close to full. We have it for 14 days, so it will be going back this next week.

In the meantime, the shop seems so much more open and airy. There’s room to move, I can see all my usable lumber (i.e., it’s not buried under useless scarps of plywood) and I’m excited to get back out there some more. Which was the point of this operation so, uh, Mission Accomplished.

Plan Update

Things have been moved more or less into the layout in the sketchup model below. I’m still in-progress on the new workbench, but once finished it will be placed directly opposite my shop cabinets so that all my hand tools and handheld power tools are right at hand.

More or less accurate layout plan

Tagged under: , ,


D-Ring Lover

Add d-rings to every damn surface.

Just wanted to add a small post about some cool shit I did with my deadlift platform this weekend.

I’ve been trying to incorporate more band exercises into my workouts, whether alone or in conjunction with dumbbells and barbells. The downside was that for some of the exercises I wanted to try I was finding it tough to anchor them. Like, I could wrap them around the uprights on my squat stand but since the stand isn’t bolted to the ground it would sometimes shift and move the whole unit when I used 60 lb bands.

Six new d-ring mounts added on and around my deadlift platform

My solution, as seen in the photo above, was to buy several different kinds of D-ring mounts and attach them to the deadlift platform itself as well as the studs in the wall behind it. The flush mount rings on the surface of the platform each went in with three 2” screws and the wall rings went into the studs with two 2” screws.

So far it’s been great—I’ve been able to easily get bands on and off at the various angles I want. Later this week I’m going to try to use the wall-mounted ones for face pulls and something like a seated row. If it works I may look at getting some heavier bands as well, it will be the next best thing to a cable column in my basement!

Tagged under: ,